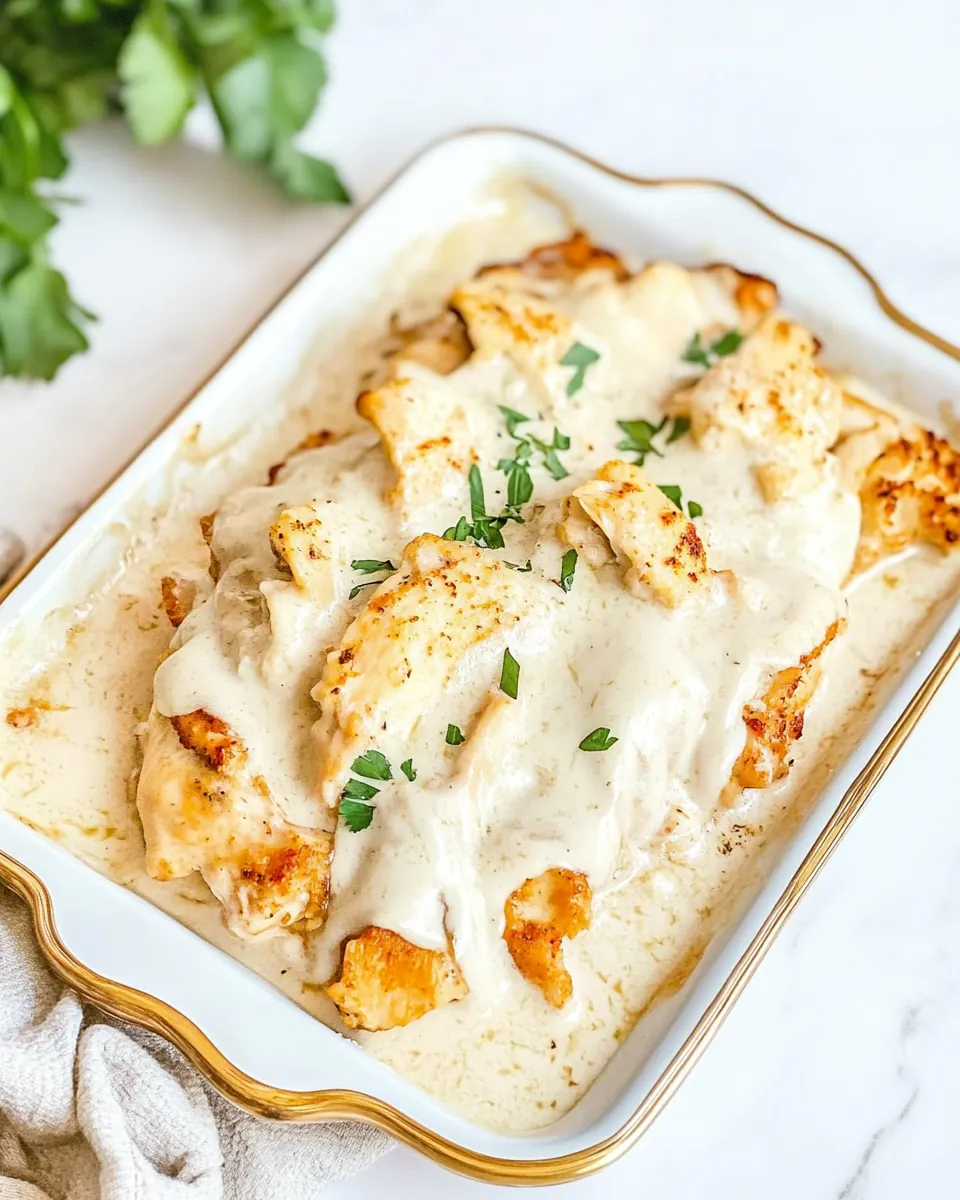
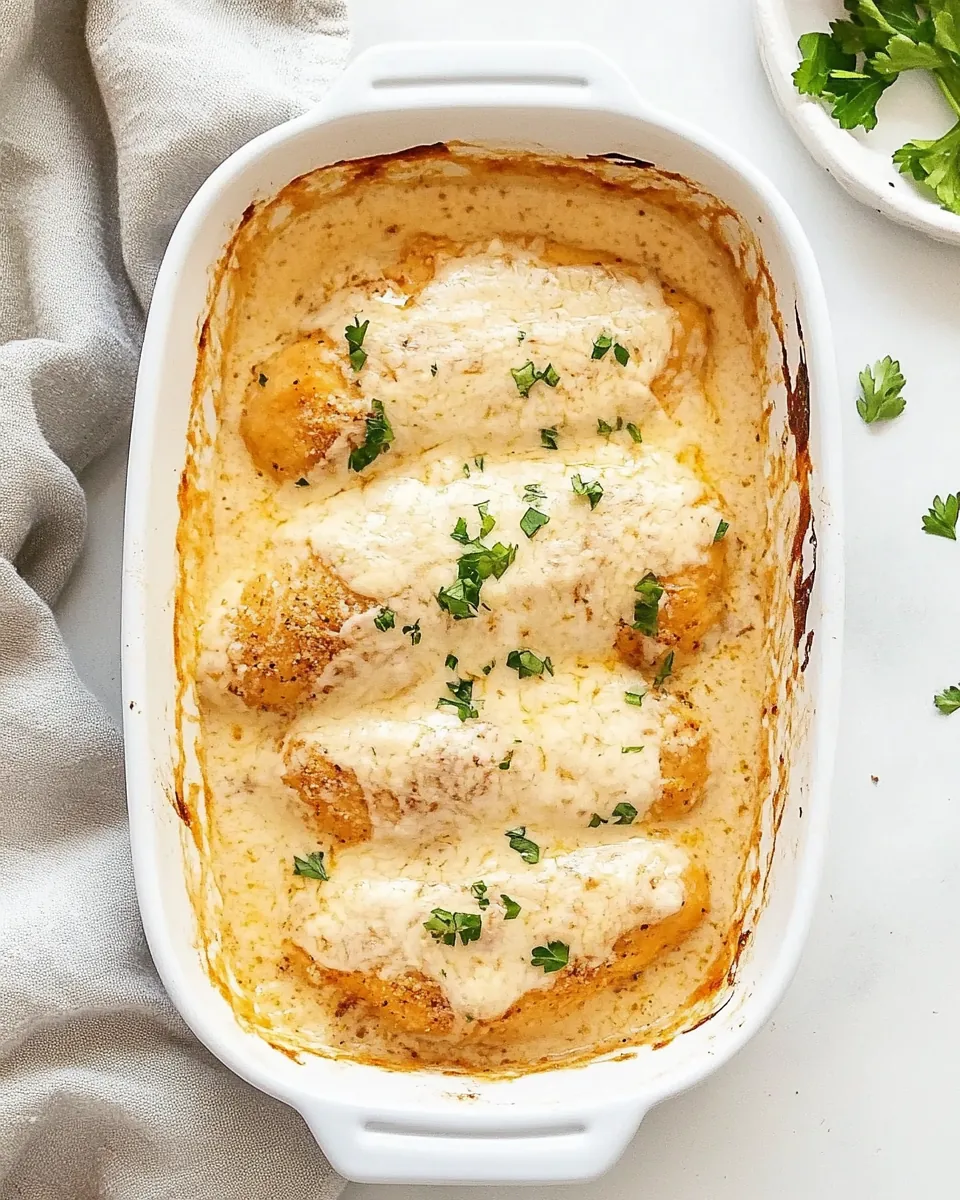
Caesar Chicken
There’s something truly comforting about a dish like Caesar Chicken. It takes me back to family dinners where laughter filled the air, and the aroma of baked chicken wafted through the house. This recipe was one my mom often made when we had guests over, and it was always a hit. The combination of tender, juicy chicken topped with creamy Caesar dressing and melted cheese creates a flavor explosion that’s hard to resist. I remember the first time I made it on my own; I was a little nervous but excited to bring that same warmth to my own table. Imagine gathering around with your loved ones, sharing stories while enjoying a dish that’s both easy to prepare and utterly delicious. That’s the magic of Caesar Chicken! It’s versatile enough for a weeknight dinner yet fancy enough for a special occasion. You can serve it with a fresh salad or some crusty bread, and it never fails to impress. Let me share how to create this comforting classic in your kitchen.
Recipe Snapshot
40 mins
10 mins
30 mins
Medium
480 kcal
44 g
Keto, Gluten-Free, Low FODMAP
32 g
9×13-inch Baking Dish
Why This Caesar Chicken Is So Good
It’s a Crowd-Pleaser
Whenever I make Caesar Chicken, I know it’s going to be a hit. The creamy sauce and gooey cheese make it irresistible, and even picky eaters seem to enjoy it. Family and friends alike ask for seconds, and I love seeing their satisfied smiles. It’s the kind of dish that brings everyone to the table.
Simple Ingredients
The beauty of this recipe lies in its simplicity. Using just a few ingredients, you can whip up something incredibly tasty. The star of the show is, of course, the chicken, which is perfectly complemented by the zesty Caesar dressing and rich cheeses. You don’t have to hunt for fancy ingredients; just head to your local grocery store!
Quick and Easy
Life can be hectic, and we all need recipes that don’t take hours to prepare. Caesar Chicken can be on your table in no time, making it a perfect choice for busy weeknights. With just a bit of prep and some baking time, you’ll have a delicious meal ready to enjoy.
Perfect for Meal Prep
If you’re like me, meal prepping is a lifesaver. Caesar Chicken is not only easy to make, but it also stores well in the fridge. I often make a double batch and enjoy the leftovers throughout the week. It reheats beautifully, making it a great option for quick lunches or dinners.
Customization Friendly
This dish is incredibly versatile. While the classic version is fantastic, I enjoy experimenting with different toppings or sides. You could add some sautéed vegetables or serve it over a bed of pasta. The possibilities are endless, making it a fun recipe to play around with!
Family Tradition
This recipe has been passed down in my family for years, and I cherish the memories associated with it. Each time I make Caesar Chicken, I feel connected to my roots and the loved ones who have shared this meal with me. It’s more than just food; it’s a tradition that warms my heart.
Ingredients You’ll Need for Caesar Chicken

When it comes to creating a delicious Caesar Chicken, the ingredients play a vital role in the overall flavor profile. The combination of the creamy dressing, succulent chicken, and melty cheese creates a dish that is comforting and satisfying. Let’s break down the key players:
- 1 teaspoon chili powder: Adds a subtle kick and depth of flavor.
- 1 teaspoon kosher salt: Enhances the dish’s overall taste.
- 1 teaspoon ground black pepper: Provides a mild heat to the dish.
- 4 boneless, skinless chicken breasts: The main protein source, tender and juicy when cooked right.
- 2 cups shredded mozzarella cheese (divided): Melts beautifully, creating a creamy topping.
- ½ cup grated Parmesan cheese (divided): Adds a salty, nutty flavor that complements the mozzarella.
- 1 cup creamy Caesar dressing: The star ingredient that ties everything together.
- 1 tablespoon lemon juice: Brightens up the flavors and adds freshness.
Putting Together Caesar Chicken
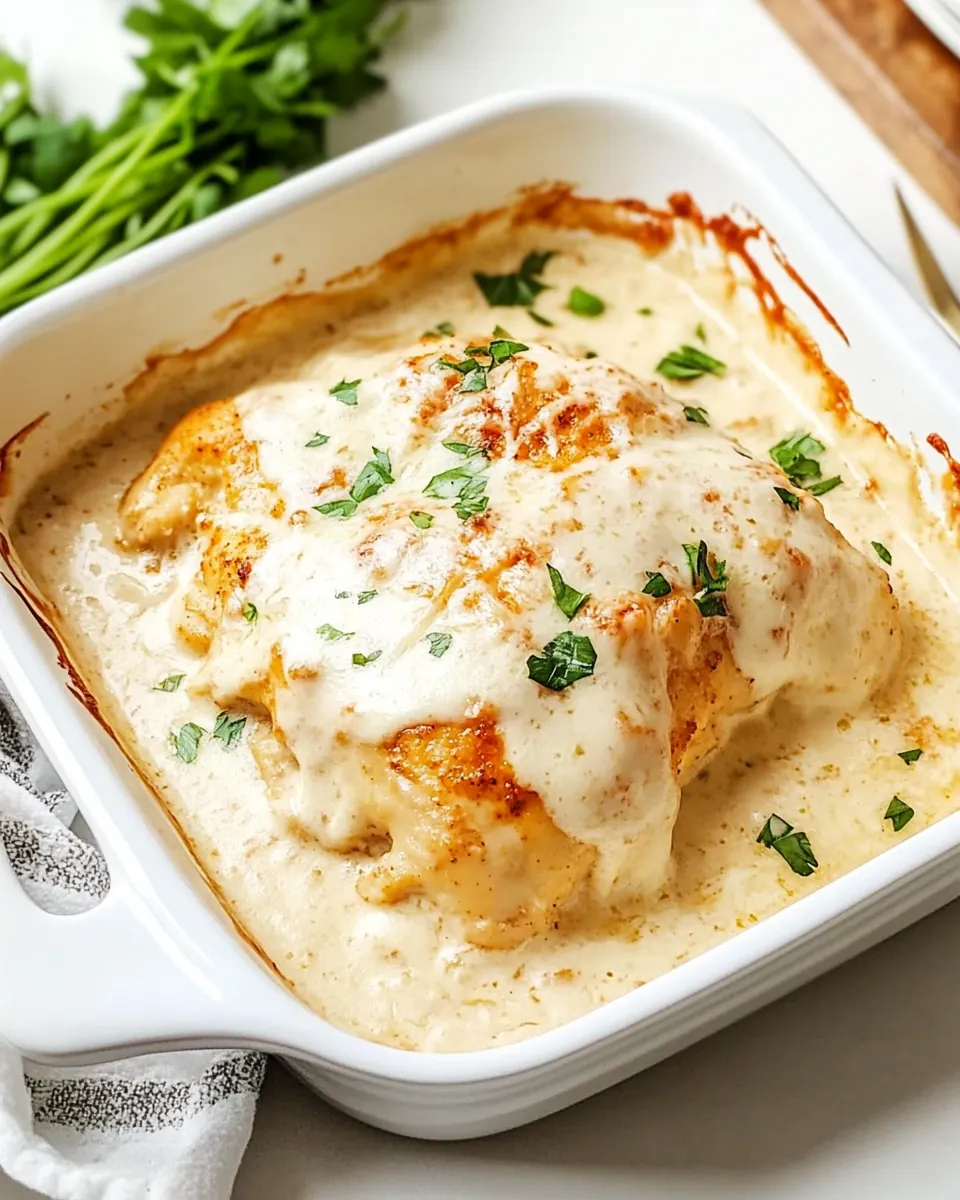
Making Caesar Chicken is a straightforward process that you will love. The steps are simple, and the results are, honestly, mouthwatering. Here’s how to do it:
Preheat your oven to 375°F. This is an essential first step to ensure your chicken cooks evenly and thoroughly. A properly preheated oven helps achieve that perfect golden brown top.
In a small bowl, mix the chili powder, salt, and black pepper together. This seasoning blend is what makes the chicken pop with flavor. Don’t be shy—really rub this mixture onto both sides of each chicken breast.
Now, place the seasoned chicken breasts in a 9×13-inch baking dish. Make sure they lay flat and have enough space around them. This helps with even cooking.
Sprinkle ½ cup of the mozzarella cheese and half of the Parmesan cheese on top of the chicken. This cheesy layer will melt and create a delicious, gooey topping.
In another small bowl, whisk the Caesar dressing and lemon juice together. Pour this mixture over the cheese and chicken. The dressing will soak into the chicken, infusing it with flavor.
Evenly sprinkle the remaining cheeses on top. This will create a beautiful crust as it bakes, adding flavor and texture.
Now it’s time to bake! Place the dish in the preheated oven and bake for 25 to 30 minutes. Keep an eye on it; you want the chicken to reach an internal temperature of 165°F. An instant thermometer is a great tool for this.
For that golden, toasty cheese topping, broil the chicken for 1 to 2 minutes just before you take it out. Watch it closely so it doesn’t burn! This step adds a beautiful finish.
Once out of the oven, let the chicken cool for about 10 minutes before serving. This resting time allows the juices to redistribute, keeping the chicken moist and tender.
Things Worth Knowing
- Chicken Preparation: Always pat your chicken dry before seasoning. This helps the spices adhere better and promotes even cooking.
- Internal Temperature: Use a meat thermometer to check the chicken’s doneness. It should reach 165°F to ensure it’s safe to eat.
- Cheese Choice: Feel free to mix and match your cheeses. Adding a bit of gouda or fontina can give an exciting twist.
- Leftover Chicken: If you have leftovers, use them in wraps or salads for a tasty lunch option.
Tips and Tricks about Caesar Chicken
Making a perfect Caesar Chicken is all about technique and a few helpful tips. Here are some insights:
- Storage: To store leftovers, place them in an airtight container. It should last up to 3 days in the refrigerator.
- Freezing: You can freeze cooked chicken for up to 3 months. Just make sure to wrap it tightly to prevent freezer burn.
- Pairing: Serve with a side of garlic bread or a light salad for a complete meal.
- Seasoning: Always taste your dish as you cook. Adjust the seasoning according to your preference.
- Serving Temperature: Serve Caesar Chicken warm for the best flavor and texture.
Perfect Pairings for Caesar Chicken
Pairing dishes with Caesar Chicken can elevate your meal experience. Here are some fantastic options:
- Garlic Bread: The ultimate side dish! The buttery, garlicky flavor complements the creamy chicken beautifully.
- Caesar Salad: Stay in theme! A fresh Caesar salad makes for a great starter.
- Rice Pilaf: Light yet flavorful, it’s a wonderful base that pairs nicely with the rich flavors of the chicken.
- Seasonal Vegetables: Roasted or sautéed veggies add color and nutrition to your meal.
- Wine Pairing: If you enjoy wine, a crisp white wine can enhance the overall dining experience.
- Occasion: This dish works for family dinners, casual gatherings, or even special occasions. It’s versatile enough to fit any setting.
FAQ
Conclusion
Caesar Chicken is a delightful dish that brings together creamy, cheesy flavors with tender chicken, making it a comforting option for any meal. It’s not only easy to prepare but also versatile enough for various occasions. I encourage you to try it for your next family dinner or casual get-together. You won’t regret it!
Caesar Chicken
Ingredients
Equipment
Method
- Preheat your oven to 375°F. This is an essential first step to ensure your chicken cooks evenly and thoroughly. A properly preheated oven helps achieve that perfect golden brown top.
- In a small bowl, mix the chili powder, salt, and black pepper together. This seasoning blend is what makes the chicken pop with flavor. Don’t be shy—really rub this mixture onto both sides of each chicken breast.
- Now, place the seasoned chicken breasts in a 9×13-inch baking dish. Make sure they lay flat and have enough space around them. This helps with even cooking.
- Sprinkle ½ cup of the mozzarella cheese and half of the Parmesan cheese on top of the chicken. This cheesy layer will melt and create a delicious, gooey topping.
- In another small bowl, whisk the Caesar dressing and lemon juice together. Pour this mixture over the cheese and chicken. The dressing will soak into the chicken, infusing it with flavor.
- Evenly sprinkle the remaining cheeses on top. This will create a beautiful crust as it bakes, adding flavor and texture.
- Now it’s time to bake! Place the dish in the preheated oven and bake for 25 to 30 minutes. Keep an eye on it; you want the chicken to reach an internal temperature of 165°F. An instant thermometer is a great tool for this.
- For that golden, toasty cheese topping, broil the chicken for 1 to 2 minutes just before you take it out. Watch it closely so it doesn’t burn! This step adds a beautiful finish.
- Once out of the oven, let the chicken cool for about 10 minutes before serving. This resting time allows the juices to redistribute, keeping the chicken moist and tender.
Notes
- Tip 1: Check the salt content of your Caesar sauce BEFORE adding salt to the chicken breasts. Caesar dressing adds plenty of flavor, including salt, and you don’t want a super salty dish.
- Tip 2: Chicken is cooked through when a meat thermometer inserted into the thickest part of the chicken reads 165°F.
- Tip 3: I always broil the chicken for 1 to 2 minutes at the end to make the cheese golden and crispy on top.