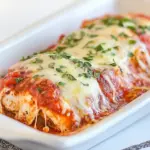
Chicken Enchiladas
There’s something magical about the aroma of Chicken Enchiladas wafting through the kitchen, instantly transporting me to a place where comfort food reigns supreme. I remember the first time I encountered this dish; it was at a family gathering where my aunt showcased her culinary skills. Each bite was a delightful explosion of flavors, with tender chicken enveloped in warm, soft tortillas, all drenched in a creamy sauce. Ever since, I’ve been on a mission to recreate that unforgettable experience in my own home.
On a busy weeknight, when time is of the essence but the craving for something hearty lingers, Chicken Enchiladas come to the rescue. They’re not just a meal; they’re an invitation to gather around the table, share stories, and savor the goodness. What I love about this dish is its versatility. You can customize the fillings, play with spices, and even sneak in some veggies for a nutritional boost. Plus, they’re a hit with both kids and adults alike, making them perfect for any occasion.
Whenever I make Chicken Enchiladas, I can’t help but feel a sense of joy. The process of preparing them is almost therapeutic—heating up the butter, sautéing the onions, and mixing in that cheesy goodness. It’s a labor of love, and believe me, it’s worth every minute. As you roll those tortillas, picture the smiles around the dinner table as they dig in. I promise, once you try your hand at making these, you’ll understand why they hold such a special place in my heart.
Recipe Snapshot
60 mins
20 mins
40 mins
Hard
420 kcal
25 g
Gluten-Free, Low FODMAP
25 g
9″x13″ casserole dish
What We Adore About This Chicken Enchiladas
Comfort Food at Its Best
There’s no denying that Chicken Enchiladas are the epitome of comfort food. They wrap you in warm, cozy flavors that feel like a big hug. Whenever I’m feeling down or just need a little pick-me-up, making these enchiladas has become my go-to remedy. It’s hard to stay in a bad mood when you’re surrounded by the rich, creamy goodness of this dish.
Versatile and Adaptable
One of my favorite things about Chicken Enchiladas is how adaptable they can be. You can switch up the protein, like using ground turkey or even beans for a vegetarian twist. Want to add a little heat? Toss in some jalapeños or your favorite hot sauce. The possibilities are endless, making it easy to tailor the recipe to your family’s taste preferences.
Perfect for Meal Prep
These enchiladas are not just for dinner; they are a fantastic meal prep option. You can make a batch ahead of time, freeze them, and then bake them whenever you’re ready for a delicious meal. This makes weeknight dinners a breeze, and you’ll always have something wholesome and satisfying at your fingertips.
Easy to Make
Don’t let the idea of making enchiladas intimidate you. They are surprisingly easy to whip up! With just a few simple steps, you can have a dish that looks and tastes like it came from a restaurant. I love involving my kids in the kitchen, and rolling the tortillas is a fun activity for them (and a great way to keep them entertained!).
Family-Friendly
Chicken Enchiladas are a crowd-pleaser, appealing to all ages. Kids love the cheesy filling, while adults appreciate the hearty ingredients and rich flavors. When I serve these, I can always count on seeing happy faces all around the table. It’s a joy to create something that brings people together, and these enchiladas do just that!
Great for Entertaining
If you’re looking for a dish to impress your guests, Chicken Enchiladas are a fantastic choice. They can be prepared in advance, and when baked fresh, they’re sure to wow everyone with their creamy, cheesy goodness. Pair them with a crisp salad or some homemade guacamole for a complete meal that your visitors will rave about.
What’s In This Chicken Enchiladas
The ingredients for Chicken Enchiladas come together to create a dish that is both satisfying and flavorful. Each component plays a crucial role in delivering that classic taste we all love. From the rich chicken to the creamy sauce, these ingredients harmonize beautifully.
- 2 tablespoons unsalted butter: This adds richness to the filling as it melts and mingles with the onions and garlic.
- 1 medium onion, chopped: A key ingredient for depth and flavor, enhancing the overall taste of the enchiladas.
- 2 teaspoons garlic, minced: Infuses the dish with a delightful aroma and flavor.
- 1 (14 oz) can green chiles, not drained: Provides a mild heat and adds a unique texture to the filling.
- 1 teaspoon ground cumin: A warm spice that brings an earthy aroma, elevating the flavor profile.
- 1 teaspoon chili powder: Adds a bit of warmth and a beautiful color to the dish.
- 1 teaspoon Kosher salt: Enhances all the flavors, making each bite delicious.
- ½ teaspoon black pepper: A subtle spice that rounds out the flavor.
- 2 cups cooked chicken, shredded or chopped: The star of the show, providing a hearty base for the enchiladas.
- 1 cup Colby Jack cheese, grated: The melty, creamy goodness that binds it all together.
- 3 tablespoons unsalted butter: Used in the sauce for added richness.
- 3 tablespoons all-purpose flour: Thickens the sauce and gives it that creamy texture.
- 2 cups chicken broth: Adds moisture and flavor to the sauce.
- 1 cup sour cream: Gives the sauce a rich creaminess that makes these enchiladas irresistible.
- 1 (14 oz) can green chiles, not drained: Adds an extra layer of flavor to the sauce.
- 1 teaspoon onion powder: Enhances the onion flavor without the crunch.
- 1 teaspoon garlic powder: Complements the fresh garlic for a deeper flavor.
- ½ teaspoon Kosher salt: Ensures the sauce is well-seasoned.
- ½ teaspoon black pepper: Adds a hint of spice to the sauce.
- 8 – 10 flour tortillas, fajita size: The perfect vessel for holding all the delicious filling.
- 1½ cups Colby Jack cheese, shredded: More cheesy goodness to top the enchiladas.
- 2 tablespoons cilantro, fresh, chopped, for garnish: Adds a fresh pop of color and flavor to the finished dish.
How to Make Chicken Enchiladas
Making Chicken Enchiladas is a delightful process that brings together all those comforting flavors in one dish. Follow these simple steps to create a meal that will have everyone coming back for seconds!
- Preheat your oven to 375°F. This initial step ensures that the enchiladas will bake evenly and come out bubbling hot.
- In a large skillet, melt 2 tablespoons unsalted butter over medium heat. As it melts, the rich aroma will fill your kitchen.
- Add the chopped onion to the melted butter and sauté until soft, about 4 to 5 minutes. You want them to be translucent and fragrant.
- Stir in the minced garlic and sauté for another 30 seconds. The garlic should be fragrant but not browned.
- Next, stir in the green chiles, ground cumin, chili powder, Kosher salt, and black pepper. Mix well and sauté for about 1 to 2 minutes to allow the spices to bloom and infuse the filling.
- Add the shredded chicken to the skillet. Stir until every piece is coated with the spice mixture. Remove the skillet from heat.
- Now, stir in the grated Colby Jack cheese until melted and incorporated into the chicken mixture. Set this filling aside.
- In a separate skillet, melt another 3 tablespoons unsalted butter over medium heat. This will be your creamy sauce.
- Once melted, stir in 3 tablespoons all-purpose flour and cook for 1 minute, stirring constantly to create a roux.
- Gradually whisk in the warmed chicken broth. Keep stirring until the mixture thickens and becomes silky smooth.
- Lower the heat and stir in sour cream, the remaining green chiles, onion powder, garlic powder, Kosher salt, and black pepper. Make sure everything is mixed well and smooth.
- Wrap the tortillas in a napkin and microwave on HIGH for 30 seconds to 1 minute, until warmed and pliable.
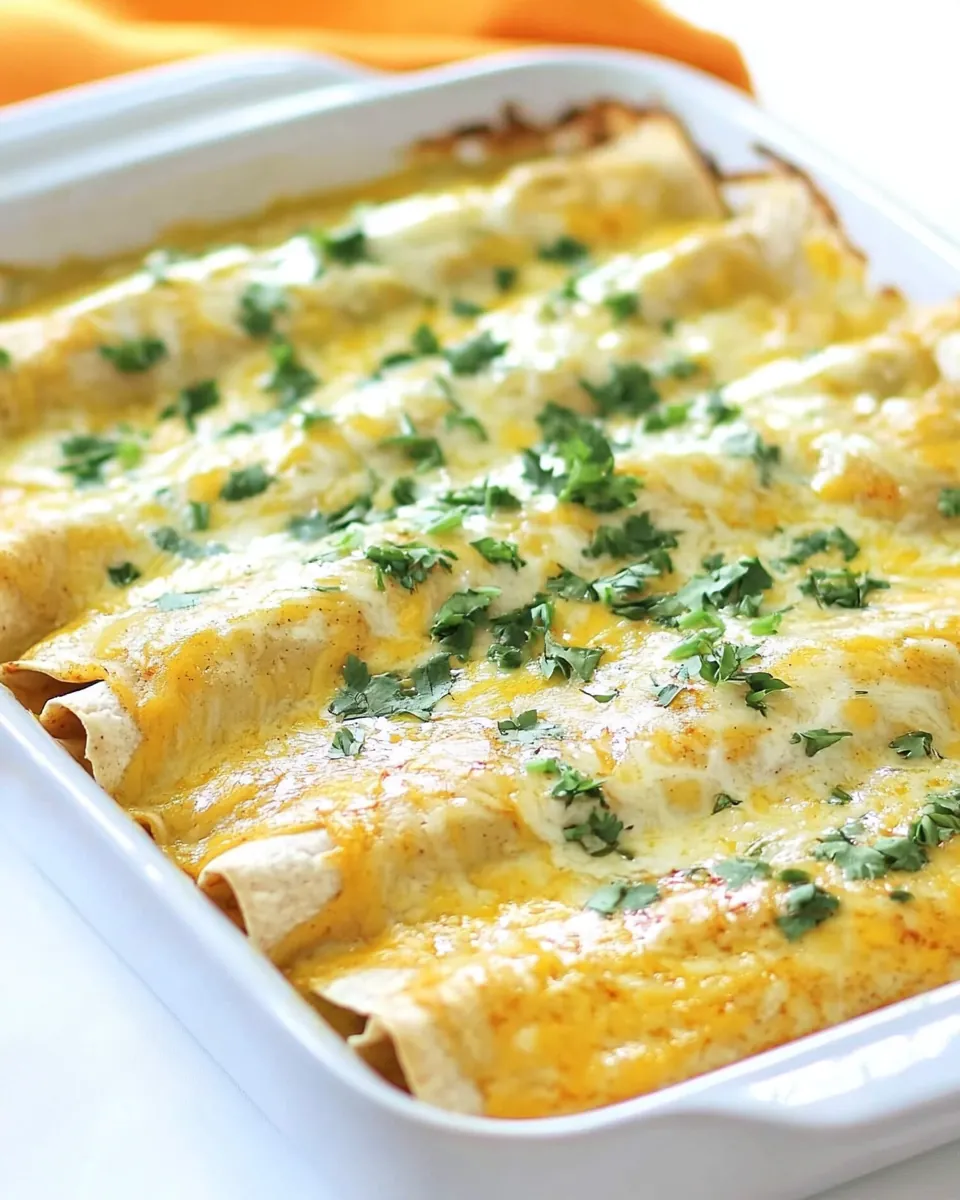
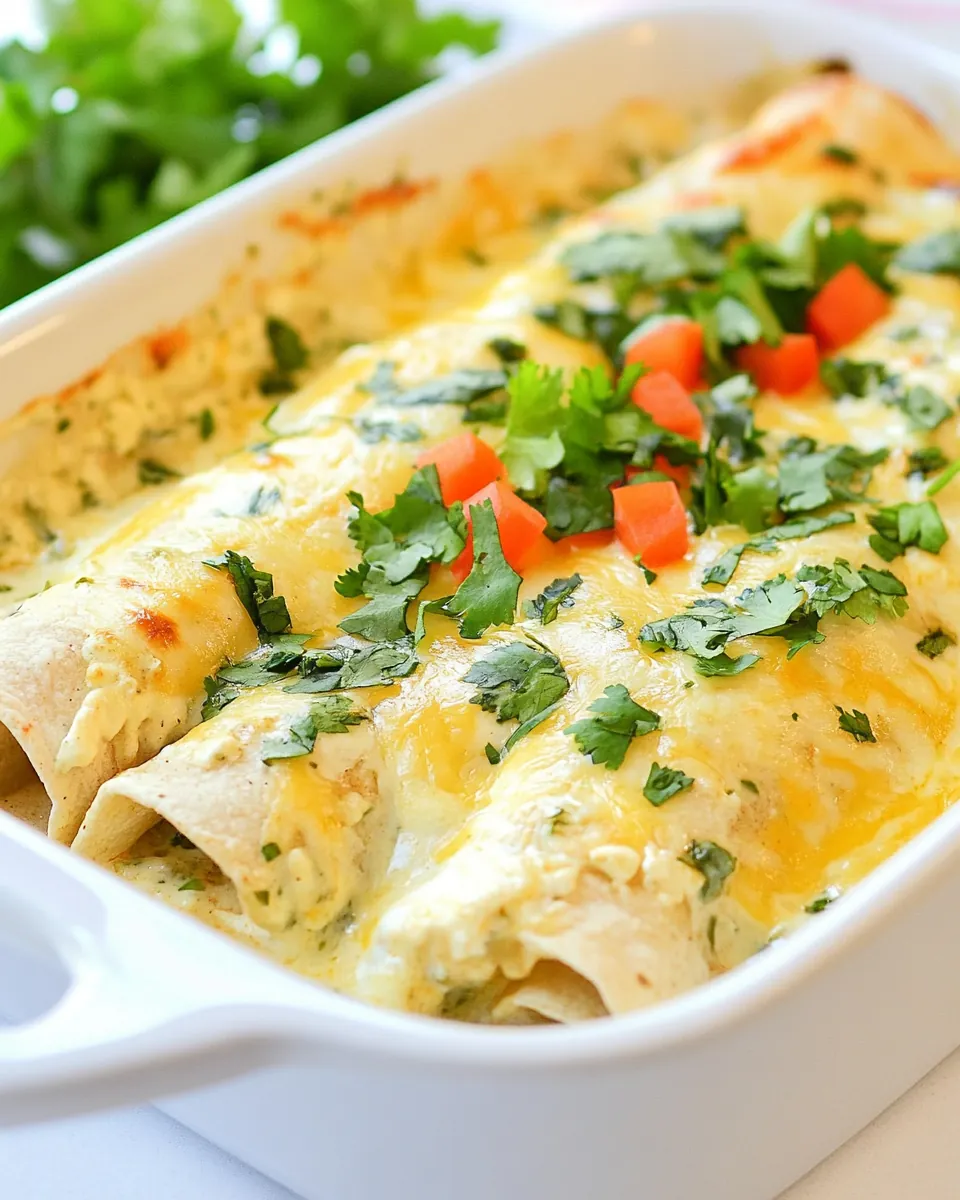
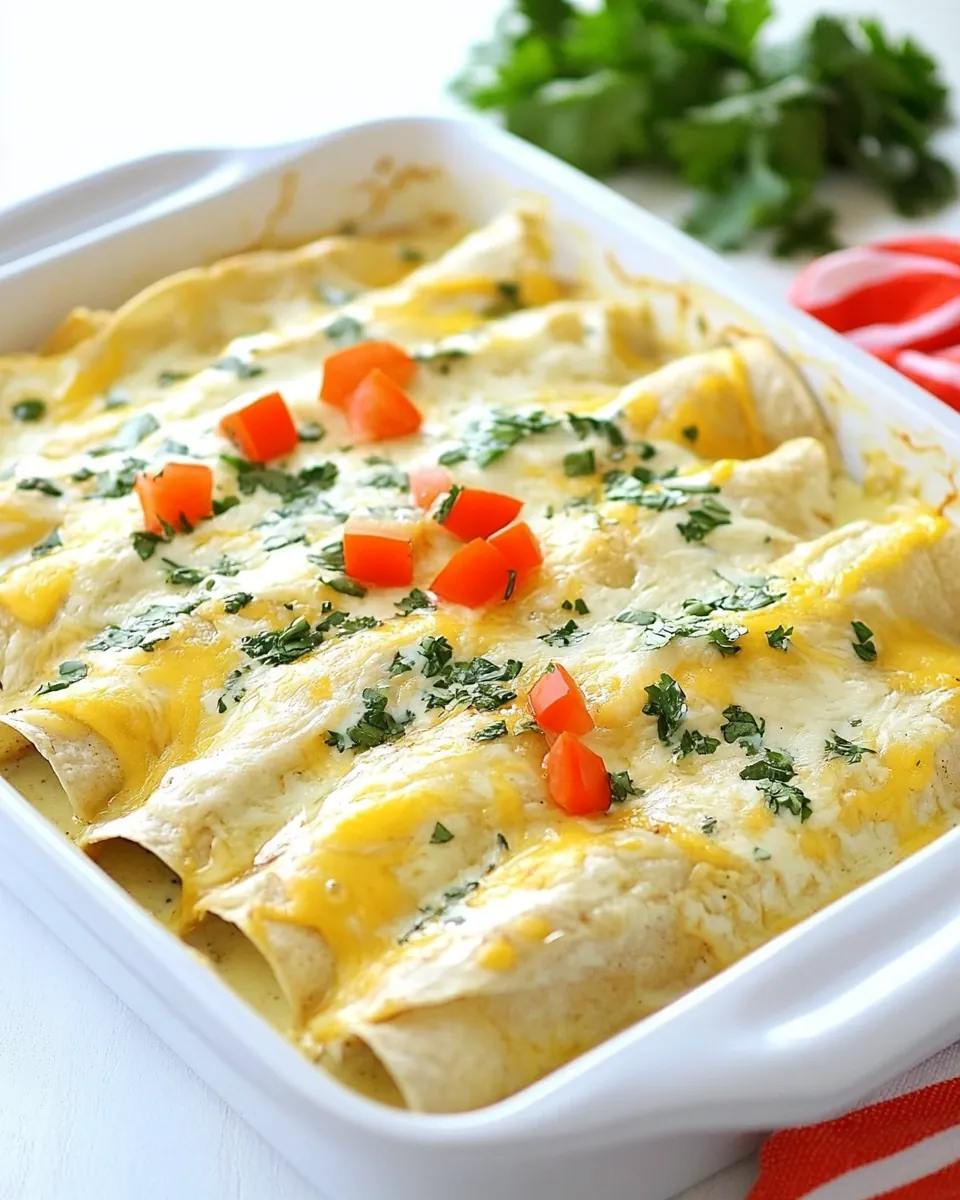
- Spread a thin layer of the sauce mixture over the bottom of a 9×13" baking dish.
- Take a warmed tortilla and spoon about ¼ cup of the chicken filling down the center. Roll it tightly and place seam-side down in the baking dish. Repeat with remaining tortillas.
- Pour the remaining sauce over the top of the rolled enchiladas. Sprinkle the remaining Colby Jack cheese generously down the center.
- Bake in the preheated oven for 20 to 25 minutes, or until the cheese is bubbly and lightly browned.
- Once done, carefully remove from the oven and let rest for 5 to 10 minutes. Garnish with fresh cilantro before serving. Enjoy your delicious Chicken Enchiladas!
Things Worth Knowing
- Tip for Tortilla Freshness: Warm the tortillas in the microwave or on a skillet to make them pliable. This prevents them from cracking when you roll them.
- Check for Doneness: The enchiladas are ready when the cheese is melted and bubbly. If you want deeper browning, broil them for a minute or two at the end.
- Storage Tips: Keep any leftovers in an airtight container in the fridge for up to three days for the best taste.
- Don’t Skip the Resting Time: Letting the enchiladas sit after baking allows the sauce to set, making them easier to serve.
How to Switch It Up

If you’re looking to elevate your Chicken Enchiladas, here are some fun ways to switch it up and keep things exciting at the dinner table!
- Cheese Variations: Experiment with different types of cheese, such as Monterey Jack, Pepper Jack, or a Mexican blend, for unique flavors.
- Vegetable Add-Ins: Consider adding sautéed bell peppers, spinach, or zucchini into your chicken filling for extra nutrition and color.
- Spice Level: Adjust the heat by adding fresh jalapeños or red pepper flakes to the filling or sauce.
- Toppings: Top your enchiladas with fresh avocado slices, diced tomatoes, olives, or a drizzle of sour cream for added flavor.
- Different Sauces: Try using a verde sauce or mole sauce instead of the creamy sauce for a change in taste.
- Make it Gluten-Free: Use corn tortillas instead of flour for a gluten-free option that still delivers great taste.
- Serve with Sides: Pair your enchiladas with sides like rice, beans, or a fresh salad to make a complete meal.
What to Pair With Chicken Enchiladas
Serving Chicken Enchiladas can be just as delightful as making them. Here are some great ideas for pairing that will complement the dish perfectly.
- Mexican Rice: A side of fluffy Mexican rice is a classic pairing that soaks up the creamy sauce beautifully.
- Refried Beans: Creamy refried beans are not only delicious but also add a hearty protein boost to your meal.
- Fresh Salad: A light and refreshing salad with avocado, tomatoes, and lime dressing can balance out the richness of the enchiladas.
- Guacamole: Creamy guacamole adds a luscious touch and a burst of flavor to every bite.
- Chips and Salsa: Start your meal with a side of crispy tortilla chips and zesty salsa for an exciting appetizer.
- Occasions: Perfect for a family dinner, game day, or even a special gathering with friends!
- Storage Tips: If you have leftovers, store them in an airtight container for up to three days to enjoy later.
FAQ
Conclusion
Chicken Enchiladas hold a special place in the hearts of many food lovers. Their creamy texture, combined with the savory filling, creates a dish that is both comforting and satisfying. I encourage you to give this recipe a try and enjoy a truly delightful meal with your loved ones. Once you experience the joy of homemade enchiladas, you’ll be hooked!
Chicken Enchiladas
Ingredients
Equipment
Method
- Preheat your oven to 375°F. This initial step ensures that the enchiladas will bake evenly and come out bubbling hot.
- In a large skillet, melt 2 tablespoons unsalted butter over medium heat. As it melts, the rich aroma will fill your kitchen.
- Add the chopped onion to the melted butter and sauté until soft, about 4 to 5 minutes. You want them to be translucent and fragrant.
- Stir in the minced garlic and sauté for another 30 seconds. The garlic should be fragrant but not browned.
- Next, stir in the green chiles, ground cumin, chili powder, Kosher salt, and black pepper. Mix well and sauté for about 1 to 2 minutes to allow the spices to bloom and infuse the filling.
- Add the shredded chicken to the skillet. Stir until every piece is coated with the spice mixture. Remove the skillet from heat.
- Now, stir in the grated Colby Jack cheese until melted and incorporated into the chicken mixture. Set this filling aside.
- In a separate skillet, melt another 3 tablespoons unsalted butter over medium heat. This will be your creamy sauce.
- Once melted, stir in 3 tablespoons all-purpose flour and cook for 1 minute, stirring constantly to create a roux.
- Gradually whisk in the warmed chicken broth. Keep stirring until the mixture thickens and becomes silky smooth.
- Lower the heat and stir in sour cream, the remaining green chiles, onion powder, garlic powder, Kosher salt, and black pepper. Make sure everything is mixed well and smooth.
- Wrap the tortillas in a napkin and microwave on HIGH for 30 seconds to 1 minute, until warmed and pliable.
- Spread a thin layer of the sauce mixture over the bottom of a 9x13" baking dish.
- Take a warmed tortilla and spoon about ¼ cup of the chicken filling down the center. Roll it tightly and place seam-side down in the baking dish. Repeat with remaining tortillas.
- Pour the remaining sauce over the top of the rolled enchiladas. Sprinkle the remaining Colby Jack cheese generously down the center.
- Bake in the preheated oven for 20 to 25 minutes, or until the cheese is bubbly and lightly browned.
- Once done, carefully remove from the oven and let rest for 5 to 10 minutes. Garnish with fresh cilantro before serving. Enjoy your delicious Chicken Enchiladas!
Notes
- Cheese Options: Colby Jack gives these enchiladas a creamy, mild flavor, but Monterey Jack, Pepper Jack, or a Mexican blend all work great too. For the smoothest melt, shred your cheese from a block— pre-shredded cheese contains anti-caking agents that can affect texture.
- Storage: Store leftover enchiladas in an airtight container in the refrigerator for up to 3 days.
- Reheating: Reheat in the oven at 325°F for 15–20 minutes or in the microwave until warmed through. Add a splash of chicken broth or extra sauce before reheating to keep them moist.
- Freezing: You can freeze unbaked enchiladas (without the sour cream sauce) for up to 2 months. Thaw overnight in the fridge, add the sauce, and bake as directed.