Chicken Caesar Sandwich
There’s something truly special about the Chicken Caesar Sandwich. It’s not just a meal; it’s a delicious memory of sunny afternoons and backyard barbecues. I remember the first time I made this sandwich for my family. I had just come home from the market with the freshest ingredients, excited to whip up something that would impress. The crispness of the lettuce, the savory notes of the chicken, and the creamy dressing all come together beautifully. As I toasted the sub rolls, the aroma filled the kitchen, and soon everyone gathered around, drawn by the smell. Even the simplest meals can create lasting moments, and that day was no exception. The Chicken Caesar Sandwich became a family favorite, one I now make whenever I want to relive those cherished times.
Recipe Snapshot
15 mins
15 mins
0 mins
Medium
450 kcal
30 g
Keto, Paleo, Whole30
20 g
Large bowl
Why Try This Chicken Caesar Sandwich
It’s a Classic Combination
The Chicken Caesar Sandwich brings together classic flavors that we all love. The pairing of crisp romaine lettuce, creamy dressing, and juicy chicken is simply unbeatable. It’s a dish that celebrates the best of comfort food while remaining light and satisfying.
Perfect for Any Occasion
Whether it’s a busy weeknight dinner or a casual lunch with friends, this sandwich fits the bill perfectly. It’s versatile enough to be served at picnics, parties, or even simply enjoyed at home. You can dress it up or down, making it suitable for any occasion.
Easy to Assemble
The beauty of the Chicken Caesar Sandwich is in its simplicity. With just a few ingredients and minimal prep time, you can throw this together in no time. It’s a great option for those days when you want something delicious but don’t want to spend hours in the kitchen.
Fun for the Whole Family
This recipe is not just for adults; kids love it too! It’s an easy way to get them involved in the kitchen. Allow them to help with mixing the salad or assembling their sandwiches. It makes for a fun family activity while sharing quality time together.
Customize to Your Taste
The Chicken Caesar Sandwich is incredibly customizable. You can add extra toppings like sliced tomatoes, avocado, or even crispy bacon if you like, making it your own unique creation. This flexibility means you can adjust it to suit your taste or dietary preferences.
Great for Leftovers
If you happen to have any leftovers, they make for a fantastic lunch the next day. Simply keep the components separate until you’re ready to enjoy them again, ensuring everything stays fresh and delicious. There’s something comforting about enjoying a meal that brings back memories while satisfying your cravings.
Everything You Need for Chicken Caesar Sandwich

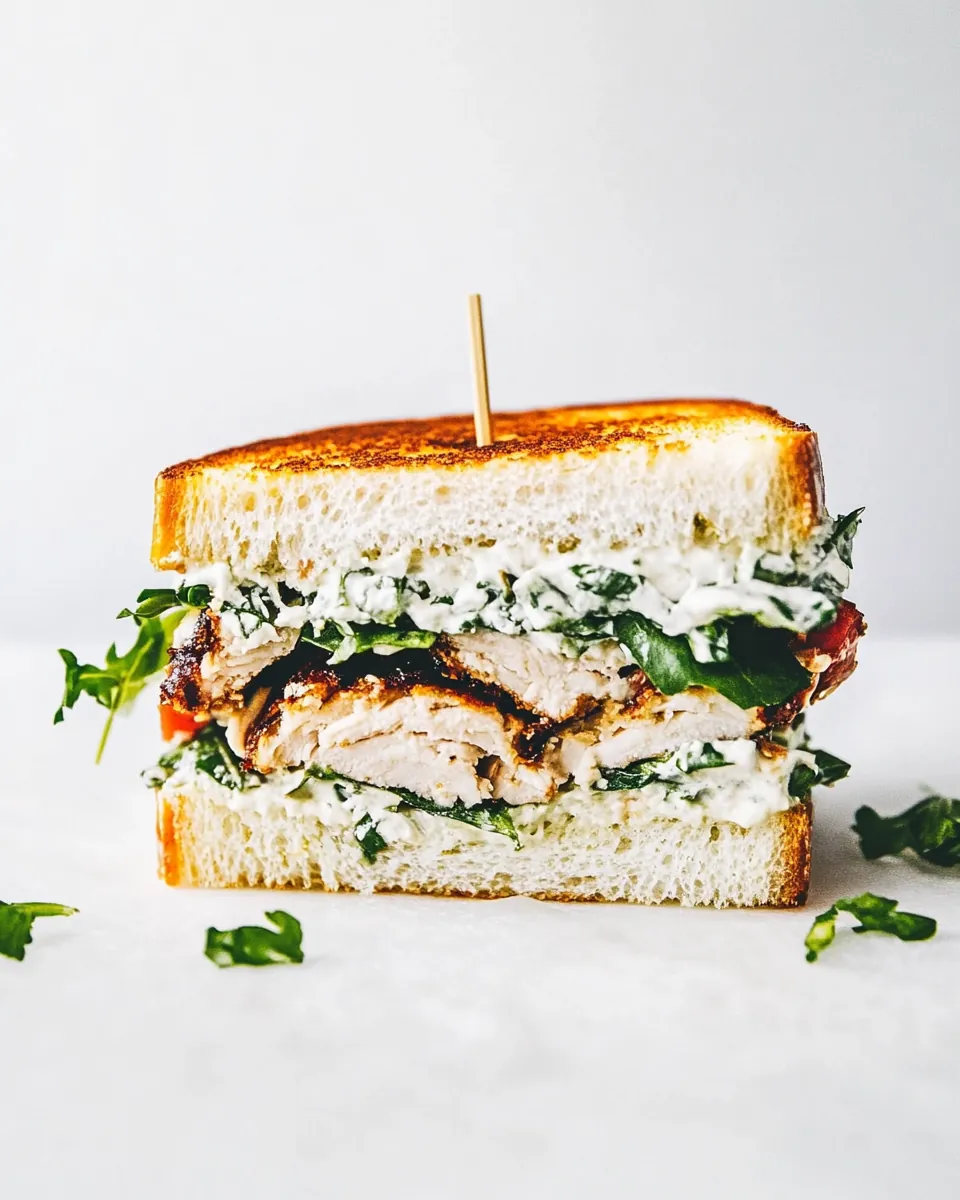
When it comes to the ingredients for the Chicken Caesar Sandwich, each one plays a crucial role in creating that perfect bite. The combination of textures and flavors is what makes this sandwich truly exceptional. You have the crispiness of the lettuce, the savory chicken, and the creamy dressing all wrapped in a soft sub roll. These ingredients work together harmoniously, making every sandwich a little piece of heaven.
- 3 white sub rolls: These soft rolls provide the perfect base for the sandwich, capable of holding all the delicious fillings without falling apart.
- Unsalted butter: Softened butter is brushed on the inside of the rolls, adding flavor and helping to achieve a lovely golden crust when toasted.
- Garlic powder: A pinch of garlic powder adds savory depth to the sandwich, complementing the other flavors beautifully.
- Mayo: Creamy mayonnaise creates a luscious texture and helps bind the various components of the sandwich together.
- 1 (10-ounce) package Caesar salad kit: This kit includes a mix of romaine lettuce, Caesar dressing, and croutons, making it easy to add fresh flavors.
- 1 batch chicken cutlets: Juicy and tender chicken cutlets are the star of this sandwich, offering protein and flavor.
- Parmesan cheese: Optional but highly recommended, fresh grated Parmesan adds a salty, nutty finish that elevates the sandwich.
Making Chicken Caesar Sandwich

Creating the perfect Chicken Caesar Sandwich is a delightful process. You’ll be amazed at how quickly everything comes together. Follow these steps closely, ensuring each ingredient is well-prepared for that ideal taste. Let’s dive into the details!
- Start by cooking the chicken cutlets. You can either use a recipe from your favorite source or opt for a convenient rotisserie chicken. If you’re cooking from scratch, season them well and cook them until golden brown and cooked through. You want about one cup of cooked chicken to fill your sandwich.
- Next, prepare your sub rolls. Brush the inside of each white sub roll generously with softened butter. This step is crucial as it not only adds flavor but also helps create a deliciously crispy texture when toasted.
- Sprinkle a light dusting of garlic powder over the buttered side of the rolls. This will infuse your sandwich with aromatic flavors. After that, toast the rolls in a skillet over medium heat or place them under the broiler in your oven. Watch them closely until they are golden and slightly crisp – this should take just a few minutes.
- While the rolls are toasting, grab a large bowl and pour the contents of the Caesar salad kit into it. This includes the chopped romaine lettuce, dressing, and croutons. If you’re using rotisserie chicken, you can add it directly to the salad mix now. Otherwise, wait until your chicken cutlets are ready.
- Using a pair of tongs, mix the salad until everything is well combined. Ensure the dressing coats every leaf of lettuce, giving it that unmistakable Caesar flavor.
- Once the rolls are toasted and slightly cooled, take them and generously spread mayo on both sides. This adds a creamy element that complements the crunchy salad.
- Now, divide the salad mixture evenly among the three rolls. Make sure each roll gets a hearty portion so that every bite is packed with flavor.
- Once the salad is in place, it’s time to add the cooked chicken cutlets on top of each sandwich. Distribute them evenly, ensuring each sandwich is hearty and satisfying.
- If you like, use a zester to grate fresh Parmesan cheese over the top of each sandwich. This step enhances the flavor and gives a professional touch.
- Finally, close each sandwich and enjoy your creation! Each bite will be a delightful combination of textures and flavors.
Things Worth Knowing
- Proper Cooking: Always ensure your chicken cutlets are cooked to an internal temperature of 165°F to guarantee they’re safe to eat.
- Toasting Technique: Broiling your rolls can create a perfectly crispy top; just ensure to keep an eye on them to prevent burning.
- Freshness Matters: Use fresh ingredients for the best flavor. Fresh romaine lettuce will elevate your sandwich.
- Meal Prep: You can prepare ingredients ahead of time, like cooking the chicken or mixing the salad, to save time during assembly.
Recipe Notes about Chicken Caesar Sandwich
Here are some valuable tips to enhance your sandwich-making experience. These notes will help you get the most out of your Chicken Caesar Sandwich.
- Storage: These sandwiches are best enjoyed fresh. If you need to store leftovers, keep the ingredients separate until you’re ready to assemble them.
- Freezing: Freezing is not recommended for assembled sandwiches, but you can freeze cooked chicken cutlets to use later.
- Pairing: This sandwich pairs well with a light salad or a bowl of soup, making for a balanced meal.
- Variations: Feel free to add additional toppings like sliced tomatoes, or cucumbers for a fresh crunch.
- Make it Spicy: If you prefer heat, add some sliced jalapeños or a drizzle of hot sauce to kick up the flavor.
Serving Options for Chicken Caesar Sandwich
The Chicken Caesar Sandwich is incredibly versatile and can be served in various ways to enhance your dining experience. Here are some serving suggestions:
- With a Side Salad: Pair your sandwich with a light side salad, such as a simple garden salad or a Caesar salad.
- Party Platters: Cut the sandwiches into smaller portions to serve at parties or gatherings; they make for perfect finger food.
- Lunch or Dinner: This sandwich is suitable for both lunch and dinner. It’s quick enough for a weeknight meal yet tasty enough for a nice weekend lunch.
- Seasonal Touch: During summer, serve with grilled vegetables or a refreshing coleslaw to balance the flavors.
- Comfort Food: For a heartier meal, serve alongside sweet potato fries or homemade potato chips.
- Picnic Perfect: Pack them for a picnic; they travel well and are easy to eat outdoors.
FAQ
Conclusion
The Chicken Caesar Sandwich offers a delightful combination of flavors and textures that will surely satisfy your cravings. Not only is it easy to make, but it also brings back fond memories of family gatherings and sunny days. I encourage you to try this recipe and see how it becomes a favorite in your household. Enjoy each bite, and let it transport you to those special moments.

Chicken Caesar Sandwich
Ingredients
Equipment
Method
- 1. Start by cooking the chicken cutlets. You can either use a recipe from your favorite source or opt for a convenient rotisserie chicken. If you're cooking from scratch, season them well and cook them until golden brown and cooked through. You want about one cup of cooked chicken to fill your sandwich.
- 2. Next, prepare your sub rolls. Brush the inside of each white sub roll generously with softened butter. This step is crucial as it not only adds flavor but also helps create a deliciously crispy texture when toasted.
- 3. Sprinkle a light dusting of garlic powder over the buttered side of the rolls. This will infuse your sandwich with aromatic flavors. After that, toast the rolls in a skillet over medium heat or place them under the broiler in your oven. Watch them closely until they are golden and slightly crisp – this should take just a few minutes.
- 4. While the rolls are toasting, grab a large bowl and pour the contents of the Caesar salad kit into it. This includes the chopped romaine lettuce, dressing, and croutons. If you're using rotisserie chicken, you can add it directly to the salad mix now. Otherwise, wait until your chicken cutlets are ready.
- 5. Using a pair of tongs, mix the salad until everything is well combined. Ensure the dressing coats every leaf of lettuce, giving it that unmistakable Caesar flavor.
- 6. Once the rolls are toasted and slightly cooled, take them and generously spread mayo on both sides. This adds a creamy element that complements the crunchy salad.
- 7. Now, divide the salad mixture evenly among the three rolls. Make sure each roll gets a hearty portion so that every bite is packed with flavor.
- 8. Once the salad is in place, it’s time to add the cooked chicken cutlets on top of each sandwich. Distribute them evenly, ensuring each sandwich is hearty and satisfying.
- 9. If you like, use a zester to grate fresh Parmesan cheese over the top of each sandwich. This step enhances the flavor and gives a professional touch.
- 10. Finally, close each sandwich and enjoy your creation! Each bite will be a delightful combination of textures and flavors.
Notes
- Storage: These sandwiches are best enjoyed fresh. If you need to store leftovers, keep the ingredients separate until you’re ready to assemble them.
- Freezing: Freezing is not recommended for assembled sandwiches, but you can freeze cooked chicken cutlets to use later.
- Pairing: This sandwich pairs well with a light salad or a bowl of soup, making for a balanced meal.
- Variations: Feel free to add additional toppings like sliced tomatoes, or cucumbers for a fresh crunch.
- Make it Spicy: If you prefer heat, add some sliced jalapeños or a drizzle of hot sauce to kick up the flavor.