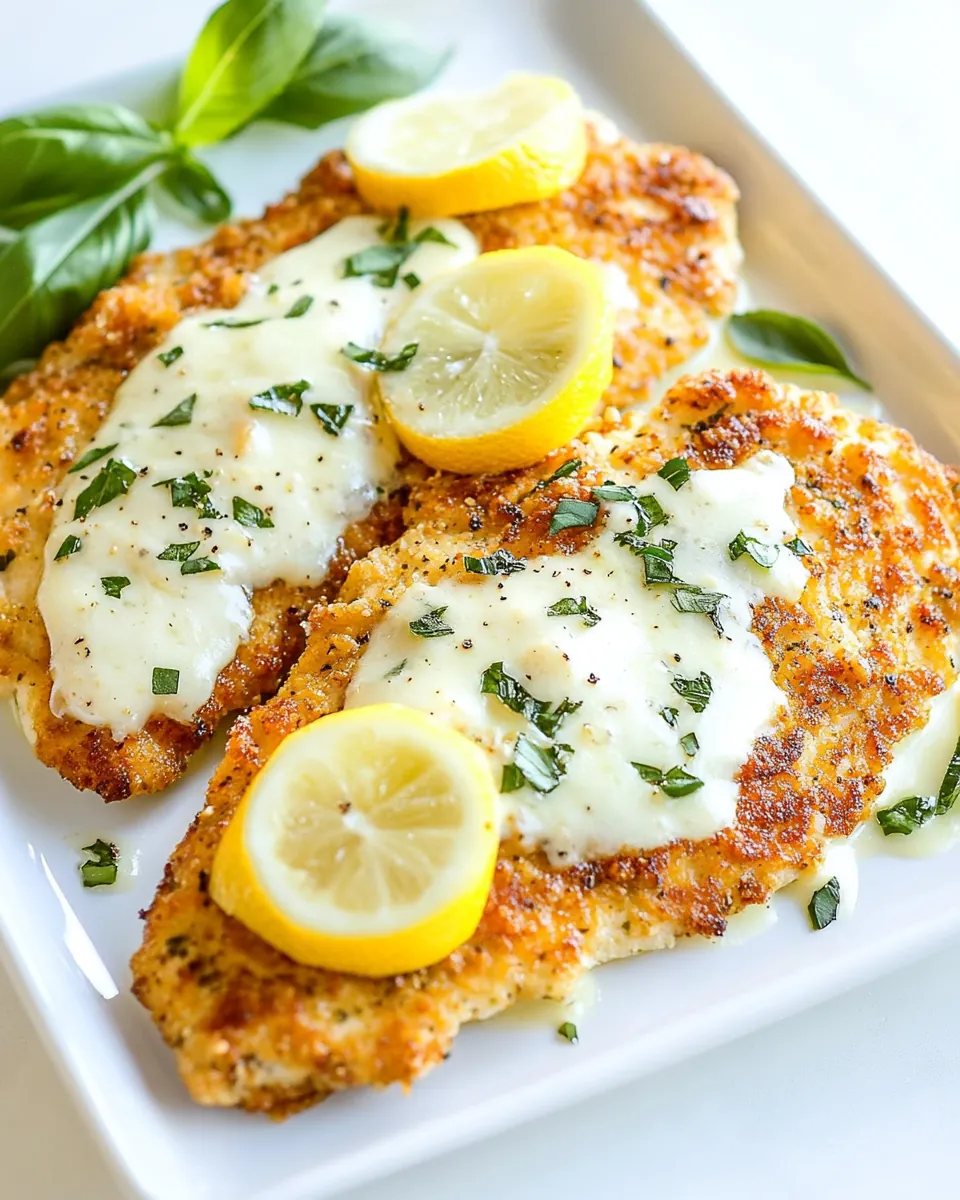
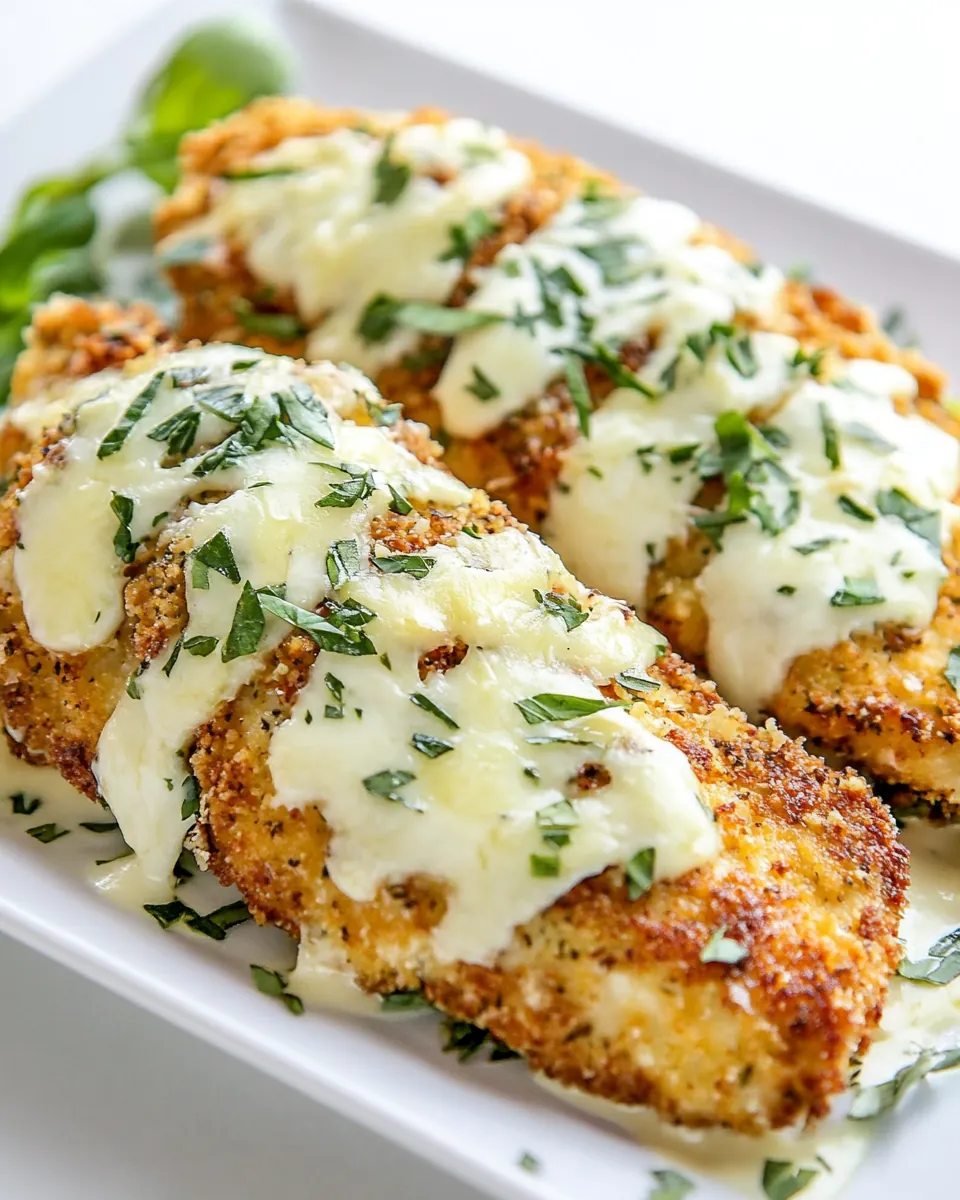
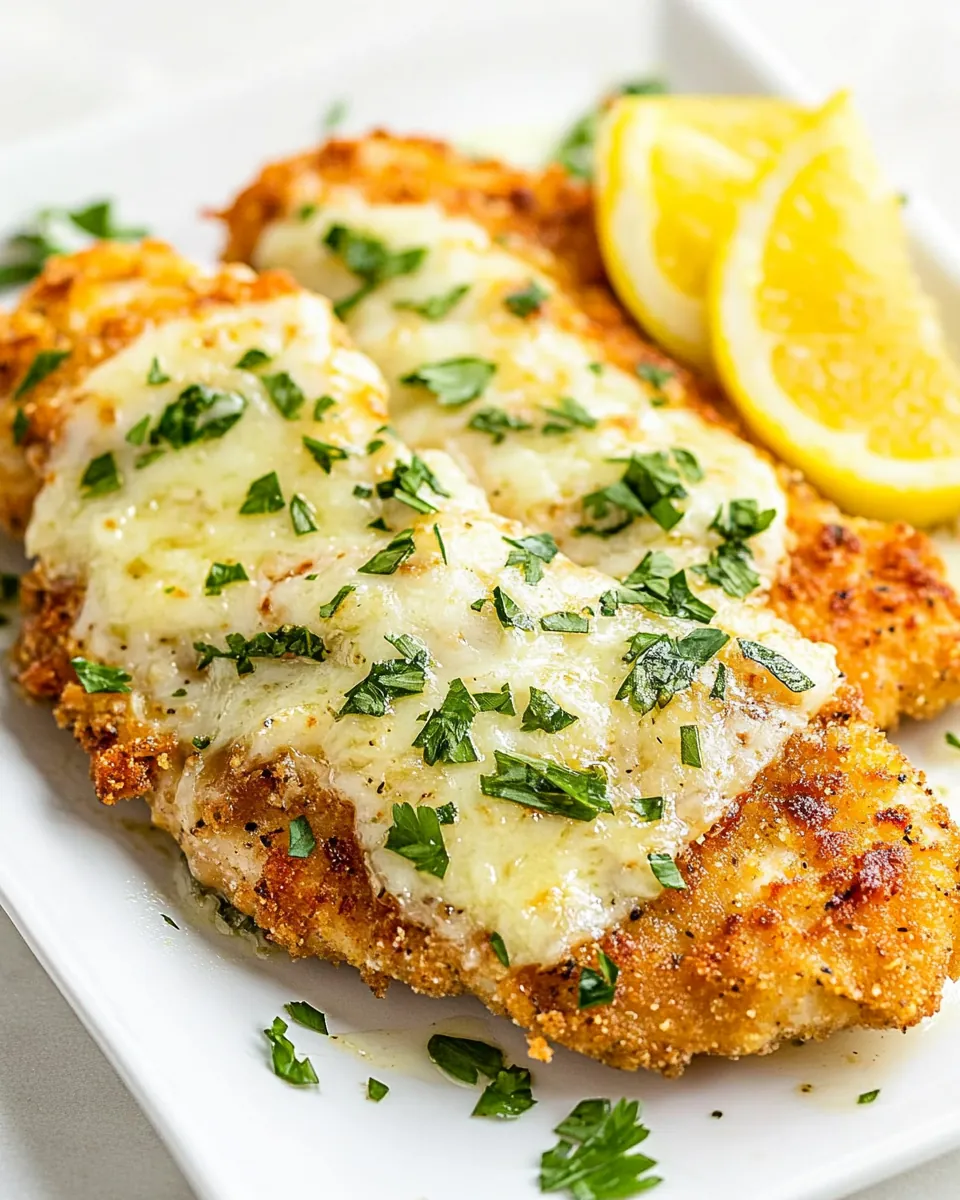
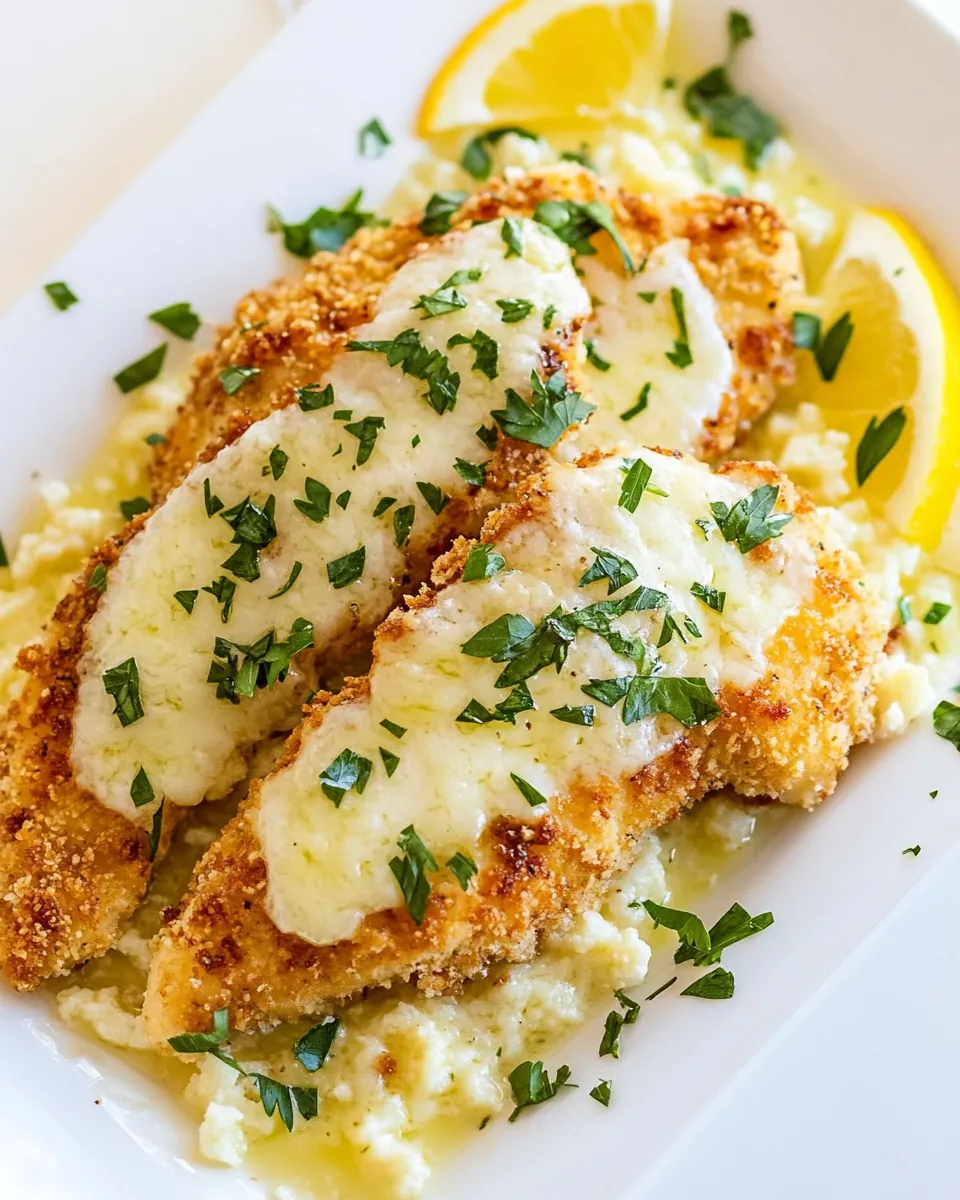
Crusted Chicken Romano
There’s something incredibly comforting about a plate of Crusted Chicken Romano. I remember the first time I indulged in this dish at a local restaurant—it was love at first bite. The crispy coating, the tender chicken, and that delightful melt of cheese made it unforgettable. Since then, I’ve made it my mission to create my own version at home. It became a regular feature at family gatherings, where everyone eagerly awaited that first slice. When you serve Crusted Chicken Romano, not only are you offering a meal; you’re sharing a piece of culinary joy that brings people together. Whether it’s a cozy dinner with loved ones or a special occasion, this dish delivers every time. So, let’s dive into this delicious recipe and explore the wonderful flavors together!
Recipe Snapshot
30 mins
10 mins
20 mins
Medium
450 kcal
35 g
Gluten-Free, Low FODMAP
20 g
Shallow bowls, Non-stick skillet, Rimmed baking sheet
What’s Great About This Crusted Chicken Romano
It’s All About the Crunch!
What I absolutely adore about Crusted Chicken Romano is its crunchy texture. The combination of panko breadcrumbs and freshly grated Romano cheese gives the chicken a delightful crispiness that contrasts beautifully with its juicy interior. Every bite offers a satisfying crunch that makes it hard to stop at just one piece.
Perfect for Any Occasion
This dish is incredibly versatile. Whether it’s a casual weeknight dinner or a fancy gathering, Crusted Chicken Romano fits right in. It’s the kind of meal that impresses guests yet is simple enough to whip up after a long day. You’ll find yourself reaching for this recipe time and time again!
Kids Love It!
If you’re looking for a meal that the whole family will enjoy, look no further. Kids love the crispy exterior and cheesy goodness. It’s an easy way to get them to eat their protein without a fight. Serve it alongside some veggies or pasta, and you’ve got a complete meal that pleases even the pickiest eaters.
Make Ahead Magic
One of the best aspects of this recipe is how well it can be prepared in advance. You can bread the chicken ahead of time, refrigerate it, and then bake it fresh when you’re ready to eat. This makes it a fantastic choice for meal prep, ensuring you have a delicious dinner ready to go without any last-minute stress.
Endless Customization
While the classic recipe is fantastic, don’t hesitate to make it your own! You can play with herbs, seasonings, or even add a kick of spice if you’re feeling adventurous. The base recipe is a blank canvas, and I encourage you to explore your creativity in the kitchen with Crusted Chicken Romano.
Recipe Ingredients for Crusted Chicken Romano
The ingredients for Crusted Chicken Romano are thoughtfully chosen to create a harmonious blend of flavors and textures. Each ingredient plays a pivotal role, ensuring the dish is both delicious and satisfying.
- 2 large chicken breasts, boneless and skinless, sliced lengthwise into thin cutlets and pounded if needed – The star of our dish, tender and juicy chicken is essential for balance.
- Salt and pepper to taste – Simple but essential for enhancing the overall flavor.
- ¼ cup (30g) all-purpose flour – This helps the coating stick beautifully to the chicken.
- 1 large egg – The binding agent for the coating that gives it a rich texture.
- 1 cup panko bread crumbs – These add a light and airy crunch to the crust.
- ½ cup (60g) grated Romano cheese – A key ingredient that gives the dish its distinctive flavor.
- 1 tablespoon fresh parsley, finely chopped – Adds a fresh element that brightens up the dish.
- 1 teaspoon lemon zest – A touch of citrus that balances the richness perfectly.
- 4 tablespoons (60ml) avocado oil or olive oil – For frying and achieving that golden brown color.
- 1 cup mozzarella cheese, shredded – To top off the chicken for an extra creamy layer.
How to Make Crusted Chicken Romano
Making Crusted Chicken Romano is a delightful experience that fills your kitchen with mouthwatering aromas. Follow these steps, and you’ll create a dish that’s not only visually appealing but also incredibly delicious!
- Preheat your oven to 350°F (180°C), or 160°C if you have a fan oven. This ensures that your chicken will cook evenly and achieve that lovely golden crust.
- Season the chicken on all sides with salt and pepper. This step is crucial as it enhances the flavor of the chicken.
- To set up your dredging station, take three shallow bowls. In the first bowl, add the flour. In the second, whisk the egg. In the third, combine the panko bread crumbs, Romano cheese, parsley, lemon zest, salt, and pepper. Each bowl plays a role in making the coating stick.
- Take each chicken cutlet and dip it into the flour, shaking off any excess. Then, dip it into the egg wash, ensuring it’s fully coated. Finally, press it into the Romano-panko mixture, making sure it’s well-coated on both sides. Repeat this with the remaining cutlets.
- In a large non-stick skillet, heat half of the avocado oil over medium heat. You want the oil to be hot enough that it sizzles when you add the chicken.
- Add two of the coated chicken breasts (or as many as you can fit) into the skillet. Cook for about 3 to 4 minutes on each side, or until the coating is golden brown. The chicken doesn’t have to be fully cooked yet.
- If the pan has burnt panko breadcrumbs, wipe it clean with a paper towel. Add the remaining oil and repeat the process with the other chicken cutlets.
- Once cooked, transfer the chicken breasts to a rimmed baking sheet lined with parchment paper.
- Generously pile mozzarella cheese on top of each cutlet. This gives a gooey, cheesy layer that pairs perfectly with the crisp crust.
- Place the baking sheet in the preheated oven and bake for about 8 to 10 minutes, or until the chicken’s internal temperature reaches 165°F (74°C). This step ensures that your chicken is cooked through while the cheese melts beautifully.
- After the baking time, take the chicken out of the oven and top with a slice of lemon if desired. Sprinkle with fresh parsley or basil for a pop of color and flavor.
Things Worth Knowing
- Even Thickness: Make the cutlets even! If after slicing the chicken, the cutlets are different thicknesses, use a meat mallet to pound them out so that they are uniform. This ensures they cook at the same rate.
- Fresh Cheese: Grate fresh cheese. While pre-shredded pecorino Romano cheese is convenient, shredding it yourself from a larger wedge provides better flavor and is often more economical.
- Hands-On Breading: Use your hands to bread the chicken. Press the breadcrumbs and cheese mixture onto the chicken so it adheres well for a perfect crust.
- Meat Thermometer: Use a meat thermometer. After baking, ensure the cutlets have an internal temperature of at least 165°F (74°C) to be safe to eat. Adjust cooking time if necessary.
- Lemon Garnish: Lemon slices are pretty on top of the chicken, but you could also serve with lemon wedges. For best results, squeeze the lemon over the chicken before eating!
- Storage: Keep leftovers in an airtight container in the fridge for up to 3 days. They reheat wonderfully in the air fryer, maintaining their crispy texture.
Variations to Try
If you’re in the mood for some creativity, here are some variations to enhance your Crusted Chicken Romano experience. Feel free to mix things up!
- Spice It Up: Add some cayenne pepper or red pepper flakes to the breadcrumb mixture for a little heat.
- Herb Infusion: Experiment with fresh herbs like basil or thyme in the breadcrumb mixture for a fragrant twist.
- Cheese Mix: Combine Romano cheese with other cheeses like cheddar or gouda for a richer flavor profile.
- Change the Sauce: Serve the chicken with a marinara sauce on the side for a classic Italian touch.
- Vegetable Medley: Pair with a side of roasted vegetables to make the meal even more nutritious.
- Substitute Chicken: Try using turkey or eggplant as a substitute for the chicken for a different approach.
- Freezing: Prepare and bread the chicken, then lay it out on a baking sheet, freeze until solid, and store in freezer bags. Bake from frozen for an easy meal.
Perfect Pairings for Crusted Chicken Romano
When it comes to serving Crusted Chicken Romano, it’s all about creating a complete meal that delights the senses. Here are some perfect pairings to consider:
- Garlic Mashed Potatoes: Creamy and buttery mashed potatoes make a wonderful side to complement the crispy chicken.
- Caesar Salad: A fresh Caesar salad adds a crunchy and refreshing contrast to the rich flavors of the chicken.
- Steamed Broccoli: Lightly steamed broccoli drizzled with olive oil will bring a nutritious element, enhancing the meal.
- Herb Rice: Fluffy rice tossed with herbs and lemon zest makes for a flavorful side dish that pairs beautifully.
- Pasta Primavera: A side of colorful pasta loaded with seasonal vegetables will elevate the dining experience.
- Seasonal Fruits: Serve a bowl of fresh seasonal fruits for a light and refreshing contrast at the end of the meal.
- Wine Pairing: For an elegant touch, serve with a glass of white wine such as Chardonnay, enhancing the overall experience.
FAQ
Conclusion
In conclusion, Crusted Chicken Romano is a delightful dish that combines crispy textures with savory flavors, making it a favorite for many. It’s a recipe that not only satisfies your hunger but also warms your heart. I encourage you to try making this dish at home and experience the joy it brings to your table. With its versatility and ease of preparation, it’s sure to become a go-to recipe in your cooking repertoire!
Crusted Chicken Romano
Ingredients
Equipment
Method
- Preheat your oven to 350°F (180°C), or 160°C if you have a fan oven.
- Season the chicken with salt and pepper from all sides.
- Set up a dredging station: To a shallow bowl, add flour, in a second bowl whisk an egg, and in a third bowl combine panko with Romano cheese, parsley, lemon zest, salt and pepper.
- Dip each chicken cutlet in the flour, shaking off the excess. Dip it into the egg wash. Press it into the Romano-panko mixture, making sure it’s well-coated on both sides. Repeat with the remaining cutlets.
- Heat half of the oil in a large skillet over medium heat. Once the oil is hot, add 2 of coated chicken breasts (or as many as you can fit in the pan) and cook for about 3-4 minutes per side, or until the coating is golden brown. The chicken does not need to be cooked all the way through.
- Wipe the skillet clean with a paper towel if there are burnt panko breadcrumbs, then add the remaining oil and repeat with the remaining chicken cutlets.
- Move the chicken breasts to a rimmed baking sheet lined with parchment paper.
- Pile shredded mozzarella cheese on top of each chicken cutlet.
- Put the baking sheet in the preheated oven and bake for about 8-10 minutes, or until the chicken’s internal temperature reaches 165°F (74°C).
- Take the chicken out of the oven and top with a slice of lemon if desired, and sprinkle with fresh parsley or basil.
Notes
- Tip 1: Make the cutlets even! If after slicing the chicken, the cutlets are different thicknesses, use a meat mallet to pound them out so that they are all the same.
- Tip 2: Grate fresh cheese. You can buy pre-shredded pecorino Romano cheese, but you’ll get much better flavor if you shred it yourself from a larger wedge.
- Tip 3: Use your hands to bread the chicken. You’ll want to press the breadcrumbs and cheese mixture onto the chicken so that it sticks well.
- Tip 4: Use a meat thermometer. After baking, the cutlets should have an internal temperature of at least 165°F (74°C).
- Tip 5: Lemon slices are so pretty on top of the chicken, but you could also serve the chicken with lemon wedges instead.
- Tip 6: To Store: Keep leftovers in an airtight container in the fridge for up to 3 days. They reheat wonderfully in the air fryer.