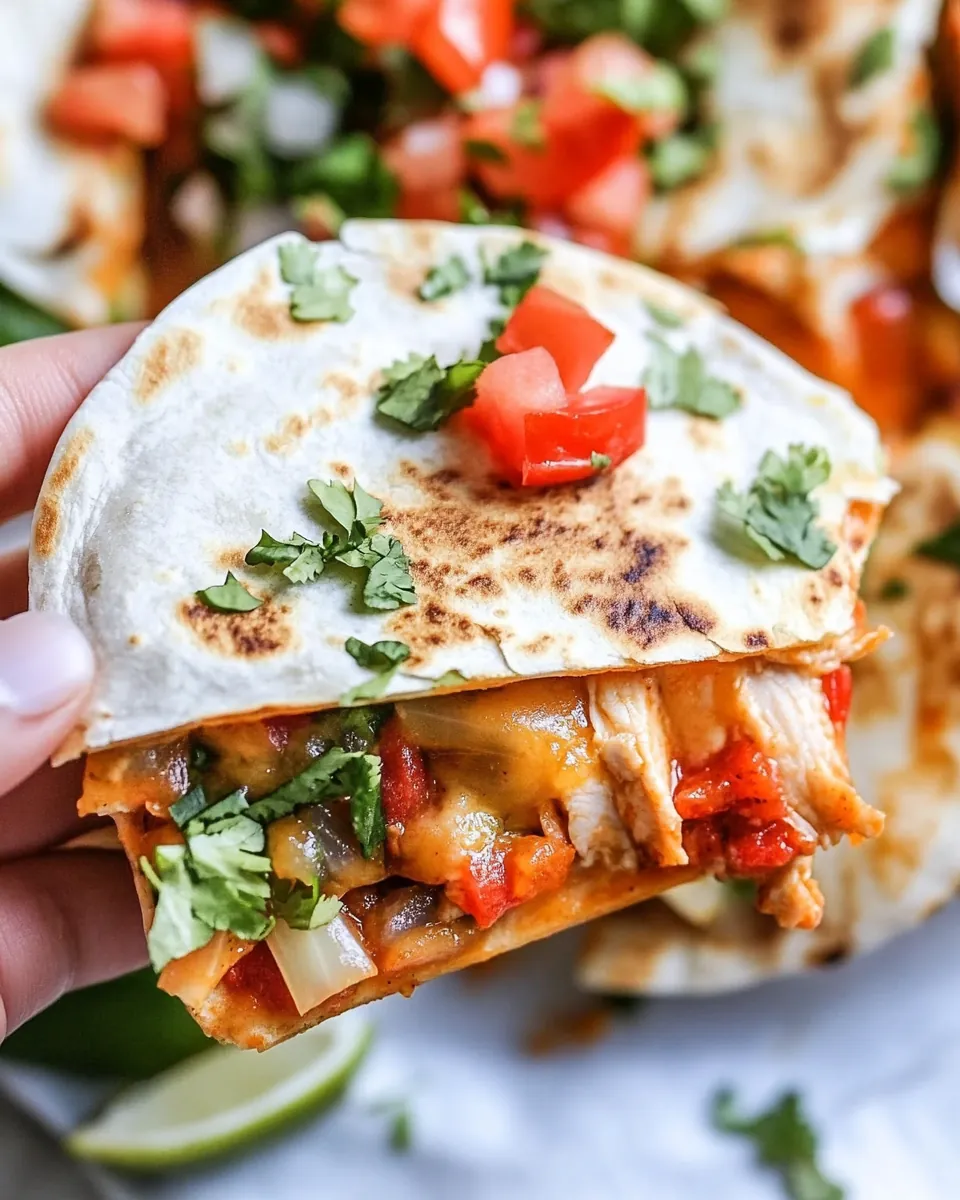
Chicken Fajita Quesadillas
What’s better than a cozy evening filled with the mouth-watering aroma of Chicken Fajita Quesadillas? Imagine gathering around the dinner table, everyone eagerly awaiting that first bite. It reminds me of family nights spent sharing stories and laughter, all while indulging in this delicious treat. The best part? They’re as fun to make as they are to eat! Picture the sizzling sound of seasoned chicken dancing in the skillet, paired with vibrant bell peppers and onions just waiting to be wrapped in warm, soft tortillas. These quesadillas have quickly become a staple in my home, and it’s not hard to see why. With each bite, you get layers of flavor and texture that leave you wanting more.
Recipe Snapshot
30 mins
10 mins
20 mins
Medium
350 kcal
25 g
Keto, Gluten-Free, Low FODMAP
15 g
Baking Sheet
What Sets This Chicken Fajita Quesadillas Apart
The Perfect Blend of Flavors
One of the reasons I absolutely adore Chicken Fajita Quesadillas is the incredible depth of flavors that come from the combination of spices. The chili powder and cumin create a warm, earthy base, while the onion powder and garlic powder add a savory note that brings everything together beautifully.
Quick and Easy to Prepare
These quesadillas are perfect for those busy weeknights when you want something tasty without spending hours in the kitchen. With just a few ingredients and about thirty minutes, you can have a delightful meal ready to serve! I love how simple it is to toss everything together, making it a go-to recipe for gatherings.
Customizable to Your Taste
Another standout feature is their versatility. You can easily adjust the ingredients to suit your preferences. Whether you want to add extra veggies, switch up the cheese to a sharp cheddar, or even toss in some beans for added protein, the possibilities are endless, and I encourage you to get creative!
Perfect for the Whole Family
Kids and adults alike fall in love with these quesadillas. They’re fun to eat and even more enjoyable to make together as a family. I often get my little ones involved in the tortilla assembly, and seeing their excitement as they create their meal is priceless.
Ideal for Any Occasion
Lastly, Chicken Fajita Quesadillas are wonderful for any occasion, be it a casual weeknight dinner, a festive gathering, or even game day. They can be served with a variety of dips like salsa or guacamole, making them a hit no matter the setting. Plus, these quesadillas are just as delicious as leftovers, making them a fantastic option for meal prep!
What to Gather for Chicken Fajita Quesadillas

To create the perfect Chicken Fajita Quesadillas, you’ll need a harmonious blend of ingredients that work beautifully together. The star of the show is, of course, the chicken, but it’s paired with a colorful mix of bell peppers and onions that add both flavor and visual appeal. The spices are what really elevate this dish, giving it that authentic fajita flair while the Monterey Jack cheese melts into gooey goodness, holding everything together.
- 1 teaspoon chili powder
- ½ teaspoon ground cumin
- ½ teaspoon onion powder
- ¼ teaspoon garlic powder
- ½ teaspoon kosher salt
- 1½ pounds boneless, skinless chicken breasts (sliced into thin strips)
- 2 tablespoons olive oil (divided)
- 1 tablespoon olive oil
- 1 onion (sliced)
- 2 pinches kosher salt
- 3 bell peppers (any color; sliced)
- 6 large flour tortillas
- 2-3 cups shredded Monterey Jack cheese
- 1 tablespoon olive oil
Step by Step Instructions for Chicken Fajita Quesadillas

Cooking Chicken Fajita Quesadillas is not only enjoyable but also a straightforward process. Let’s dive into the steps to create this delightful dish! You’ll find that as you prepare each component, the kitchen fills with enticing aromas that will have everyone gathering in anticipation.
- Preheat your oven to 400°F. This ensures a crispy exterior for the tortillas once they’re baked. Spray a baking sheet with nonstick spray and set it aside to prepare for the quesadillas.
- In a small dish, combine the chili powder, cumin, onion powder, garlic powder, and kosher salt. Stir these spices together for a balanced flavor profile that will coat the chicken.
- In a bowl, place the sliced chicken breasts. Drizzle in 1 tablespoon of olive oil and add the spice mixture. Toss well to coat the chicken evenly with the spices.
- Heat the remaining 1 tablespoon of olive oil in a large skillet over medium heat. Once hot, add the seasoned chicken strips. Cook for a few minutes on each side until they’re browned and cooked through. Transfer the chicken to a clean plate once cooked.
- In the same skillet, add more olive oil if needed. Toss in the sliced onion and a pinch of kosher salt. Sauté for 3 to 4 minutes until the onion becomes softened and translucent.
- Add the sliced bell peppers to the skillet along with another pinch of kosher salt. Continue sautéing for an additional 3 to 4 minutes until the peppers are tender. This adds a nice crunch and sweetness to the dish.
- Spread the tortillas out on the greased baking sheet. On one half of each tortilla, sprinkle 2-3 tablespoons of cheese, followed by an even amount of the cooked chicken and sautéed peppers.
- Sprinkle any remaining cheese over the filled half and then fold each tortilla in half. Rub a little olive oil on the top of the tortillas for extra crispiness.
- Place the baking sheet in the oven and bake for 8 to 10 minutes. The tortillas should turn golden brown and the cheese should be melted. Keep a close eye to prevent burning.
Things Worth Knowing
- Rest the Ingredients: Letting the cooked chicken and veggies rest for a few minutes before assembling helps excess moisture evaporate, avoiding sogginess in your quesadillas.
- Don’t Overfill: Be careful not to overstuff your quesadillas, as this can lead to them turning out soggy or floppy when cooked.
- Oil Wisely: Apply just a little olive oil on the tortillas; too much can make them greasy.
- Broil for Extra Crunch: For a crispy finish, consider broiling the quesadillas for the last 1 to 2 minutes of baking, but watch closely to prevent burning.
- Serving Tip: Let the baked quesadillas rest for 2 minutes before slicing. This keeps the fillings intact and makes for a cleaner cut.
Ways to Customize

When it comes to Chicken Fajita Quesadillas, there are countless ways to make this dish your own. Here are some tips to customize it to your liking:
- Add Extra Veggies: Consider adding mushrooms, zucchini, or corn for added texture and flavor.
- Cheese Varieties: Experiment with different cheeses like pepper jack for an extra kick or mozzarella for a milder flavor.
- Protein Options: Swap the chicken for beef, shrimp, or even a plant-based protein for a different protein profile.
- Spice Level: Adjust the amount of chili powder to suit your spice tolerance, or add a dash of hot sauce for an extra kick!
- Creative Dips: Serve with a variety of dips such as guacamole, sour cream, or even a spicy salsa to enhance the flavors.
- Tortilla Choices: Try using whole wheat or corn tortillas to change up the texture and flavor.
- Make It a Meal: Serve alongside a fresh salad or a side of rice to make it a full meal.
Great Combinations for Chicken Fajita Quesadillas
When it comes to serving Chicken Fajita Quesadillas, there are plenty of delicious pairings to consider. Here are some ideas:
- Side Salads: Pair with a refreshing side salad, such as a simple green salad dressed with a zesty vinaigrette for contrast.
- Rice Dishes: Serve alongside a flavorful cilantro-lime rice to complement the spices in the quesadillas.
- Dips: Offer an array of dips like guacamole, salsa, and sour cream for guests to enjoy.
- Occasions: These quesadillas are perfect for casual gatherings, family dinners, or even game days — they’re sure to impress!
- Seasonal Pairings: In colder months, serve with a warm soup, while in warmer months, fresh veggies or fruit salads can balance the meal.
- Storage Tips: Store leftovers in an airtight container in the refrigerator for up to three days; they reheat wonderfully!
- Freezing: You can freeze assembled, uncooked quesadillas for up to two months. Just bake them straight from frozen, adding a few extra minutes to the cooking time.
FAQ
Conclusion
The beauty of Chicken Fajita Quesadillas lies in their incredible flavors and ease of preparation. They’re perfect for any occasion, from a family dinner to casual get-togethers. I encourage you to try making them tonight; I promise you won’t be disappointed. Enjoy every cheesy, spicy bite!
Chicken Fajita Quesadillas
Ingredients
Equipment
Method
- Preheat your oven to 400°F. Spray a baking sheet with nonstick spray and set aside.
- Combine the chili powder, cumin, onion powder, garlic powder, and kosher salt in a small dish.
- Place the sliced chicken breasts in a bowl. Pour in 1 tablespoon of olive oil and the spice mixture and toss to coat the chicken.
- Heat the remaining 1 tablespoon of olive oil in a large skillet set over medium heat. Add in the seasoned chicken strips, and cook for a few minutes on each side until browned and cooked through. Transfer the chicken to a clean plate.
- Heat the olive oil in the same skillet. Add the sliced onion and a pinch of kosher salt and sauté for 3-4 minutes, or until softened. Add in the sliced bell peppers and another pinch of kosher salt. Sauté for an additional 3-4 minutes, until softened. Remove from heat.
- Spread the tortillas out on the greased baking sheet. Sprinkle the cheese on one half of each tortilla (2-3 tablespoons per tortilla half). Then, place an even amount of chicken and peppers over the cheese.
- Sprinkle any remaining cheese on top and fold each tortilla in half. Rub the olive oil on the tortillas.
- Bake for 8-10 minutes until the cheese is melted and the tops of the tortillas are golden brown.
Notes
- Tip 1: Let the cooked chicken and veggies rest for a few minutes before assembling.
- Tip 2: Take care not to overfill your quesadillas, as this can cause them to turn out soggy or floppy.
- Tip 3: Don’t add too much olive oil to the tops of your tortillas, or they’ll turn out greasy.
- Tip 4: Optionally, you can carefully flip the quesadillas with a large spatula halfway through cooking.
- Tip 5: For extra crunch, broil the quesadillas for the last 1-2 minutes of baking.
- Tip 6: Let baked quesadillas rest for 2 minutes before slicing to keep the fillings intact.
- Tip 7: Serve with salsa and sour cream, with a sprinkling of fresh cilantro.