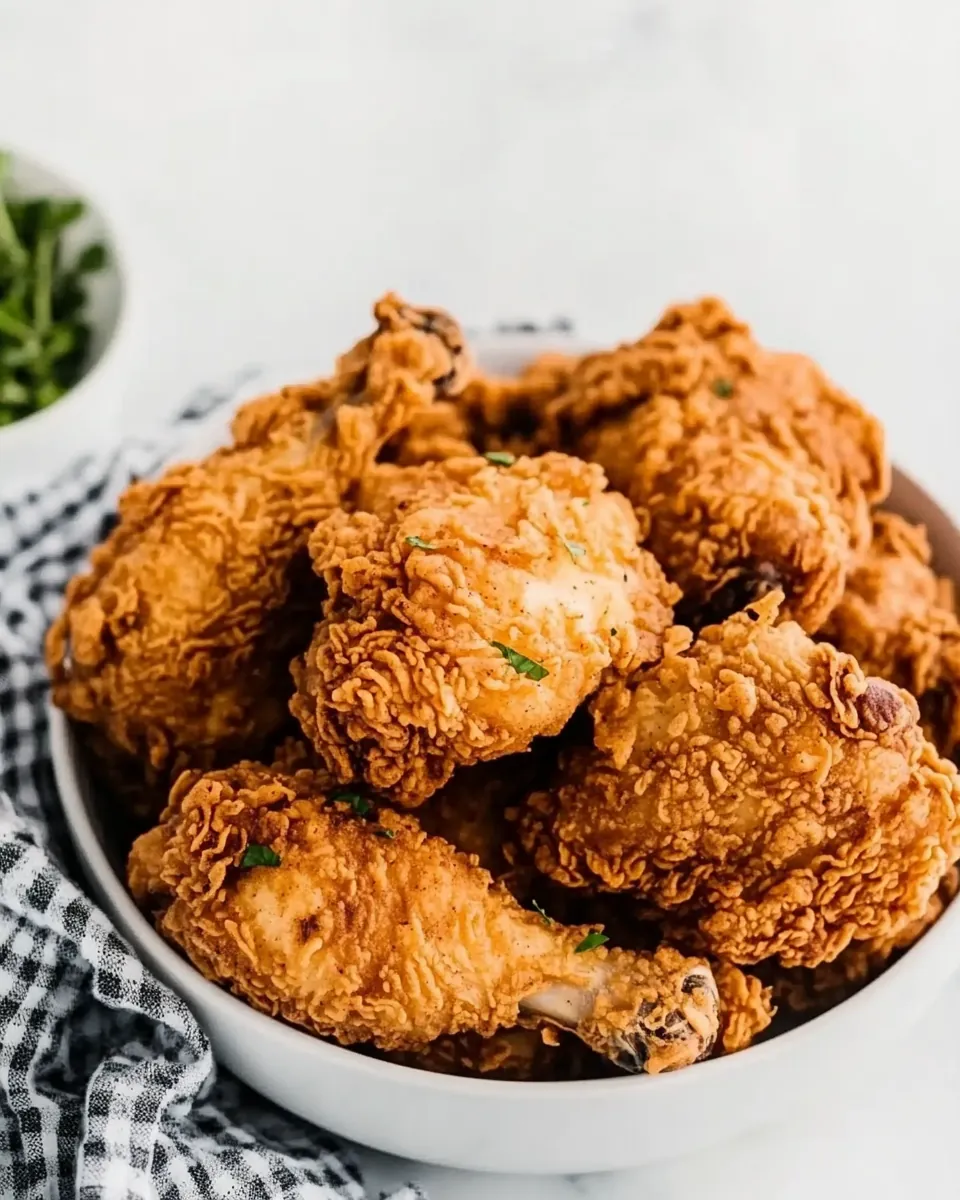
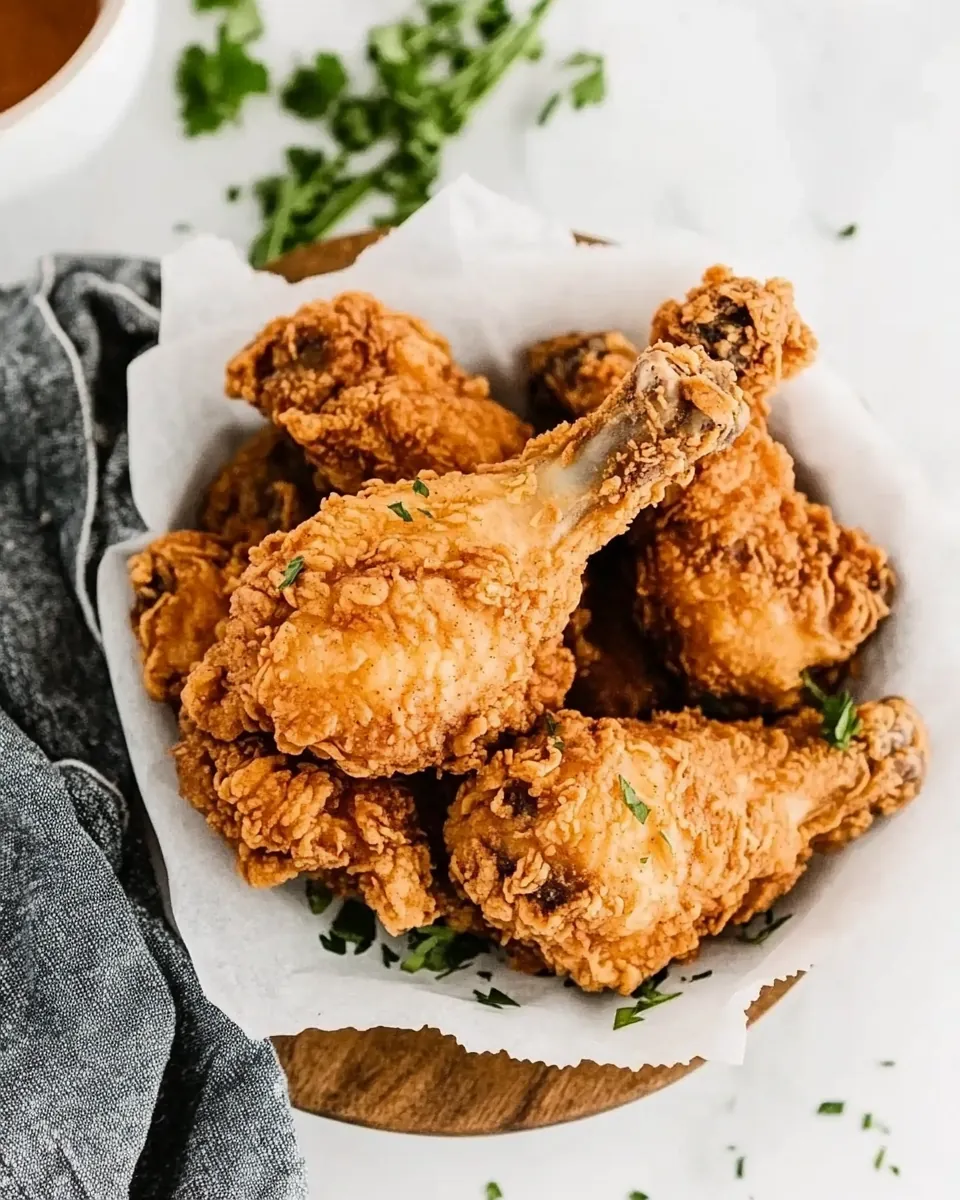
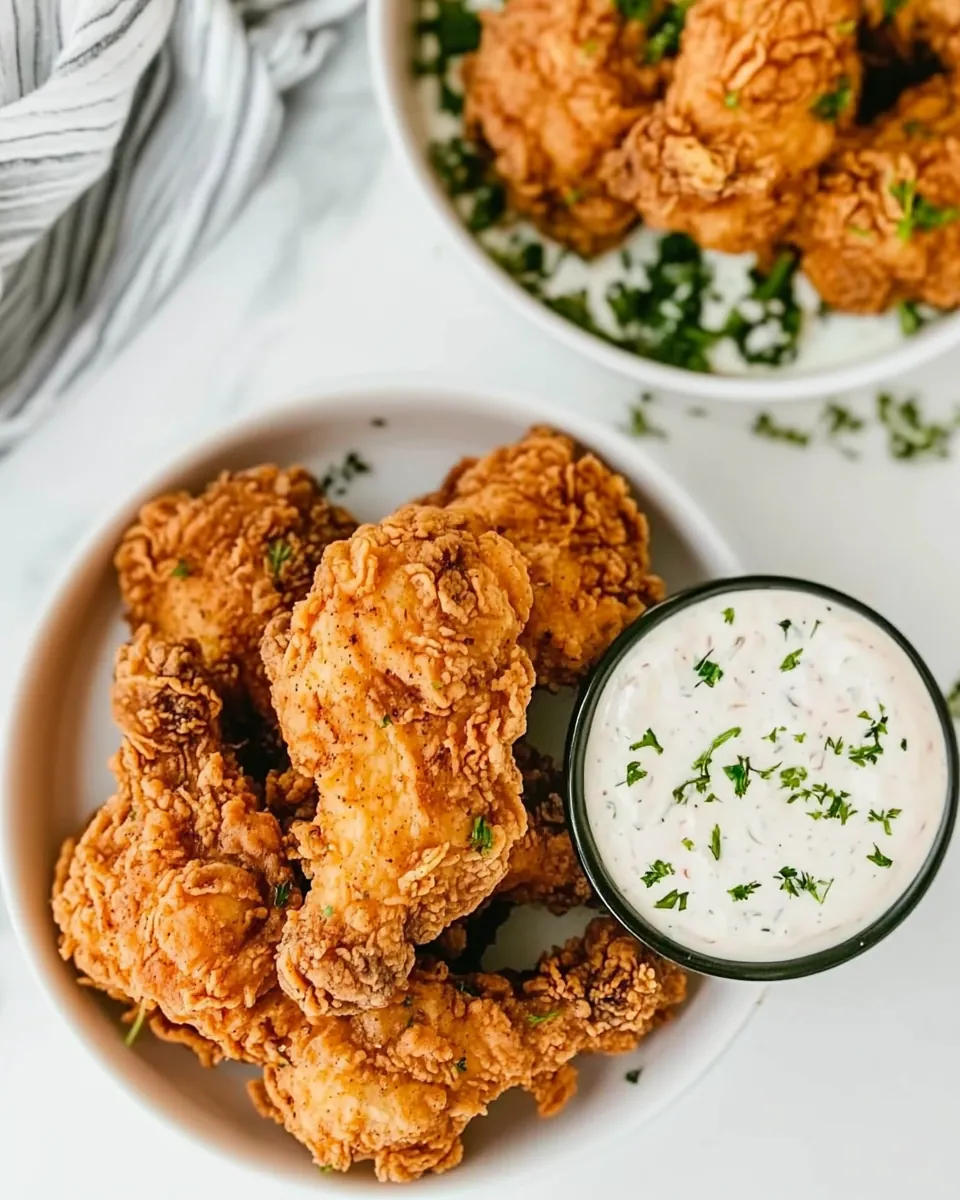
Buttermilk Fried Chicken
There’s something undeniably comforting about Buttermilk Fried Chicken. Growing up, our family gatherings often revolved around a big platter of golden, crispy chicken that was juicy on the inside and perfectly seasoned. It would have everyone gathered around the table, forks at the ready, eyes wide with anticipation. This dish holds memories of laughter, sharing stories, and savoring each bite while the aroma filled the room. It’s no wonder that Buttermilk Fried Chicken has become a cherished recipe in many households. Every time I make it, I can’t help but remember those warm afternoons spent in the kitchen, the clinking of pots, and the joy of cooking for loved ones. This recipe not only fills the belly but also warms the heart.
Recipe Snapshot
1 hr 30 mins
60 mins
30 mins
Medium
400 kcal
25 g
Gluten-Free
20 g
Wooden Spoon, Mixing Bowl, Oven, Large Pot, Skillet, Frying Pan, Whisk
What You’ll Enjoy About This Buttermilk Fried Chicken
It’s All About the Brine
The secret to achieving that juicy and flavorful chicken lies in the brining process. Soaking the chicken in a blend of salt and spices not only enhances its natural flavor but also ensures that it stays moist during cooking. This is a step you definitely don’t want to skip.
Crispy Coating Perfection
Who doesn’t love biting into that crunchy, crispy exterior? The combination of all-purpose flour, garlic powder, onion powder, and paprika creates a coating that’s not just crispy but has layers of flavor. It’s the kind of crunch that makes you want to go back for seconds.
Flavor That Packs a Punch
The seasoning blend in this recipe is concise yet powerful. Each ingredient plays a crucial role in elevating the taste of the chicken, from the spicy kick of cayenne to the aromatic notes from black peppercorns. You’ll discover that every bite is layered with flavor, inviting you to savor it slowly.
Perfect for Any Occasion
Whether it’s a family dinner, a picnic, or a holiday celebration, Buttermilk Fried Chicken fits right in. It’s a dish that brings people together, making any meal feel special. The best part? It’s just as delicious served cold, making leftovers a treat!
Easy to Make
Despite the impressive result, making Buttermilk Fried Chicken is simpler than you might think. The process might seem lengthy, but with a little planning, you’ll find it’s quite manageable. Plus, the end result is absolutely worth the effort.
Everyone Will Love It
This recipe is a crowd-pleaser. From kids to adults, everyone enjoys the comforting flavors of fried chicken. It’s the kind of meal that brings smiles and happy faces, making it a staple in any kitchen.
Key Ingredients for Buttermilk Fried Chicken
The ingredients for Buttermilk Fried Chicken are simple yet effective, creating that perfect balance of flavors and textures. The key players in this dish are the buttermilk, which tenderizes the chicken, and the blend of spices that infuse it with amazing taste. Let’s take a closer look at these essential components.
- Chicken: 22½ to 3 pounds of whole chicken, cut into pieces like breasts, thighs, drumsticks, and wings. This is the star of the dish, and using a whole chicken ensures a variety of textures.
- Lemons: 5, halved. Fresh lemons add a bright acidity that balances the dish and enhances the overall flavor.
- Bay Leaves: 24 bay leaves contribute a subtle herbal aroma to the brine.
- Fresh Parsley: 1 bunch (4 ounces) adds a fresh touch to the brining liquid.
- Fresh Thyme: 1 bunch (1 ounce) for an additional layer of herbal flavor.
- Honey: ½ cup (169.5 ml) for a hint of sweetness that contrasts beautifully with the savory elements.
- Garlic: 1 head, halved horizontally, infuses the brine with rich flavor.
- Black Peppercorns: ¾ cup (0.08 g) for a punch of heat and spice.
- Kosher Salt: 2 cups (584 g) is essential for the brining process, helping to season the chicken deeply.
- Water: 2 gallons (7.57 l) to dissolve the salt and create the brine.
- All-Purpose Flour: 6 cups (750 g) creates the crispy coating that everyone loves.
- Garlic Powder: ¼ cup (0.03 g) adds depth to the coating.
- Onion Powder: ¼ cup (27.5 g) complements the garlic powder in flavor.
- Paprika: 4 teaspoons for color and sweetness.
- Cayenne: 4 teaspoons for a spicy kick.
- Black Pepper: 1 teaspoon, freshly ground for added seasoning.
- Buttermilk: 1 quart (0.95 l) plus 6 tablespoons, divided, helps create that lovely tender texture.
- Peanut or Canola Oil: 2 to 3 quarts (1.9 to 2.85 l) for frying, providing the necessary fat to achieve that crispiness.
How to Make Buttermilk Fried Chicken
Making Buttermilk Fried Chicken is a delightful journey that requires a bit of patience, but the rewards are plentiful. This method will guide you through each step to ensure your chicken is tender, flavorful, and perfectly crispy.
- Prepare the Brine: Start by combining all of the brine ingredients in a large stockpot. Cover it and bring to a boil. This step is crucial as boiling helps dissolve the kosher salt. Keep stirring for about 1 minute, then remove it from the heat. Allow it to cool completely and then chill it thoroughly in the refrigerator before using. You can refrigerate the brine for up to 3 days.
- Brine the Chicken: Pour the cooled brine into a large container and add the pieces of chicken. Make sure the chicken is fully submerged and refrigerate it for 8 to 12 hours. Be careful not to leave it too long, or the chicken may become overly salty.
- Prepare the Chicken: Once the brining is complete, remove the chicken from the brine and rinse it under cold water, ensuring you wash off any leftover brine particles. Pat the chicken dry using paper towels and let it sit at room temperature for about 1½ hours until it warms up. This helps in achieving even cooking.
- Prepare the Coating and Dredging Station: Fill a large pot with at least 2 inches of frying oil and heat it to 320 degrees F over medium heat. Meanwhile, set up a wire cooling rack on top of a baking sheet, which will help drain the fried chicken later. In a mixing bowl, combine the flour, garlic powder, onion powder, paprika, cayenne, and black pepper. Divide this mixture onto two shallow bowls. In a separate bowl, pour in 1 quart of buttermilk. Add 6 tablespoons of buttermilk to one bowl of the flour mixture and mix it with a fork until it resembles a shaggy texture.
- Dredge the Chicken: Arrange your dredging station in this order: chicken pieces, dry flour mixture, buttermilk, and shaggy flour mixture. Before frying, dip the chicken thighs in the first bowl of coating, making sure to coat them thoroughly while patting off any excess. Then, dip them into the buttermilk, letting the excess run back into the bowl, and finally into the second bowl of shaggy coating. Transfer the coated pieces to the parchment-lined baking sheet.
- Fry the Chicken: Carefully lower the coated chicken thighs into the hot oil. Monitor the temperature closely, adjusting as needed to keep the oil at 320 degrees F. Fry for about 2 minutes before gently moving the chicken around to promote even cooking. Continue frying for 11 to 12 minutes until the chicken is a deep golden brown, cooked through, and registers 170 degrees F on an instant-read thermometer. Once cooked, transfer the thighs to the cooling rack, skin-side-up, and let them rest while you fry the remaining pieces.
- Fry the Drumsticks: Ensure the oil is back to 320 degrees F before adding the chicken drumsticks. Fry them for about 8 minutes, checking for doneness similar to the thighs. Once finished, place them on the cooling rack.
- Fry the Breasts and Wings: Increase the heat slightly to bring the oil up to 340 degrees F. Coat the chicken breasts and wings, carefully lowering the breasts into the hot oil. Fry for about 7 minutes, or until golden brown and cooked through (165 degrees F). For the wings, fry for 6 minutes. Once done, transfer them to the cooling rack. Turn off the heat and let the chicken rest for about 10 minutes before serving.
- Serve and Enjoy: If you’ve made the chicken ahead, you can warm it up in a 400 degrees F oven for a few minutes. Now it’s time to enjoy your homemade Buttermilk Fried Chicken!
Things Worth Knowing
- Brining is Key: The longer you brine, the more flavorful and juicy your chicken will be.
- Oil Temperature Matters: Maintaining the correct frying temperature ensures a crispy crust without greasy chicken.
- Resting is Important: Letting the chicken rest after frying helps retain moisture.
- Batch Frying: Frying in small batches ensures the oil temperature stays consistent for perfect results.
Change It Up
If you’re looking to customize your Buttermilk Fried Chicken, consider these helpful tips:
- Storage: Store leftover chicken in an airtight container in the refrigerator for up to 3 days. Reheat in the oven to maintain crispiness.
- Freezing: You can freeze the fried chicken for up to 3 months. Ensure it’s cooled completely before placing in a freezer-safe container.
- Pairing: Serve your fried chicken with classic sides like coleslaw, mashed potatoes, or cornbread for a comforting meal.
- Spice Variations: Adjust the spice levels in your coating by adding more or less cayenne to suit your taste.
- Herb Infusion: Experiment with different herbs in your brine, such as rosemary or dill, for a unique flavor twist.
How to Enjoy Buttermilk Fried Chicken
- Serve Hot: Enjoy Buttermilk Fried Chicken straight from the fryer for maximum crispiness.
- Family Gatherings: This dish is perfect for family dinners or gatherings, providing a memorable meal everyone will love.
- Picnic Delight: Pack it for a picnic; it travels well and is delicious cold or at room temperature.
- Comfort Food: Whether it’s a rainy day or a cozy night in, Buttermilk Fried Chicken is the ultimate comfort food.
- Holiday Celebrations: It’s a fantastic addition to holiday meals, bringing joy to your festive table.
FAQ
Conclusion
Buttermilk Fried Chicken is a delightful dish that brings a bit of joy to any table. The combination of a crispy exterior and juicy, flavorful meat makes it a favorite among many. I encourage you to try making this recipe and share it with family and friends. It’s perfect for gatherings and is sure to impress everyone. So roll up your sleeves, gather your ingredients, and enjoy the process of creating this delicious comfort food!
Buttermilk Fried Chicken
Ingredients
Equipment
Method
- Prepare the Brine: Combine all of the brine ingredients in a large stockpot, cover, and bring to a boil. Boil for 1 minute, stirring to dissolve the salt. Remove from the heat and cool completely, then chill thoroughly in the refrigerator before using. The brine can be refrigerated for up to 3 days.
- Brine the Chicken: Pour the brine into a large container, add the chicken pieces and refrigerate for 8 to 12 hours.
- Prepare the Chicken: Remove the chicken from the brine and rinse under cold water. Pat dry with paper towels and let sit at room temperature for 1½ hours.
- Prepare the Coating and Dredging Station: Fill a large pot with at least 2 inches of frying oil, place it over medium heat, and heat to 320 degrees F. Place a wire cooling rack on top of a baking sheet. Whisk together the flour, garlic powder, onion powder, paprika, cayenne, and black pepper; divide the mixture between two shallow bowls. In a third shallow bowl, pour 1 quart of buttermilk.
- Dredge the Chicken: Dip the chicken thighs into the first bowl of coating, turning to coat and patting off the excess; dip them into the buttermilk, allowing the excess to run back into the bowl; then dip them into the second bowl of shaggy coating. Transfer to the parchment-lined pan.
- Fry the Chicken: Carefully lower the thighs into the hot oil. Fry for 11 to 12 minutes, until the chicken is a deep golden brown and cooked through (should register 170 degrees F). Transfer the cooked thighs to the cooling rack.
- Fry the Drumsticks: Cook the chicken drumsticks for about 8 minutes, checking for doneness. Transfer to the cooling rack.
- Fry the Breasts and Wings: Coat the chicken breasts and wings, then carefully lower them into the hot oil. Fry for 7 minutes for the breasts and 6 minutes for the wings.
- Serve and Enjoy: Allow the chicken to rest for about 10 minutes before serving.
Notes
- Brine: If you don’t have time for the brine, place 1-quart buttermilk and the chicken in a resealable plastic bag, and refrigerate overnight.
- Brine in Advance: You can make the brine up to 3 days before.
- Chicken: Buying pre-cut chicken pieces might save time and be less messy.
- Reheating Instructions: If you have leftovers, place the chicken in a 400°F oven for about 15 minutes to warm up.