Chicken Enchilada Pizza
There’s something incredibly satisfying about a homemade meal, especially when it’s as vibrant and flavorful as Chicken Enchilada Pizza. I remember the first time I made this dish; I was craving something that combined all the best elements of my favorite Mexican dishes but with a twist. After experimenting in the kitchen, I found the perfect balance of spicy, cheesy goodness on a crispy crust. This recipe has since become a go-to for cozy family dinners and casual gatherings with friends. Everyone loves it, and it’s always a hit! Plus, there’s just something about the smell of it baking in the oven that makes the anticipation all the more exciting.
Recipe Snapshot
1 hr 15 mins
45 mins
30 mins
Medium
450 kcal
25 g
Gluten-Free
20 g
Wooden Spoon, Mixing Bowl, Oven, Peeler, Cutting Board, Grater, Skillet, Chef’s Knife, Baking Sheet
The Magic of This Chicken Enchilada Pizza
It’s a Flavor Explosion
One of the reasons I love Chicken Enchilada Pizza is the way it brings together all those incredible flavors we adore from classic enchiladas. The combination of spices like cumin, paprika, and chili powder creates a flavor explosion that dances on your palate.
Perfect for Any Occasion
This dish isn’t just for dinner. It’s the perfect crowd-pleaser for game nights, family gatherings, or even a cozy movie marathon. Everyone can grab a slice and enjoy, making it a fun and interactive meal.
Customizable Toppings
Another reason this recipe stands out is the endless possibilities for customization. You can switch up the toppings based on your mood or what you have on hand. Feel like adding more veggies? Go for it! Want to spice it up? Toss on some jalapeños. The flexibility is part of the fun.
Kid-Friendly
If you have little ones running around, they’ll absolutely love this pizza. The cheesy, gooey goodness is always a hit, and it’s a sneaky way to get some protein and veggies into their diet without them even noticing!
Leftover Magic
Let’s not forget about leftovers! This pizza reheats beautifully, making it a fantastic option for meal prep. I often find myself enjoying it for lunch the next day, and it tastes just as good (if not better) after sitting in the fridge.
Chicken Enchilada Pizza Shopping List
When it comes to making Chicken Enchilada Pizza, using fresh, high-quality ingredients truly makes a difference. The blend of flavors from the spices, alongside the freshness of the veggies and the richness of the cheeses, creates a harmonious dish that everyone will enjoy. The key players in this recipe are the chicken, the enchilada sauce, and the blend of cheeses, which come together beautifully. Let’s dive into what you’ll need!
- 1 1/8 cups warm water
- 3 teaspoons active dry yeast
- 1 tablespoon honey
- 1 tablespoon olive oil
- 3 cups all-purpose flour
- 1 teaspoon salt
- 2 boneless, skinless chicken breasts, cooked and shredded
- 1 tablespoon olive oil
- 1/2 red onion, diced
- 1/2 red pepper, diced
- 1/2 green pepper, diced
- 1/2 jalapeño, seeded and diced
- 2 garlic cloves, minced
- 1 (4 ounce) can of diced green chiles
- 1 teaspoon ground cumin
- 1 teaspoon smoked paprika
- 1 teaspoon chili powder
- 1 cup of enchilada sauce, store-bought
- 6 ounces sharp cheddar cheese, freshly grated
- 6 ounces monterey jack cheese, freshly grated
- 1 cup of grape tomatoes, quartered
- 1 cup of shredded lettuce
- 1 avocado, thinly sliced
- Optional: sour cream or Greek yogurt for topping
How to Assemble Chicken Enchilada Pizza
Making Chicken Enchilada Pizza is an enjoyable experience that blends technique with creativity. You’ll find each step brings you closer to that delicious, cheesy masterpiece. So, let’s roll up our sleeves and get started!
In a large bowl, combine water, yeast, honey, and olive oil. Use a spoon to mix it up, and let it sit for about 10 minutes until it becomes foamy. This step is crucial because it activates the yeast, which is what makes your crust rise and gives it that delightful fluffiness.
Once it’s foamy, add in 2 1/2 cups of flour and salt. Stir everything together with a spoon until the dough begins to come together, although it will still be a bit sticky. At this point, you can feel free to get your hands in there!
Using your hands, form the dough into a ball. Knead in the additional 1/2 cup of flour on a floured surface for a few minutes. You’ll want the dough to be smooth and elastic to the touch, so don’t rush through this step.
Next, rub the same bowl with a little olive oil and place your dough inside, turning it to coat. Cover the bowl with a towel and let it rest in a warm place for about one to one and a half hours until it has doubled in size. The warmth is key to helping the yeast do its magic!
Once the dough has risen, punch it down to release the air and place it back on the floured surface. Shape it into your desired pizza shape using your hands or a rolling pin. This dough is versatile, and you can make it as thick or thin as you like!
Now transfer your shaped dough onto a baking sheet or pizza peel. Cover it with a towel again and let it rest in a warm spot for an additional 10 minutes. This helps it relax and become easier to work with.
While the dough is resting, preheat your oven to 375 degrees. If you’re using a pizza stone, heat your oven to 450 degrees instead. You want it hot enough to give your pizza that beautiful crust.
Heat a large skillet over medium-low heat and add a tablespoon of olive oil. Once hot, toss in onions, garlic, and peppers with a pinch of salt. Stir them around and cook until they soften, which should take about 5 minutes. This step builds a wonderful flavor base.
Next, add in the shredded chicken along with the green chiles, cumin, paprika, and chili powder. Stir everything well to coat and let it cook for another 5 minutes. The aroma will be heavenly!
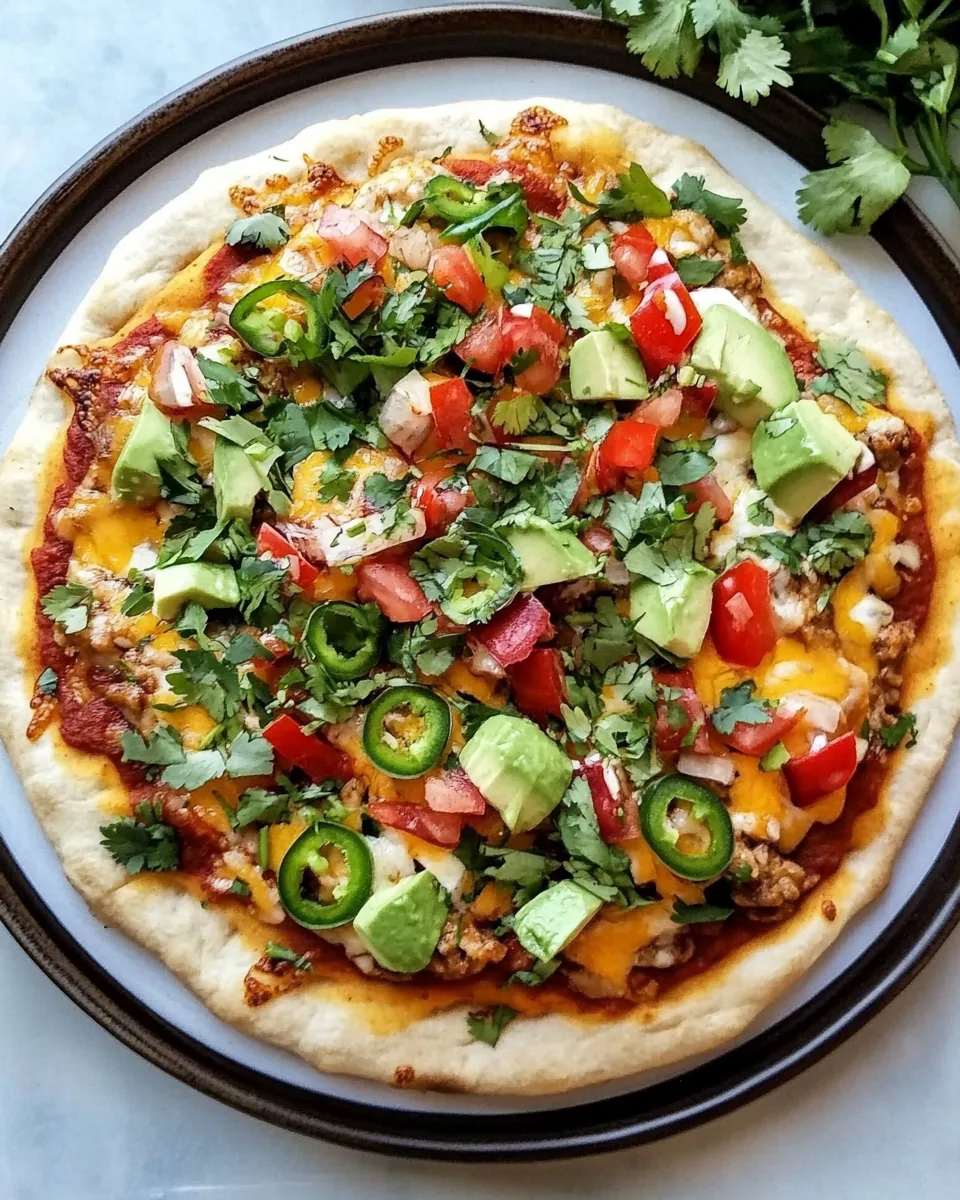
Now it’s time to assemble your pizza. Spread about 1/2 cup of the enchilada sauce all over the pizza dough as a base layer. Then sprinkle a little cheese on top, followed by the chicken and pepper mixture. Finally, add the remaining cheese on top so it melts beautifully as it bakes.
Place your pizza in the oven and bake for about 25 to 30 minutes, or until the cheese and crust are golden and bubbly. Keep an eye on it, as ovens can vary! The anticipation will be worth it.
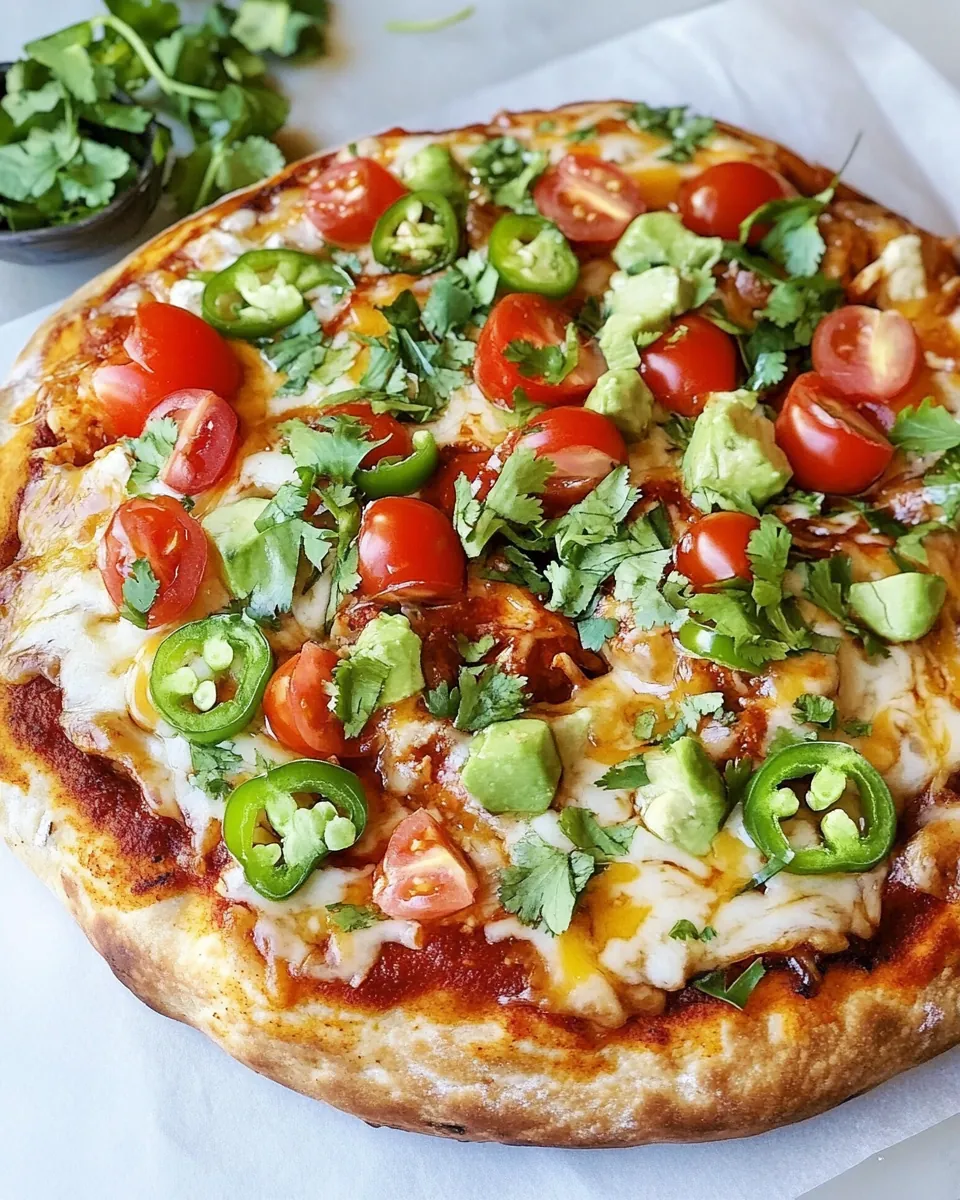
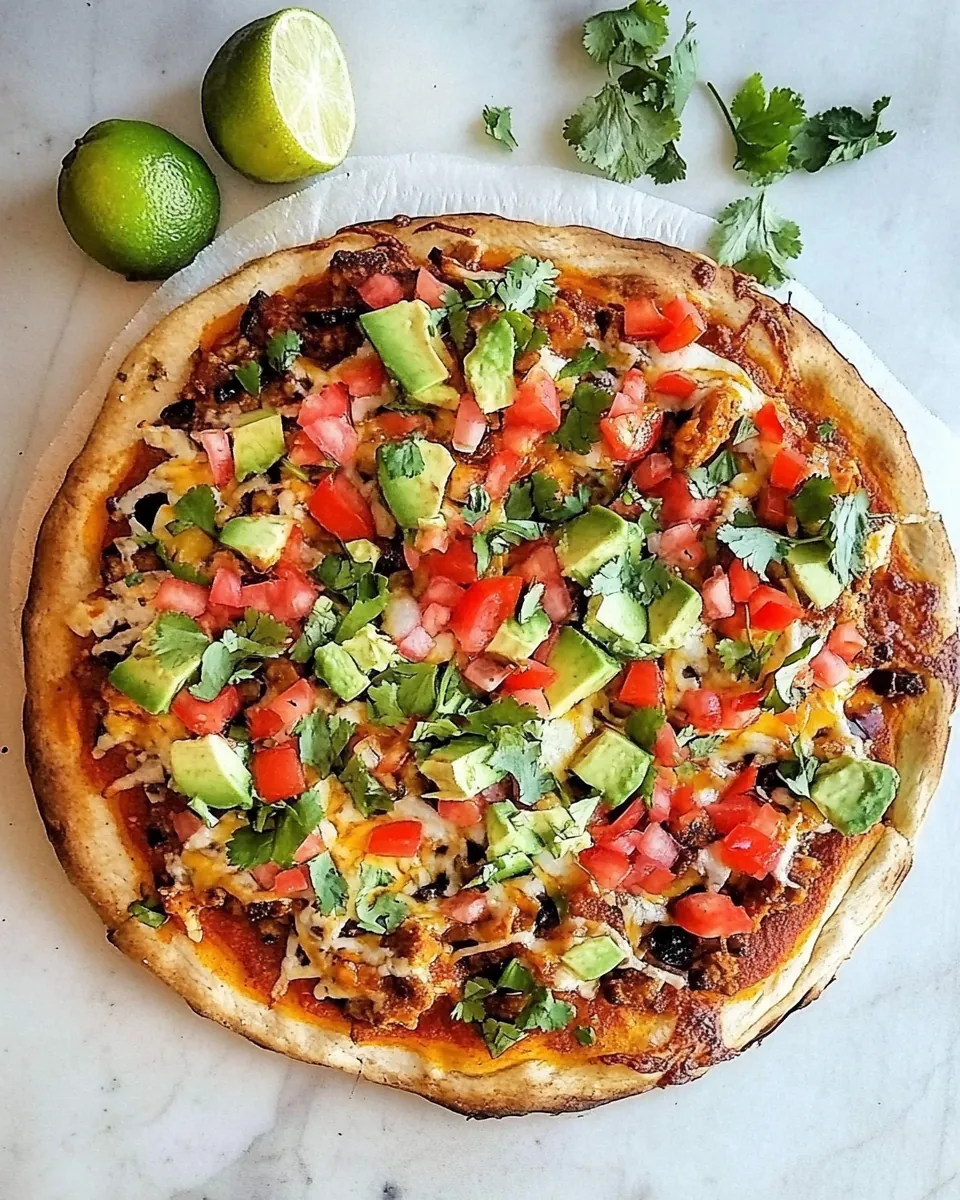
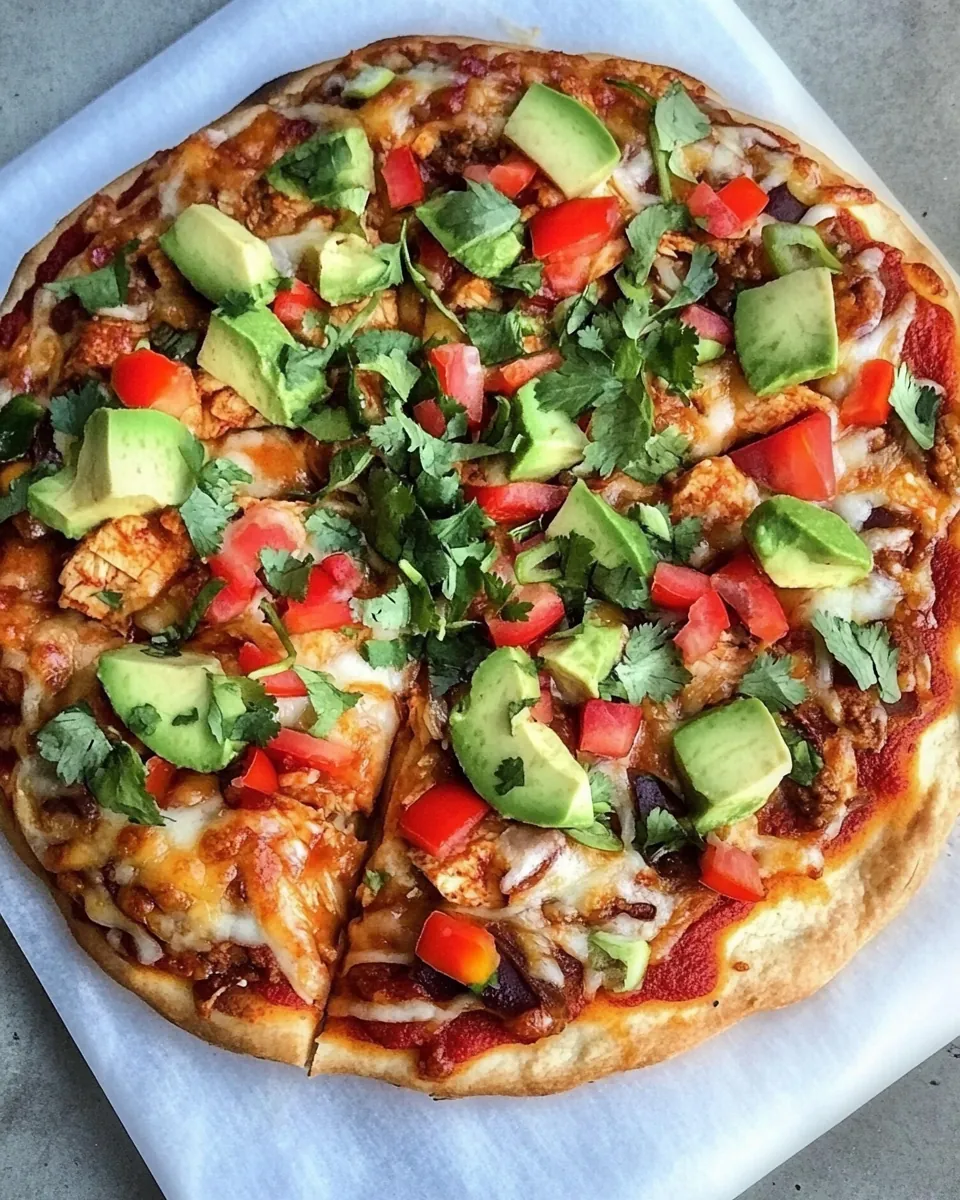
Once baked, remove your pizza from the oven and let it cool for 5 to 10 minutes. This is crucial as it allows the cheese to set slightly, making it easier to slice. Top with lettuce, tomatoes, and avocado. A little extra drizzle of enchilada sauce and a dollop of sour cream or Greek yogurt makes it even more delicious!
Things Worth Knowing
- Texture Matters: When kneading the dough, you want it to be smooth and elastic. This indicates that the gluten has formed properly.
- Cheese Choices: Feel free to experiment with different types of cheese. A blend of cheddar and monterey jack is classic, but you can also try others like pepper jack!
- Serving Temperature: Serving the pizza immediately after baking enhances the texture and flavor, so don’t wait too long to dig in!
- Spice Level: Adjust the level of spice by using more or fewer jalapeños or adding hot sauce to the enchilada sauce.
Helpful Notes about Chicken Enchilada Pizza
There are a few things to keep in mind when making your Chicken Enchilada Pizza to ensure everything goes smoothly. Let’s dive in!
- Storage: Store leftover pizza in an airtight container in the refrigerator for up to 3 days.
- Freezing: You can freeze the assembled pizza before baking. Just wrap it tightly in plastic wrap and foil for up to 2 months. Bake directly from frozen but add extra time.
- Pairing: Serve with a refreshing salad or some tortilla chips with salsa to balance the richness of the pizza.
- Adaptations: Feel free to use shredded beef or beans instead of chicken for a different protein option.
- Make it Gluten-Free: Swap out the all-purpose flour for a gluten-free flour blend if you need to avoid gluten.
What to Serve Alongside Chicken Enchilada Pizza
When it comes to serving Chicken Enchilada Pizza, the options are deliciously endless! Here’s a list of ideas to complement your meal:
- Fresh Salads: A crisp salad with romaine, tomatoes, and a light vinaigrette brings a refreshing crunch that pairs well with the richness of the pizza.
- Guacamole and Tortilla Chips: These are always a crowd-pleaser. The creaminess of the guacamole contrasts beautifully with the spiced pizza.
- Mexican Street Corn: This flavorful side dish adds that perfect touch of sweetness and creaminess to your meal.
- Rice or Quinoa: Serve it with some cilantro lime rice or a quinoa salad for a wholesome feel.
- Drinks: Pair with a refreshing drink like iced tea, lemonade, or a fruity mocktail for a fun twist.
- Occasions: Perfect for casual dinners, game days, or even themed parties. It’s versatile and loved by all!
FAQ
Conclusion
The Chicken Enchilada Pizza is a delightful fusion of flavors that marries the beloved aspects of enchiladas with the comforting nature of pizza. It’s perfect for any gathering or a night in when you crave something special and satisfying. I encourage you to try it for your next dinner; I promise it will become a family favorite!
Chicken Enchilada Pizza
Ingredients
Equipment
Method
- In a large bowl, combine warm water, active dry yeast, honey, and olive oil. Mix with a spoon, then let sit until foamy, about 10 minutes.
- Add in 2 1/2 cups of all-purpose flour and salt, stirring with a spoon until the dough comes together but is still sticky.
- Using your hands, form the dough into a ball and work in the additional 1/2 cup of flour, kneading it on a floured surface for a few minutes.
- Rub the same bowl with olive oil then place the dough inside, turning to coat. Cover with a towel and place in a warm place to rise for about 1 to 1 1/2 hours.
- After the dough has risen, punch it down and place it back on the floured surface.
- Using a rolling pin or your hands, form it into your desired shape and place on a baking sheet or pizza peel.
- Cover with a towel and let sit in the warm place for 10 minutes.
- Preheat oven to 375 degrees. If using a pizza stone, heat to 450 degrees.
- Heat a large skillet over medium-low heat and add olive oil. Add in onions, garlic, and peppers with a pinch of salt and stir well. Cook until soft, about 5 minutes.
- Toss in shredded chicken with green chiles, cumin, paprika, and chili powder. Stir to coat well and cook for another 5 minutes.
- Spread a thin layer of enchilada sauce all over the pizza dough. Cover with a small sprinkle of cheese, then top with the chicken and pepper mixture. Add remaining cheese on top evenly.
- Place in the oven and bake for 25 to 30 minutes, until cheese and crust are golden and bubbly.
- Remove and let cool for 5 to 10 minutes, then top with lettuce, tomatoes, and avocado.
- Serve with an extra drizzle of enchilada sauce and sour cream or greek yogurt for topping.
Notes
- Tip 1: Store leftover pizza in an airtight container in the refrigerator for up to 3 days.
- Tip 2: You can freeze the assembled pizza before baking. Just wrap it tightly in plastic wrap and foil for up to 2 months. Bake directly from frozen but add extra time.
- Tip 3: Serve with a refreshing salad or some tortilla chips with salsa to balance the richness of the pizza.
- Tip 4: Feel free to use shredded beef or beans instead of chicken for a different protein option.
- Tip 5: Swap out the all-purpose flour for a gluten-free flour blend if you need to avoid gluten.