Chicken Enchiladas
There’s nothing quite like a plate of Chicken Enchiladas to bring everyone together for dinner. I remember the first time I tried this dish; it was at a friend’s house during a cozy winter evening. The warmth of the enchiladas, with their rich flavors and cheesy goodness, wrapped me in a comforting embrace. I knew right then that I had to learn how to make them myself. Over the years, I’ve perfected my version, infusing joy and love into every bite. Whether it’s a weeknight dinner or a special occasion, Chicken Enchiladas never fail to impress. Plus, they’re so versatile! You can customize them with your favorite ingredients, making them a delightful choice for everyone at the table. So grab your apron and join me on this flavorful journey!
Recipe Snapshot
60 mins
10 mins
50 mins
Medium
450 kcal
30 g
Keto, Gluten-Free, Low FODMAP
20 g
Mixing Bowl, Oven, Cutting Board, Frying Pan, Baking Sheet
The Beauty of This Chicken Enchiladas
It’s Comfort Food at Its Best
When I think of comfort food, Chicken Enchiladas instantly comes to mind. They’re warm, cheesy, and bursting with flavors that just feel like a hug. There’s something incredibly satisfying about rolling up tortillas filled with seasoned chicken and smothering them in sauce. Each bite takes me back to those chilly evenings, reminding me of cherished memories.
Perfect for Any Occasion
Whether you’re hosting a casual family dinner or celebrating a special occasion, Chicken Enchiladas are always a hit. They’re easy to prepare in large batches, making them ideal for gatherings. I love serving them at potlucks; everyone leaves with a smile and usually asks for the recipe!
Customizable to Your Taste
One of the best parts about making Chicken Enchiladas is the ability to customize them. You can use different proteins like shredded chicken, beef, or even beans for a vegetarian option. Want more spice? Add some jalapeños or a dash of hot sauce. The flexibility in this recipe allows you to cater to every palate, ensuring that everyone at your table is happy.
Freezer-Friendly Delight
If you’re like me and love meal prepping, you’ll appreciate that Chicken Enchiladas freeze beautifully. I always make an extra batch to keep on hand for those busy weeknights. Just pop them in the oven after thawing, and you’ve got a delicious homemade meal ready in no time.
Rich with Flavor
The combination of tender chicken, creamy sauce, and gooey cheese makes Chicken Enchiladas an explosion of flavors in every bite. The luscious enchilada sauce ties everything together, enhancing the overall experience. Each mouthful is a delightful journey of taste, making you crave more!
Recipe Ingredients for Chicken Enchiladas
The ingredients for Chicken Enchiladas are not only delicious but also work harmoniously together. The core elements bring a wonderful balance of textures and flavors, creating a masterpiece that’s sure to impress. From the soft tortillas to the creamy sauce and the savory chicken, each component plays a vital role in making this dish a family favorite.
- 8 Flour Tortillas (10-inch burrito size): The base for our delicious enchiladas, they’re soft and pliable, perfect for rolling.
- 1 1/2 lb Chicken Breast or Thighs: This lean protein adds heartiness to the dish. I often use pre-cooked chicken for convenience.
- 3 oz Cream Cheese (room temp): This ingredient adds creaminess to the filling, giving it a delightful texture.
- 1/3 cup Sour Cream: It balances the richness of the cheese and cream cheese, adding tanginess.
- 4.5 oz Diced Green Chilis (with their juice): These lend a mild heat and flavor that enhances the overall taste.
- 20 oz Mild Red Enchilada Sauce: The star of the show, this sauce envelops the enchiladas in rich flavor.
- 1 1/4 tsp Salt (divided): Essential for enhancing all the flavors in the dish.
- ¼ tsp Ground Black Pepper: Adds a subtle warmth.
- ½ tsp Garlic Powder: Infuses a savory note that’s hard to resist.
- ½ tsp Paprika: This gives a lovely color and smokiness.
- 2 1/2 cups Shredded Cheese (divided, such as Mexican blend, Four Cheese or Colby Jack): The melty goodness that ties everything together.
Making Chicken Enchiladas
Let’s dive into the delicious process of making Chicken Enchiladas. The aroma that will fill your kitchen as these bake is simply irresistible, and you’re sure to impress everyone at the table. Follow these steps to create your own batch of comfort food!
- Preheat your oven to 400°F (200°C) and grease a 9×13 casserole dish. This will ensure that your enchiladas don’t stick and bake perfectly.
- If you’re using uncooked chicken, place it in a saucepan and cover it completely with water. Season with 1 tsp salt. Cook the chicken for about 8 to 10 minutes, or until it’s cooked through and no longer pink in the center. Shred the chicken using two forks and set it aside.
- In a medium bowl, prepare the enchilada sauce mix. Beat the cream cheese until smooth. Then, add the sour cream, diced green chilis (with juice), enchilada sauce, 1/4 tsp salt, ground black pepper, garlic powder, and paprika. Beat until everything is well combined and creamy.
- Divide the enchilada sauce mixture into two bowls. Pour 2/3 of the sauce into a large mixing bowl, and set aside the remaining 1/3 of the sauce for topping the enchiladas.
- Add the shredded chicken and 2 cups of shredded cheese to the bowl with 2/3 of the sauce. Mix it all together with a spatula until the chicken is fully coated with the sauce.
- Take a flour tortilla and generously add the chicken filling to the center. Roll the tortilla tightly to enclose the filling. Repeat this process for all tortillas, placing them seam-side down in the greased casserole dish.
- Once all the enchiladas are rolled and in the dish, pour the reserved 1/3 of sauce over the top. Sprinkle the remaining 1/2 cup of cheese generously on top. Add more cheese if you desire!
- Cover the casserole dish with aluminum foil and bake in the preheated oven for 30 minutes. This will allow the flavors to meld beautifully.
- After 30 minutes, remove the foil and bake for an additional 10 minutes, or until the cheese is melted and bubbly, turning a lovely golden brown. Your kitchen will smell heavenly at this point!
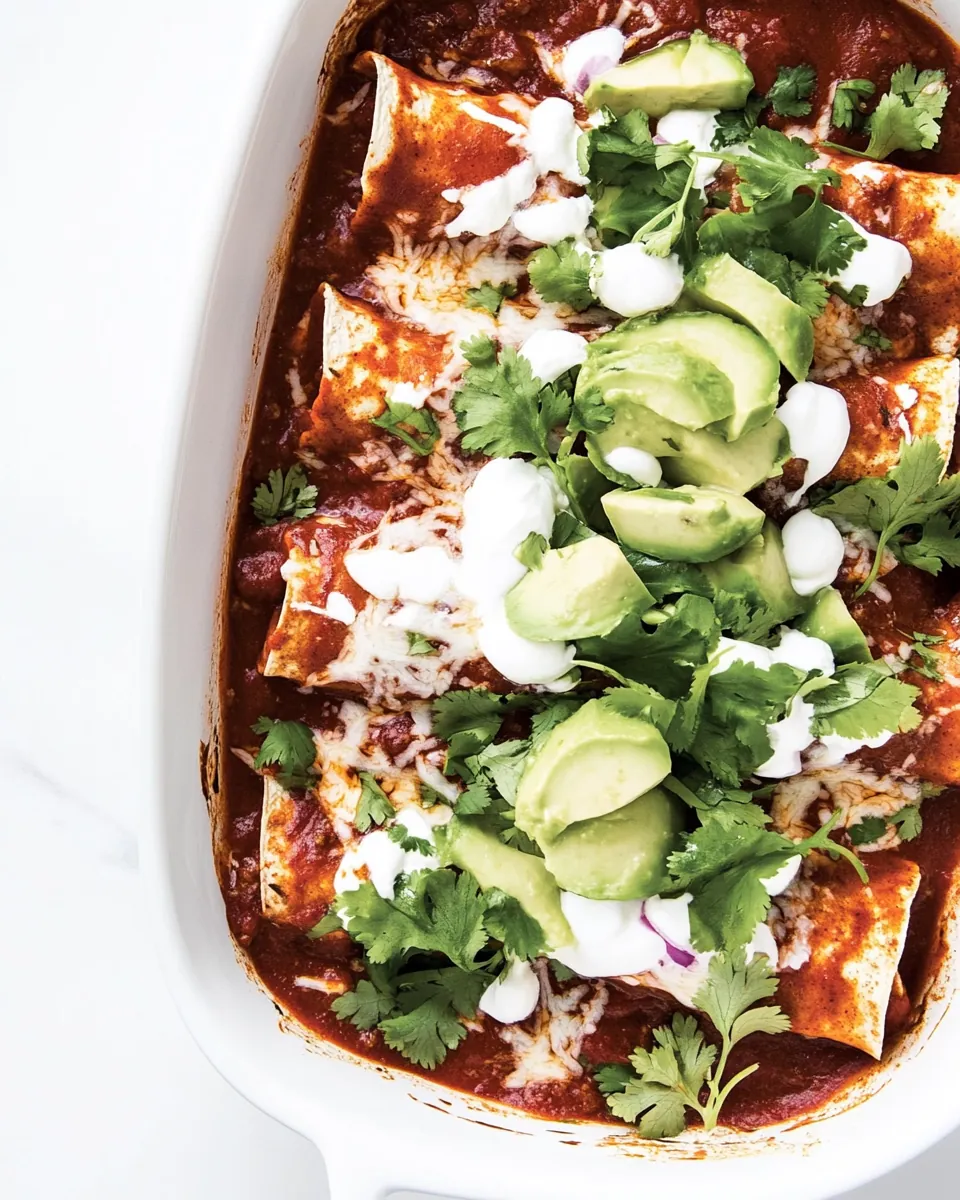
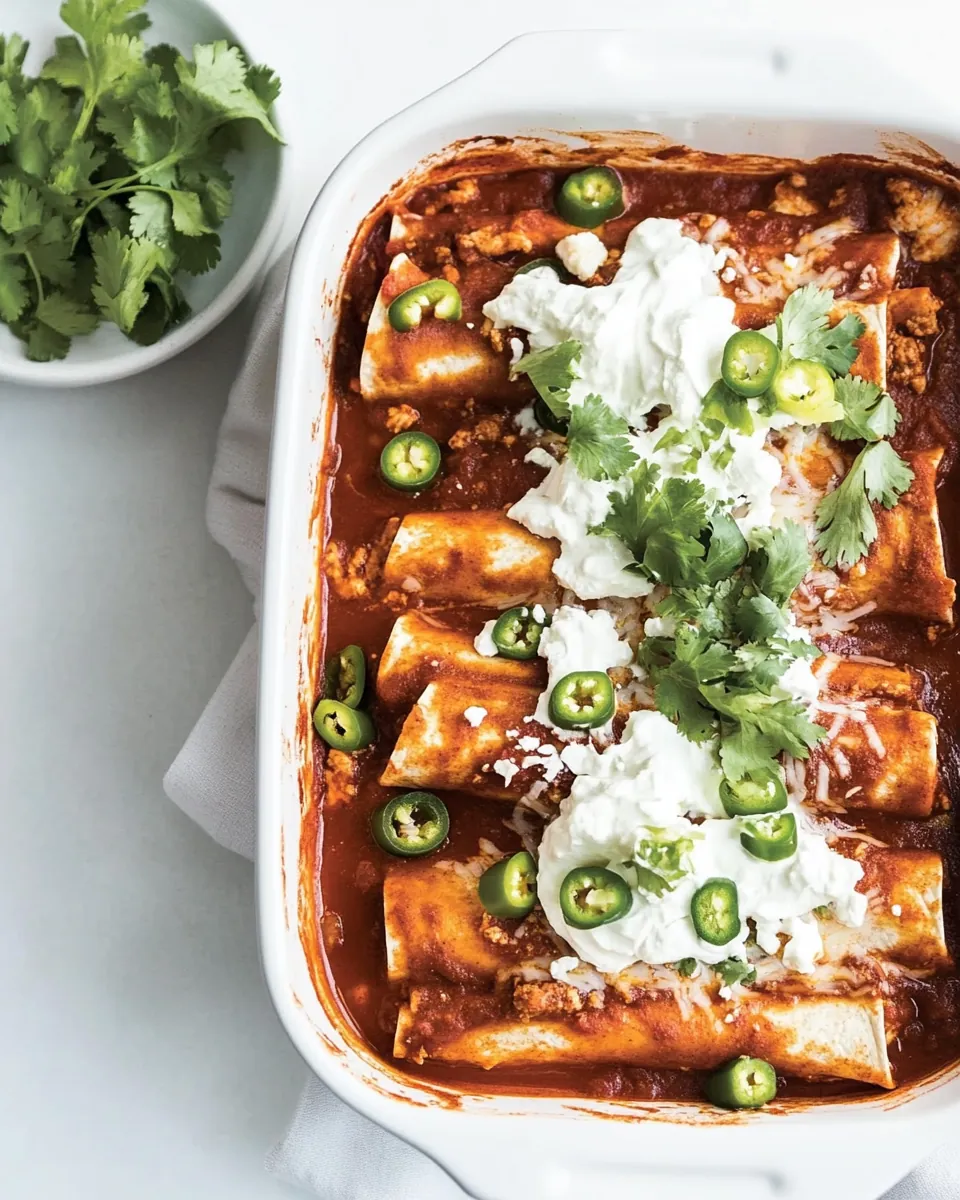
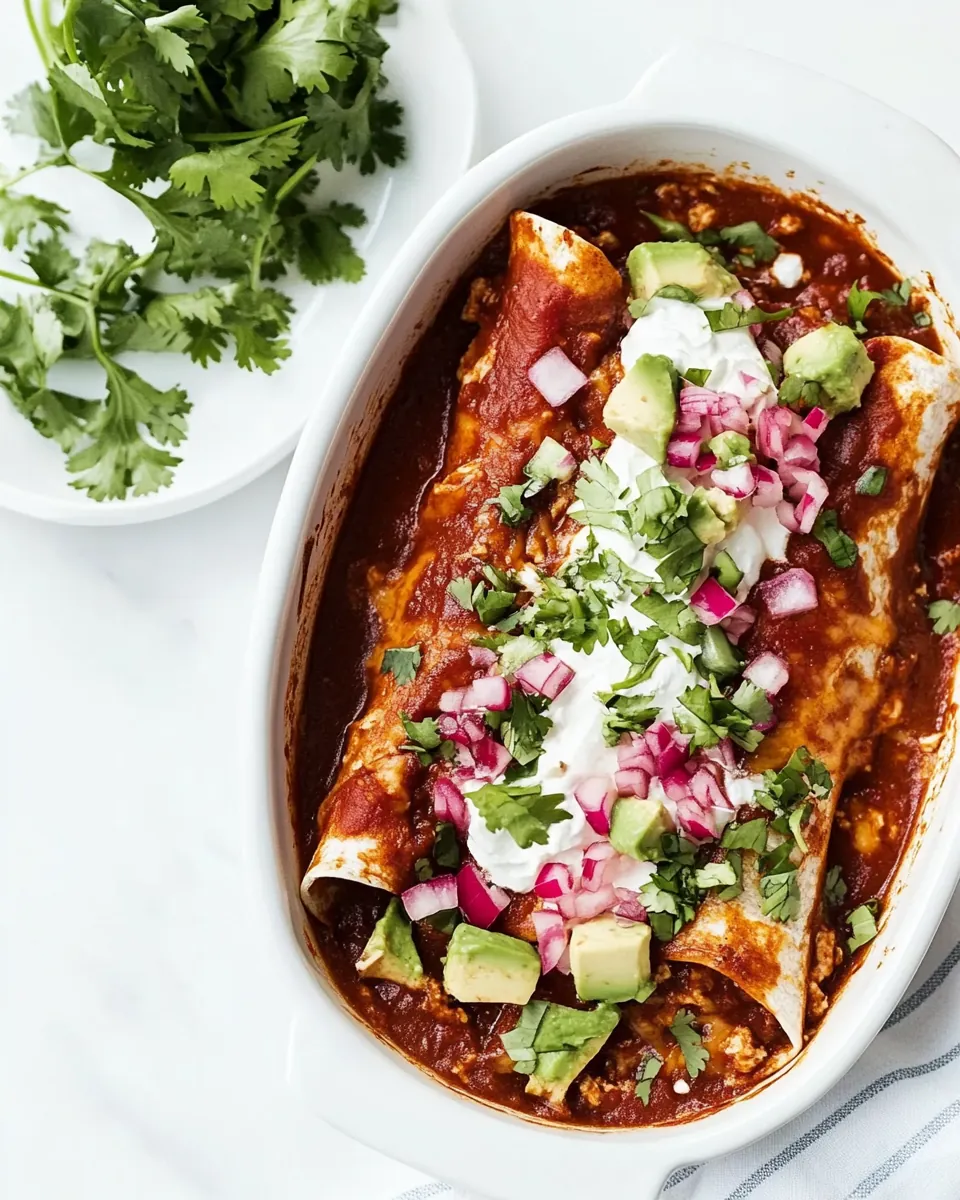
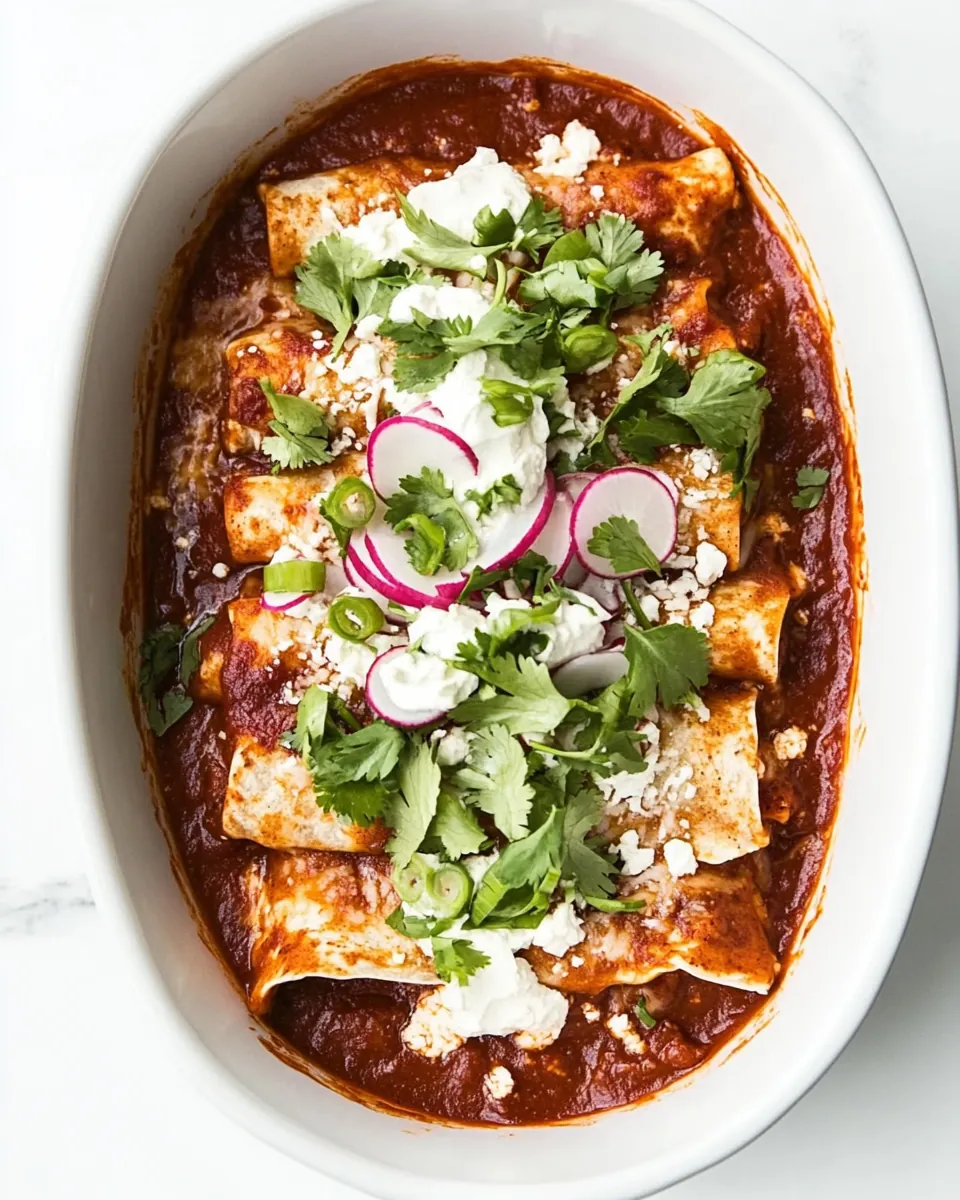
Once baked, let the Chicken Enchiladas cool for a few minutes before serving. Garnish with fresh cilantro or avocado if desired, and enjoy!
Things Worth Knowing
- Use a good quality enchilada sauce: A flavorful sauce can elevate your enchiladas. You can make your own or buy a high-quality store brand.
- Don’t overfill the tortillas: This can make rolling them difficult and lead to spills. Stick to a moderate amount of filling.
- Serve immediately: For the best texture, enjoy the enchiladas straight from the oven while they’re hot and cheesy.
- Experiment with toppings: Consider adding fresh toppings like chopped cilantro, diced onions, or jalapeños to enhance the flavor.
Tips and Tricks about Chicken Enchiladas
Making Chicken Enchiladas can be even more enjoyable with a few handy tips. Whether you’re a beginner or an experienced cook, these pointers will help you perfect your dish.
- Storage: Place any leftovers in an airtight container in the fridge. They can be stored for up to 3 days.
- Freezing: You can freeze the assembled uncooked enchiladas. Just wrap them tightly in plastic wrap and foil, and they’ll keep for up to 2 months.
- Reheating: To reheat, simply thaw in the fridge overnight and then bake at 350°F (175°C) until heated through.
- Pairing: Serve with a side of Mexican rice or a fresh salad to balance the richness of the enchiladas.
- Variations: Feel free to experiment with different fillings, such as beans, vegetables, or different types of protein to suit your taste.
What Goes Well With This Chicken Enchiladas
Pairing Chicken Enchiladas with the right side dishes can elevate your meal even further. Here are some fantastic combinations:
- Mexican Rice: A flavorful Mexican rice complements the enchiladas perfectly, adding a wonderful texture and flavor.
- Guacamole: The creamy texture of guacamole is a delightful contrast to the cheese in the enchiladas.
- Refried Beans: Serve warm refried beans on the side for a satisfying protein addition.
- Chips and Salsa: Offer a side of crispy tortilla chips with fresh salsa for a crunchy appetizer.
- Fresh Salad: A simple green salad with a light vinaigrette offers a refreshing counterbalance to the richness of the dish.
- Occasions: These enchiladas are perfect for family dinners, casual get-togethers, or even a cozy night in. They bring everyone together!
- Seasonal Pairings: Enjoy them throughout the year, especially during cooler months when a warm dish feels comforting.
FAQ
Conclusion
In conclusion, Chicken Enchiladas are a fantastic dish that combines comfort with versatility. Their creamy, cheesy filling wrapped in warm tortillas creates a truly satisfying meal that everyone loves. I encourage you to give this recipe a try and experience the joy it brings to your table. With its rich flavors and ease of preparation, it’s bound to become a family favorite!
Chicken Enchiladas
Ingredients
Equipment
Method
- Preheat your oven to 400°F (200°C) and grease a 9x13 casserole dish. This will ensure that your enchiladas don’t stick and bake perfectly.
- If you’re using uncooked chicken, place it in a saucepan and cover it completely with water. Season with 1 tsp salt. Cook the chicken for about 8 to 10 minutes, or until it’s cooked through and no longer pink in the center. Shred the chicken using two forks and set it aside.
- In a medium bowl, prepare the enchilada sauce mix. Beat the cream cheese until smooth. Then, add the sour cream, diced green chilis (with juice), enchilada sauce, 1/4 tsp salt, ground black pepper, garlic powder, and paprika. Beat until everything is well combined and creamy.
- Divide the enchilada sauce mixture into two bowls. Pour 2/3 of the sauce into a large mixing bowl, and set aside the remaining 1/3 of the sauce for topping the enchiladas.
- Add the shredded chicken and 2 cups of shredded cheese to the bowl with 2/3 of the sauce. Mix it all together with a spatula until the chicken is fully coated with the sauce.
- Take a flour tortilla and generously add the chicken filling to the center. Roll the tortilla tightly to enclose the filling. Repeat this process for all tortillas, placing them seam-side down in the greased casserole dish.
- Once all the enchiladas are rolled and in the dish, pour the reserved 1/3 of sauce over the top. Sprinkle the remaining 1/2 cup of cheese generously on top. Add more cheese if you desire!
- Cover the casserole dish with aluminum foil and bake in the preheated oven for 30 minutes. This will allow the flavors to meld beautifully.
- After 30 minutes, remove the foil and bake for an additional 10 minutes, or until the cheese is melted and bubbly, turning a lovely golden brown. Your kitchen will smell heavenly at this point!
Notes
- Storage: Place any leftovers in an airtight container in the fridge. They can be stored for up to 3 days.
- Freezing: You can freeze the assembled uncooked enchiladas. Just wrap them tightly in plastic wrap and foil, and they’ll keep for up to 2 months.
- Reheating: To reheat, simply thaw in the fridge overnight and then bake at 350°F (175°C) until heated through.
- Pairing: Serve with a side of Mexican rice or a fresh salad to balance the richness of the enchiladas.
- Variations: Feel free to experiment with different fillings, such as beans, vegetables, or different types of protein to suit your taste.