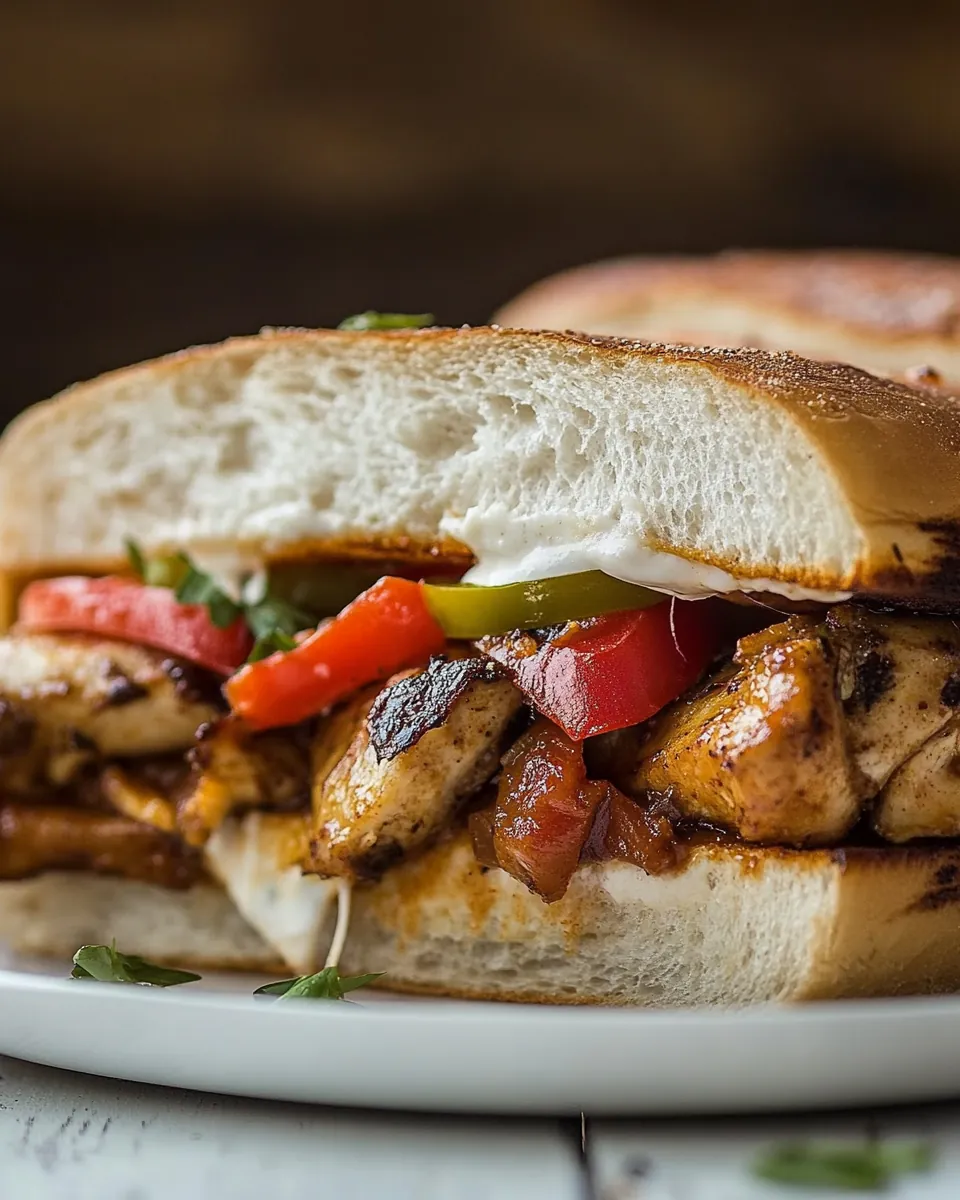
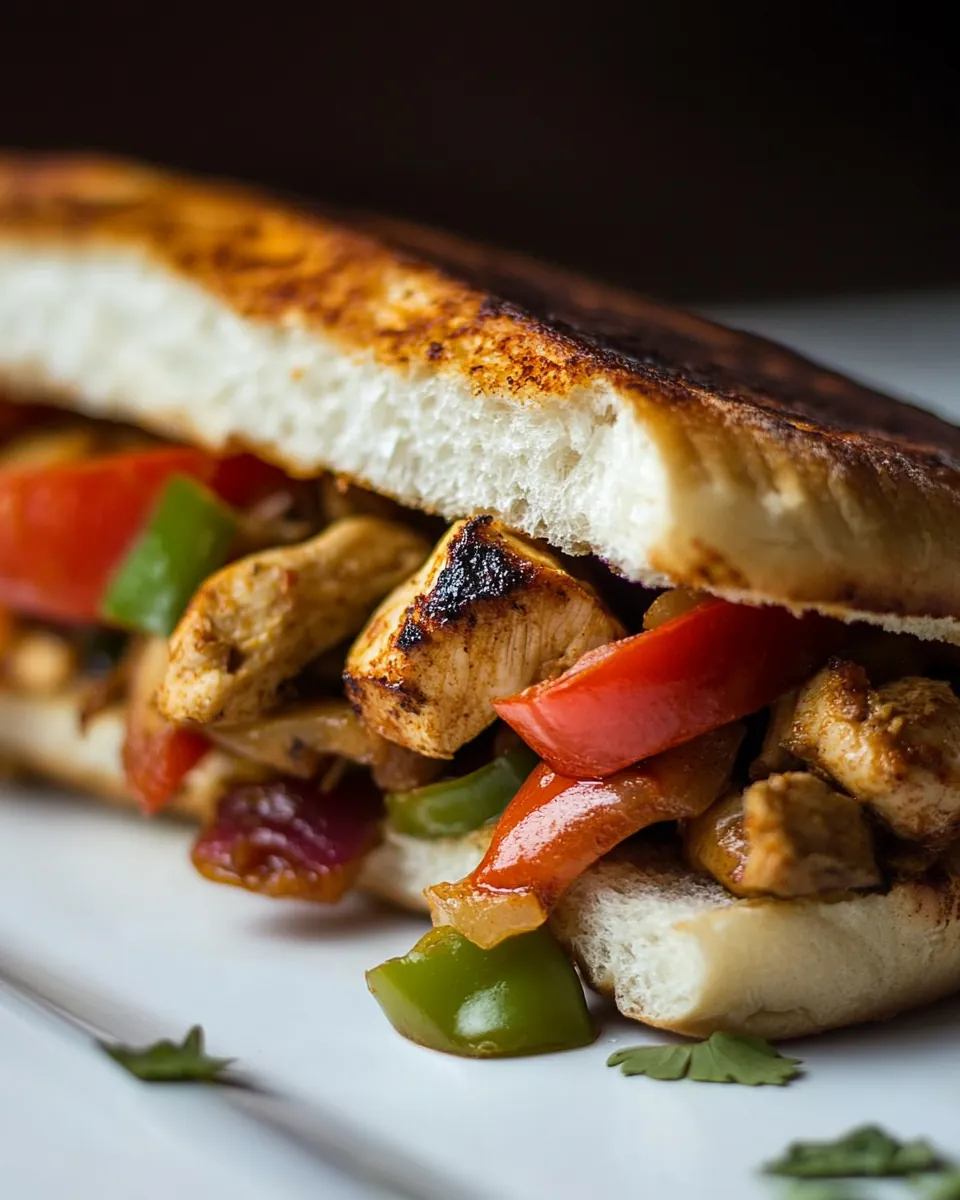
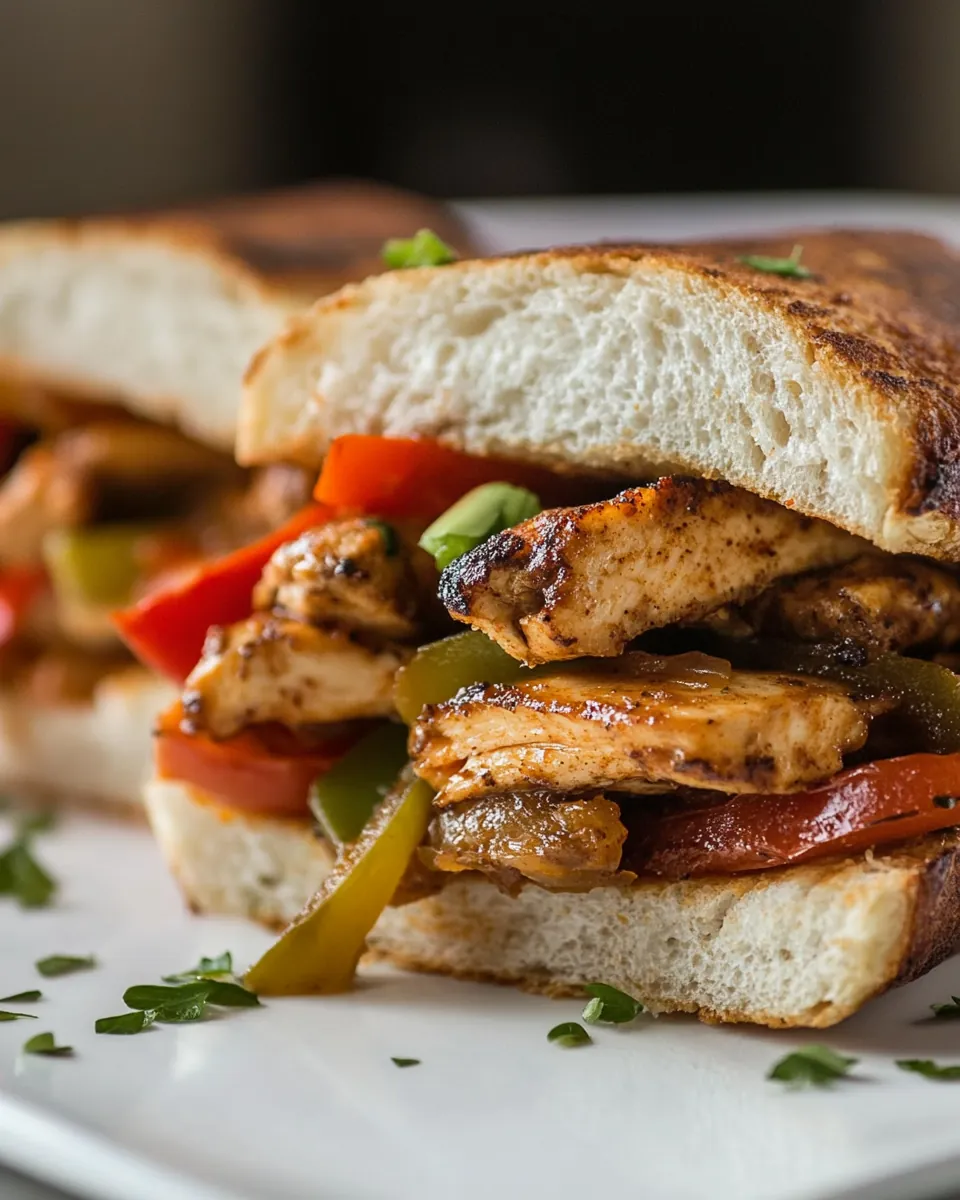
Chicken Fajita Sandwiches
The moment I first sunk my teeth into a Chicken Fajita Sandwich, I knew I’d found something special. It was a bustling weeknight, and after a long day, I was craving something hearty yet easy to whip up. I fondly recalled brunches with friends, where the sizzle of peppers and onions would fill the air, and I decided to create my own twist on that experience. The flavors of juicy chicken, vibrant bell peppers, and creamy aioli all tucked into a toasted roll filled my kitchen with a delightful aroma. This dish not only satisfied my hunger but also brought a sense of warmth and comfort. I knew I had to share this mouthwatering recipe.
Recipe Snapshot
35 mins
15 mins
20 mins
Easy
480 kcal
25 g
Keto, Gluten-Free, Low FODMAP
25 g
Wooden Spoon, Oven, Skillet, Chef’s Knife, Baking Sheet
The Magic of This Chicken Fajita Sandwiches
Rich, Flavorful Ingredients
One of the things I absolutely love about this Chicken Fajita Sandwich is the vibrant ingredients that come together to create a delicious flavor profile. The star of the show is the tender, seasoned chicken thighs that soak up the spices beautifully. Combined with colorful bell peppers and onions, this sandwich is not just a feast for the palate but also a visual treat. The addition of a zesty aioli takes it to another level, providing a creamy contrast that enhances every bite.
Quick and Easy to Prepare
We all have those busy nights where dinner needs to be quick yet satisfying. This Chicken Fajita Sandwich can be prepared in no time, making it an ideal choice for weeknight meals. With just a few steps to follow, you can have a gourmet-like sandwich ready in under thirty minutes. It checks all the boxes for a delicious meal that fits into a hectic schedule.
Customizable to Your Taste
Another fantastic feature of this recipe is its versatility. You can easily switch up the ingredients to cater to your preferred flavors. Whether you want to add more spice with jalapeños or keep it simple with just the basics, this sandwich can adapt. I often find myself experimenting with different toppings and sauces depending on my mood, which keeps things exciting in the kitchen.
Perfect for Meal Prep
If you love meal prepping, this Chicken Fajita Sandwich is a great option. The chicken and veggies can be cooked ahead of time and stored in the refrigerator, making it a breeze to assemble when hunger strikes. Just warm everything up, toast your rolls, and you have a satisfying lunch or dinner ready in minutes. It’s perfect for those days when you need a quick, wholesome meal.
Great for Any Occasion
Whether you’re enjoying a casual family dinner or hosting friends for game day, these sandwiches are a hit. Their finger-friendly nature makes them a wonderful party food option, and the bold flavors will impress any crowd. I’ve served them at various gatherings, and they never fail to bring smiles and satisfied appetites.
Shopping List for Chicken Fajita Sandwiches
When it comes to the ingredients for this Chicken Fajita Sandwich, each one plays a crucial role in creating a symphony of flavors. The combination of tender chicken thighs, sweet bell peppers, and zesty aioli unites perfectly, resulting in a sandwich that’s both hearty and refreshing. Here’s your shopping list for the key players that make this dish shine.
- 4 large boneless skinless chicken thighs: Juicy and flavorful, these chicken thighs serve as the protein base for your sandwich. Their richness complements the spices beautifully.
- Taco seasoning: A blend of spices that adds depth and enhances the chicken’s flavor. You can use store-bought or create your own mix for a personalized touch.
- 1 tablespoon vegetable oil: Essential for cooking the chicken and vegetables, providing the needed moisture and flavor.
- 1/2 large onion, sliced: The sweetness of the onion, when sautéed, adds a lovely layer of flavor to the sandwich.
- 2 bell peppers, sliced (any color): These not only bring color to your dish but also provide a sweet crunch that perfectly balances the savory elements.
- 1/2 cup mayonnaise: Creamy and rich, this will be the base of your aioli, perfectly complementing the other ingredients.
- 2 cloves garlic, pressed: Fresh garlic adds a punch of flavor and aroma that elevates the aioli.
- 1 tablespoon lemon or lime juice: This adds a zesty kick that brightens up all the flavors in your sandwich.
- 1/4 teaspoon chipotle chili powder (plus more to taste): For those who enjoy a little heat, chipotle chili powder brings a smoky spiciness that’s absolutely irresistible.
- Salt and pepper: Essential seasonings that enhance the overall flavor profile of the sandwich.
- 4 telera, ciabatta, or french rolls, sliced: These rolls provide the perfect vessel for all the delicious fillings and contribute to the sandwich’s texture.
- 4 slices pepper jack or Monterey jack cheese: Melty cheese that adds a creamy texture and a bit of spice, making every bite indulgent.
How to Assemble Chicken Fajita Sandwiches
Assembling the Chicken Fajita Sandwich is an exciting process that brings all the flavors together. The key is to layer everything in a way that allows each bite to be packed with flavor. Here’s how to create your delicious sandwiches step by step.
- Preheat your oven to 350°F. This will ensure your rolls get toasty while the cheese melts.
- In a small mixing bowl, combine mayonnaise, pressed garlic, lemon or lime juice, and chipotle chili powder. Stir until well blended, and season with salt and pepper to taste. Set this flavorful aioli aside for later.
- Next, take the chicken thighs and sprinkle the taco seasoning evenly over them, making sure to coat all sides lightly.
- In a large skillet, heat vegetable oil over medium-high heat. Once the oil is hot, carefully add the seasoned chicken thighs to the pan. Cook for about 3 to 5 minutes on each side until they reach an internal temperature of 165°F. Keep an eye on them, and if they seem to be browning too quickly, reduce the heat slightly.
- While the chicken is cooking, take another large skillet and add a little more vegetable oil over medium heat. Once hot, add the sliced onions and sliced bell peppers. Sprinkle some taco seasoning over the veggies and toss to coat. Cook, stirring occasionally, for about 4 to 8 minutes until the edges start to brown and the vegetables become tender-crisp. Season with salt and pepper to taste.
- If you prefer softer veggies, turn the heat down to medium after they are browned and continue cooking them until they reach your desired texture.
- Once the chicken thighs are cooked, remove them from the skillet and let them rest for a minute. Then, slice them into strips.
- Grab your rolls and spread the aioli generously on both sides. Layer the chicken strips on the bottom half of each roll, followed by the sautéed vegetables and a slice of pepper jack or Monterey jack cheese.
- Place the assembled rolls in the preheated oven and bake for about 5 to 6 minutes, or until the cheese is melted and the rolls are slightly toasty.
- Finally, remove the sandwiches from the oven, serve warm, and enjoy your delicious Chicken Fajita Sandwiches!
Things Worth Knowing
- Cooking Chicken: Always ensure that your chicken is cooked to an internal temperature of 165°F for safety. Using an instant-read thermometer is the best way to guarantee perfect doneness.
- Vegetable Cook Time: The cooking time for the vegetables can vary based on how soft you like them. If you prefer firmer vegetables, keep them on medium-high heat and stir occasionally.
- Spice Level: Adjust the amount of chipotle chili powder based on your spice tolerance. Start with less, and you can always add more for extra heat.
- Resting Chicken: Letting the cooked chicken rest for a few minutes before slicing allows the juices to redistribute, making for a more tender and juicy sandwich.
Substitutions and Tips

Making a delicious Chicken Fajita Sandwich is about finding the right balance of flavors, but there are always ways to make it even better. Here are some helpful tips and substitutions you might consider.
- Storage: Store any leftover sandwiches in an airtight container in the refrigerator. They can be reheated in the oven or microwave, but best eaten fresh.
- Freezing: If you want to prepare these ahead of time, you can freeze the cooked chicken and vegetables separately, then assemble the sandwiches when you’re ready.
- Pairing: Serve these sandwiches with a side of tortilla chips and salsa for a complete meal experience.
- Variations: Feel free to switch up the protein! Grilled shrimp or beef fajitas work just as well.
- Garnish: Fresh cilantro or avocado slices can add a refreshing touch to your sandwich.
Perfect Pairings for Chicken Fajita Sandwiches
When it comes to serving Chicken Fajita Sandwiches, the options are endless. You can keep it simple or get a bit creative with sides and beverages. Here are some fantastic pairing ideas:
- Fresh Salad: A light salad with mixed greens, tomatoes, and a zesty vinaigrette makes for a refreshing side that balances the richness of the sandwich.
- Chips and Salsa: Tortilla chips paired with a fresh salsa or guacamole provide a great crunch and are perfect for dipping.
- Coleslaw: A creamy coleslaw or a tangy vinegar-based slaw can add a delightful crunch and flavor contrast to your sandwich.
- Drinks: Serve your sandwiches with a chilled iced tea or a citrusy lemonade to complement the flavors.
- Seasonal Touch: In the summer, serve with grilled corn on the cob, while in the winter, a warm bowl of soup can round out the meal.
- Picnic Ready: These sandwiches are perfect for picnics! Wrap them up for a delicious and easy meal on the go.
FAQ
Conclusion
The Chicken Fajita Sandwiches are a delightful combination of flavors and textures that make them a standout choice for any meal. With juicy chicken, vibrant vegetables, and creamy aioli, they truly come together to create a satisfying experience. I encourage you to give this recipe a try; it’s not only delicious but also simple enough to whip up on a busy night. You won’t be disappointed!
Chicken Fajita Sandwiches
Ingredients
Equipment
Method
- Preheat oven to 350°F. In a small bowl, stir together mayonnaise, garlic, lemon or lime juice, and chipotle chili powder. Add salt and pepper to taste. Set aside.
- Sprinkle taco seasoning over chicken thighs until lightly coated on all sides. In a large skillet, over medium-high heat, heat vegetable oil. Once hot, add chicken thighs and cook for 3 to 5 minutes per side, until an instant-read thermometer reads 165°F. If the outside cooks too quickly, turn down the heat.
- While meat cooks, in another large skillet, heat vegetable oil over medium heat and add onion and bell peppers. Sprinkle with taco seasoning and toss to coat. Cook, stirring occasionally, for 4 to 8 minutes, until edges are lightly browned and vegetables are tender-crisp. Add salt and pepper to taste.
- For softer vegetables, turn heat down to medium once browned and cook until desired doneness.
- Slice chicken thighs into strips. Spread aioli over both sides of each roll and layer chicken, fajita vegetables, and cheese on the bottom half of each roll.
- Place rolls in the oven and bake for 5 to 6 minutes until cheese is melted and rolls are toasty. Serve and enjoy!
Notes
- Tip: In place of taco seasoning, sprinkle chili powder, cumin, salt, and pepper.
- Tip: You can use adobo sauce from chipotle peppers instead of chipotle powder.
- Tip: Omit the chipotle for a regular garlic aioli, which is still delicious.