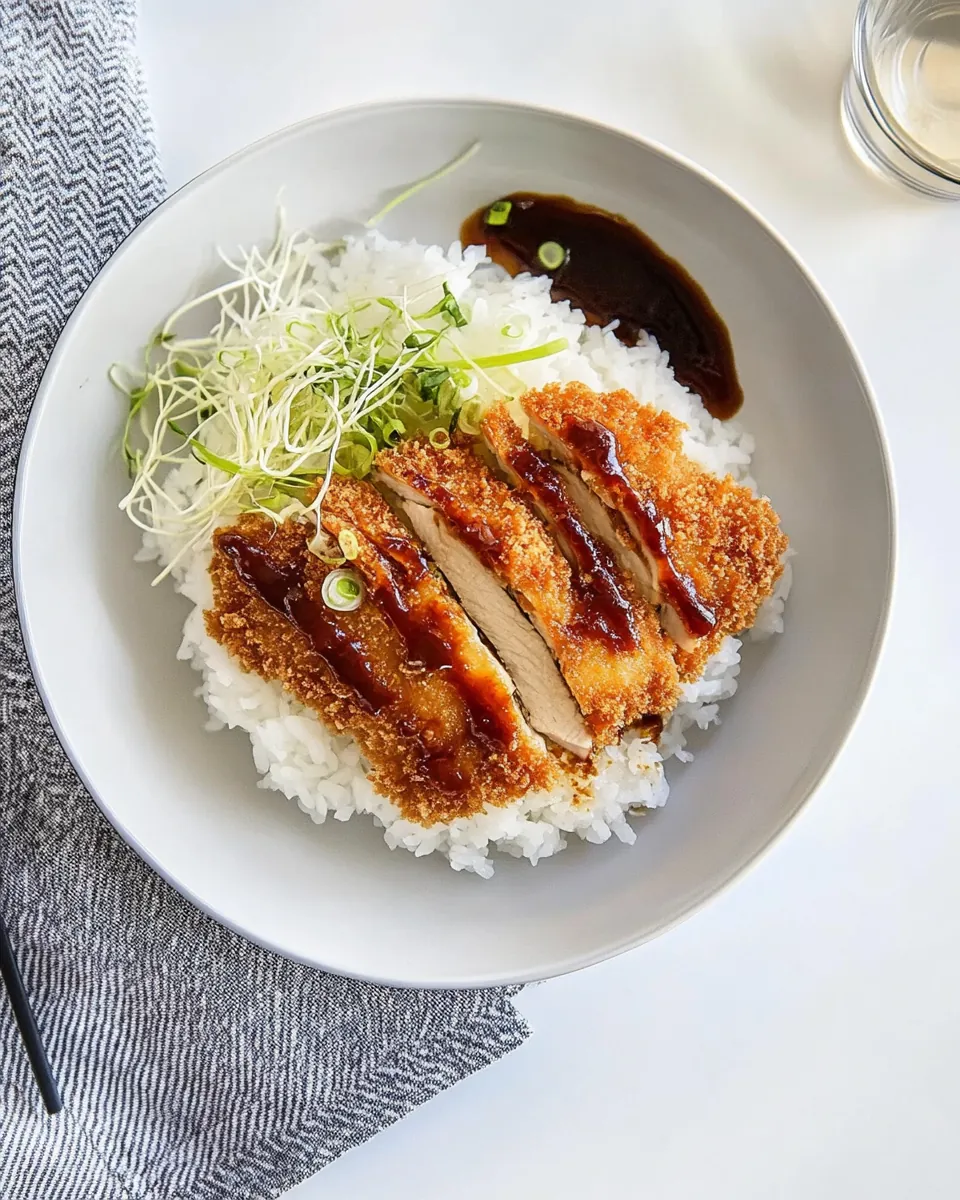
Chicken Katsu
The first time I tried Chicken Katsu, I was instantly charmed by its crispy exterior and succulent chicken. It was a rainy day, and I needed something comforting yet simple to prepare. As I took my first bite, the crunch of the breadcrumbs encapsulated the tender chicken inside, and I was transported to a cozy little diner in Tokyo where the fragrance of fried goodies danced in the air. Since then, Chicken Katsu has become a favorite in my household, a dish that brings warmth and nostalgia every time I make it.
Recipe Snapshot
25 mins
10 mins
15 mins
Medium
450 kcal
30 g
Gluten-Free, Low FODMAP
20 g
Cast Iron Skillet, Instant-Read Thermometer (optional)
What Sets This Chicken Katsu Apart
1. The Perfect Crunch
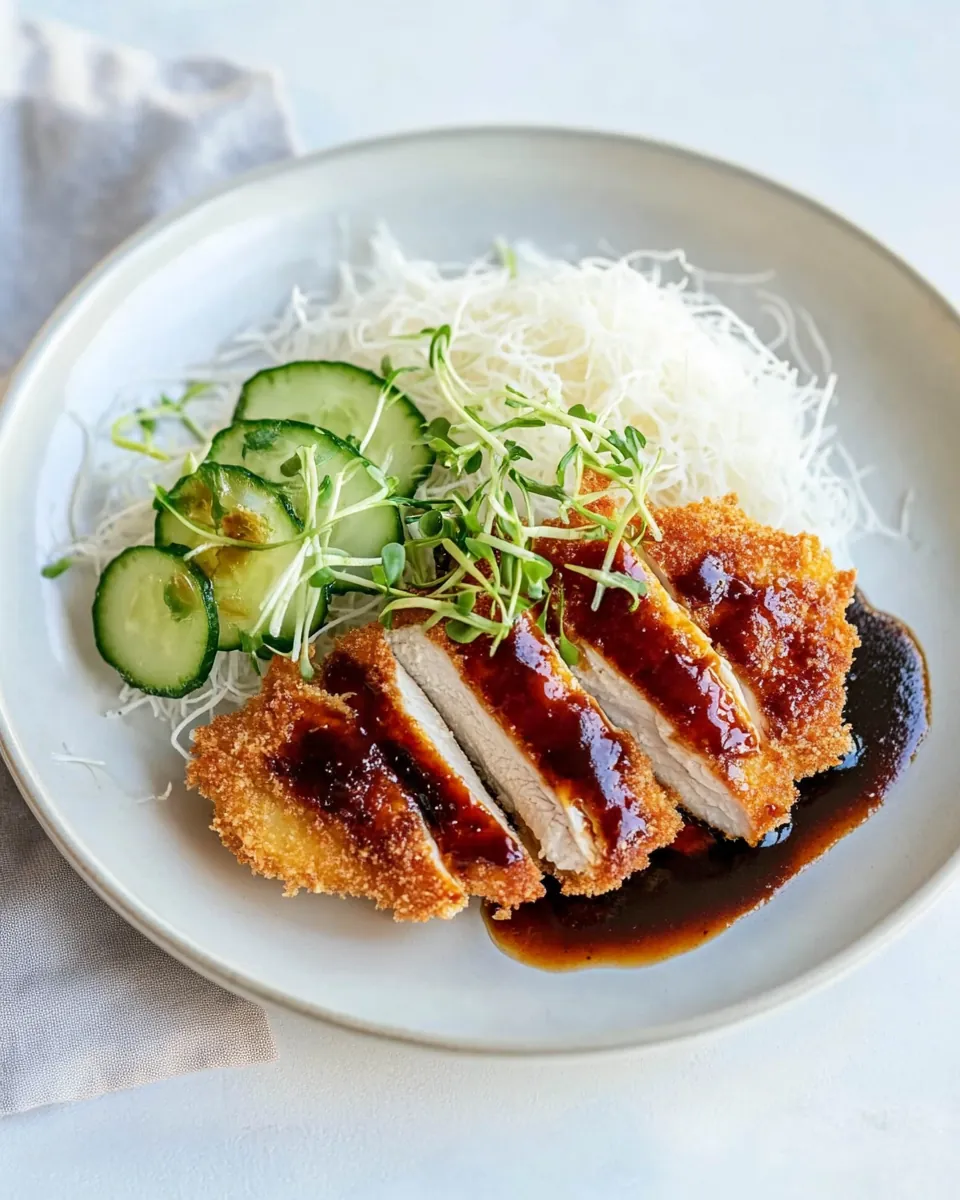
What sets Chicken Katsu apart is its unique crunch, achieved through the use of Panko breadcrumbs. These light, airy breadcrumbs create a crispy shell that contrasts beautifully with the juicy chicken inside. The texture is satisfying and makes every bite an experience!
2. Versatile Yet Simple
This recipe is incredibly versatile. Whether you’re serving it for a cozy family dinner or a casual lunch, Chicken Katsu fits the bill perfectly. You can serve it with rice, salad, or even a delicious tonkatsu sauce on the side. It’s a dish that adapts to any occasion.
3. Quick to Prepare
Despite its impressive appearance, Chicken Katsu is surprisingly quick to prepare. With just a few steps—breading the chicken and frying it—you can have dinner on the table in no time. It’s a perfect go-to recipe for busy weeknights when you want something homemade without spending hours in the kitchen.
4. Kid-Friendly Delight
Kids love Chicken Katsu, and it’s a great way to introduce them to new flavors. The crispy coating and tender chicken are irresistible, making it a meal that will please even the pickiest eaters. You can even let your kids help with the breading process, which makes it a fun family activity!
5. Healthier Option
While fried foods often get a bad rap, Chicken Katsu can be made healthier by frying in good quality oil and serving it alongside fresh vegetables. You can enjoy the crunch without the guilt, making it a balanced meal option.
6. Authentic Flavor
This recipe brings authentic Japanese flavors right to your kitchen. The combination of the sauce and the seasoned breading helps replicate the experience of enjoying Chicken Katsu at your favorite Japanese restaurant.
Key Ingredients for Chicken Katsu
The ingredients for Chicken Katsu are simple yet essential for achieving that perfect balance of flavors and textures. Each component plays a role in creating a dish that is both satisfying and delicious. Let’s explore the key players in this recipe!
- Ketchup: 6 tablespoons add a sweet and tangy flavor to the tonkatsu sauce.
- Worcestershire Sauce: 7 tablespoons bring depth with its complex flavor profile.
- Oyster Sauce: 3 tablespoons enhance the umami taste in the sauce.
- Granulated Sugar: 1 tablespoon balances out the flavors in the tonkatsu sauce.
- Chicken Breasts: 2 boneless, skinless pieces provide a juicy and tender protein base.
- Kosher Salt: ½ teaspoon is essential for seasoning the chicken properly.
- Black Pepper: ¼ teaspoon adds a little kick to the flavor.
- All-Purpose Flour: ½ cup helps the breadcrumbs stick to the chicken.
- Eggs: 2 large, beaten, act as a binder for the breadcrumbs.
- Panko Breadcrumbs: 1½ cups create that crispy texture that makes this dish so delightful.
- Vegetable Oil: 1 cup is necessary for frying the chicken to golden perfection.
Instructions for Chicken Katsu
Cooking Chicken Katsu is an enjoyable task that rewards you with a mouthwatering meal. Follow these detailed steps to ensure your chicken turns out perfectly every time!
Line a plate with paper towels and set it aside. This will be where the cooked Chicken Katsu rests and drains off any excess oil, helping to keep it crispy.
In a medium bowl, whisk together the tonkatsu sauce ingredients: ketchup, Worcestershire sauce, oyster sauce, and granulated sugar. Set aside this mixture to allow the flavors to meld, creating a delicious dipping sauce.
Take each chicken breast and slice it lengthwise, parallel to your work surface, into two pieces. Season both sides with kosher salt and black pepper to enhance the chicken’s natural flavors.
Now, create a breading station. In three separate shallow bowls, add all-purpose flour, beaten eggs, and Panko breadcrumbs. This setup will make the breading process smoother.
Dredge each piece of chicken in the flour, shaking off any excess. Next, dip it in the beaten eggs, allowing any excess to drip off, and finally coat it in the Panko breadcrumbs, pressing gently to ensure an even coating.
In a large cast iron skillet, fill it with about ¼ inch of vegetable oil. Heat over medium heat until the oil reaches 350°F. This is important as the right temperature prevents the chicken from absorbing too much oil.
Carefully place the breaded chicken pieces into the hot oil, cooking them two at a time. Fry each piece for about 2 minutes on each side or until they turn golden brown and reach an internal temperature of 165°F.
Once cooked, transfer the chicken to the prepared plate lined with paper towels. Allow it to rest briefly while you repeat the frying process with the remaining pieces.
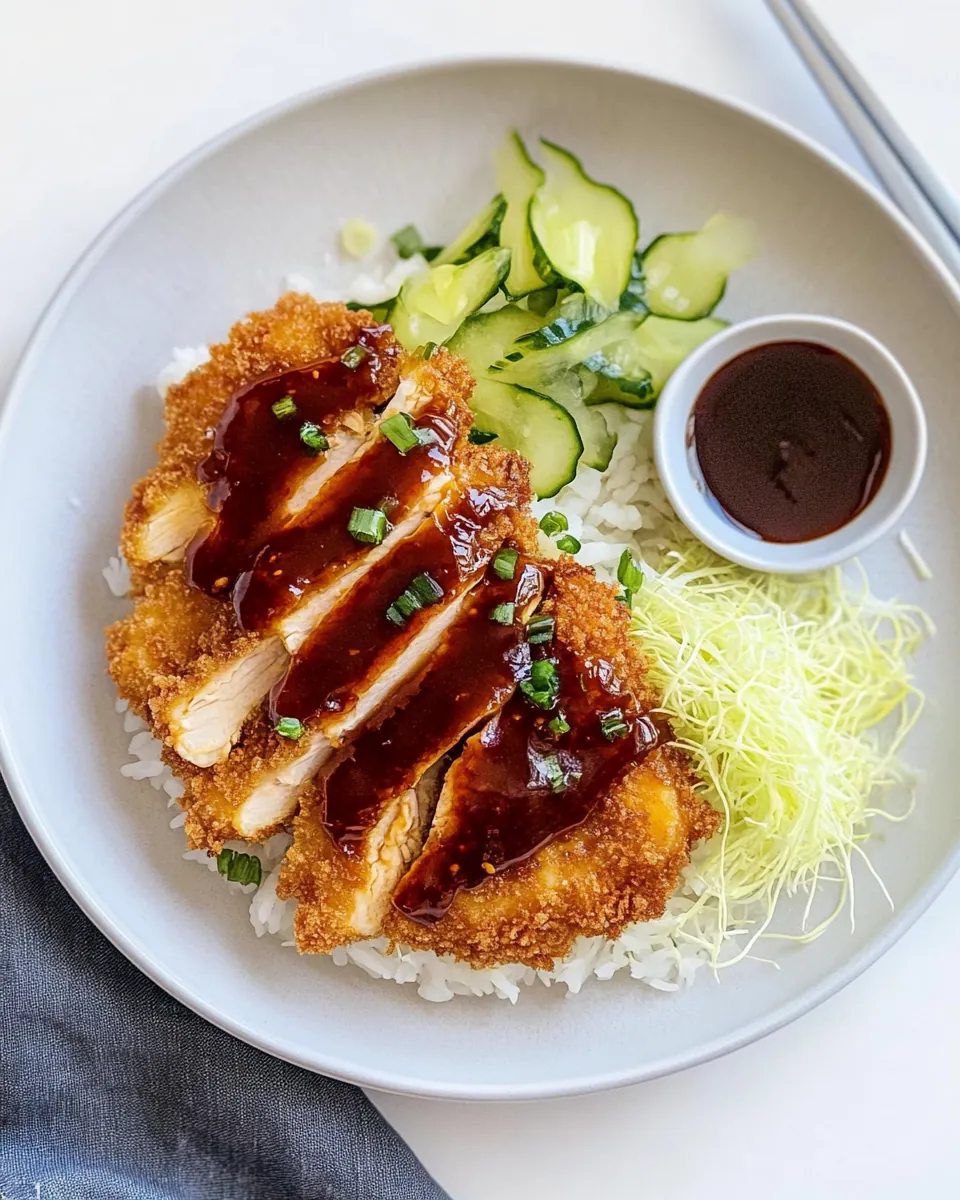
Serve the Chicken Katsu hot with the prepared tonkatsu sauce for dipping. Enjoy the crispy texture paired with the tangy sauce!
Things Worth Knowing
- Temperature Check: Use an instant-read thermometer to check that the chicken has reached 165°F. This ensures it is cooked thoroughly and safe to eat.
- Oil Temperature: Maintaining the right oil temperature is crucial. Too hot and the outside burns before the inside cooks; too cool and the chicken absorbs excess oil.
- Pressing Breadcrumbs: If the Panko breadcrumbs aren’t adhering well, gently press them onto the chicken’s surface. This can help achieve a better coating.
- Leftover Sauce: The tonkatsu sauce can be stored in an airtight container in the refrigerator for up to a week, making it great for use with other dishes.
Making Adjustments
Chicken Katsu is a wonderful dish that can be easily tailored to your tastes. Here are some tips to help you adjust the recipe to your liking:
- Storage: Store any leftover Chicken Katsu in an airtight container in the refrigerator. Reheat in the oven for best results to regain the crispiness.
- Freezing: You can freeze the cooked chicken for up to 2 months. For optimal texture, reheat in the oven rather than the microwave.
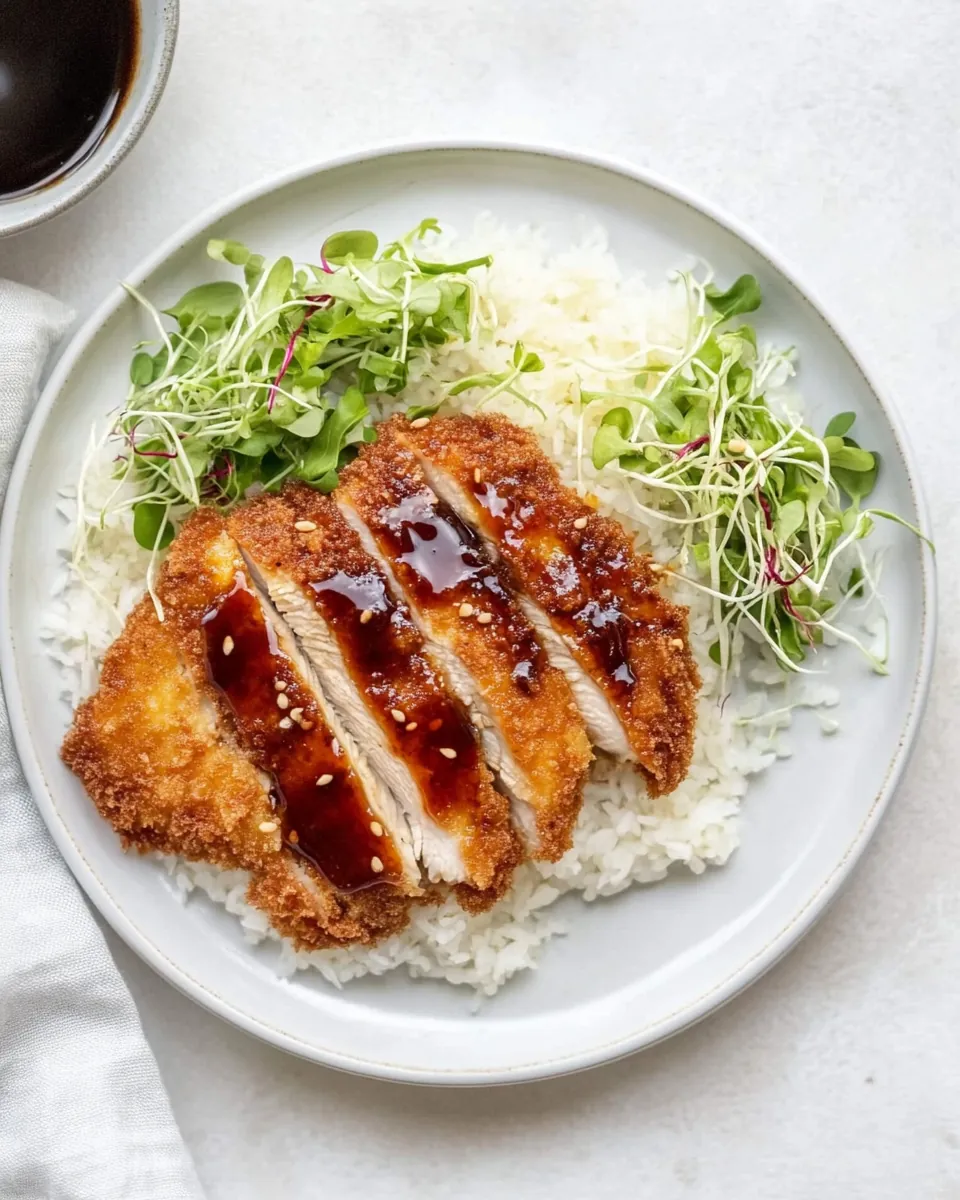
- Pairing: Serve with steamed rice, a fresh salad, or even a side of miso soup to round out the meal.
- Gluten-Free Option: Use gluten-free breadcrumbs to make this dish suitable for gluten-sensitive eaters. Just ensure all other ingredients are gluten-free as well.
- Spicing It Up: Add a little chili powder to the breadcrumbs for a spicy twist on the traditional flavor.
- Using Thighs: Substitute the chicken breasts with thighs for a juicier result. They can offer a more flavorful experience.
Great Combinations for Chicken Katsu
When it comes to serving Chicken Katsu, there are endless possibilities to enhance your meal. Here are some fantastic combinations:
- Steamed Rice: A classic pairing that balances the richness of the fried chicken.
- Fresh Salad: A crisp salad with a light dressing complements the savory flavors of the Chicken Katsu.
- Miso Soup: Serving a warm bowl of miso soup is a comforting addition that rounds out the meal.
- Pickled Vegetables: A side of pickled vegetables adds a delightful tang and crunch to your plate.
- Lunch Box Delight: Slice the Chicken Katsu and pack it in a bento box for a delicious lunch option.
- Seasonal Pairing: In summer, serve with a refreshing cucumber salad, and in winter, add hearty vegetables for a warming meal.
FAQ
Conclusion
Chicken Katsu is a dish that brings comfort and joy to any meal. Its crispy exterior paired with tender chicken creates a delightful experience that everyone will love. I encourage you to try making it at home and enjoy the wonderful flavors it brings to your table. You’ll find that it’s not just a meal, but a memory waiting to be made.
Chicken Katsu
Ingredients
Equipment
Method
- Line a plate with paper towels. Set aside.
- In a medium bowl, whisk the tonkatsu sauce ingredients together. Set aside.
- Slice each chicken breast lengthwise into two pieces. Season both sides with salt and pepper.
- Create a breading station. Add the flour, eggs, and Panko each to separate shallow bowls.
- Dredge the chicken in the flour, shaking off excess; then the eggs, letting any excess drip off; and finally, the Panko.
- Fill a large cast iron skillet with ¼-inch oil. Heat over medium until it reaches 350°F.
- Place the chicken, 2 pieces at a time, into the oil, cooking on both sides until golden and 165°F internally, about 2 minutes per side.
- Transfer to the prepared plate and repeat with remaining chicken breasts.
- Serve hot with tonkatsu sauce.
Notes
- Tip 1: You can find bottled tonkatsu sauce at most Asian grocery stores, but store-bought plum sauce or Japanese BBQ sauce are also great substitutes.
- Tip 2: If the Panko breadcrumbs aren’t sticking well to the chicken, gently press them onto the surface of the chicken to help them adhere.