Chicken Pakora
Whenever I think of a cozy evening, one dish that instantly comes to mind is Chicken Pakora. The mere thought of these crispy, golden-brown bites makes my mouth water and transports me back to my childhood kitchen, where the aroma of frying spices filled the air. I remember sitting by the stove, eagerly waiting for the first batch to come out, the sound of bubbling oil signaling that something delicious was on its way. Each piece of chicken coated in a spiced batter is a little treasure, perfect for sharing with friends and family.
There’s something magical about Chicken Pakora. It’s not just the taste; it’s the stories that come with it. I’ve enjoyed this dish on countless occasions—during family gatherings, quiet nights at home, or festive celebrations. Whether it’s served as a starter or a snack, each bite brings warmth and joy. And let’s not forget the delightful crunch when you take that first bite. Pair it with a tangy chutney or a squeeze of lemon, and you’ve got a dish that truly shines.
What I love most about Chicken Pakora is that it’s surprisingly easy to prepare. With just a handful of ingredients and a little time, you can create something spectacular that will impress any guest. So, if you’re looking for a recipe that not only satisfies cravings but also brings people together, look no further. Join me as we dive into the delightful world of Chicken Pakora.
Recipe Snapshot
25 mins
10 mins
15 mins
Medium
280 kcal
20 g
Paleo, Whole30, Vegan
10 g
Wooden Spoon, Mixing Bowl, Skillet, Frying Pan, Chef’s Knife
The Best Thing About This Chicken Pakora
A Culinary Delight
One of the first reasons I adore Chicken Pakora is the way it captivates everyone at the table. The first bite is always met with smiles and a chorus of “Mmm!” It’s a dish that brings people together, making any gathering feel special.
Versatility at Its Best
Another thing I love about this dish is its versatility. You can adjust the spices according to your preference, making it as mild or spicy as you like. Whether you’re feeding kids or spice enthusiasts, Chicken Pakora can be tailored to suit everyone’s taste.
Quick and Easy Preparation
The simplicity of preparation is a significant plus. With just a few steps, you can whip up a batch in no time. It’s perfect for those unexpected guests or when you want a quick snack!
Fried to Perfection
The frying process enhances every flavor, creating a crispy exterior that gives way to tender chicken inside. It’s hard to resist the charm of freshly fried snacks, especially when they’re golden and aromatic.
Perfect Pairings
Chicken Pakora pairs wonderfully with various dips and accompaniments. Whether it’s a zesty mint chutney or cooling yogurt sauce, the right pairing can elevate your experience.
A Traditional Favorite
Lastly, Chicken Pakora holds a special place in many cultures. It’s often a staple during festivals and family occasions, making it not just a meal but a part of cherished memories.
What to Gather for Chicken Pakora
When preparing Chicken Pakora, the ingredients truly make the dish shine. Each component plays a crucial role in crafting the perfect flavor profile and texture. The key players include gram flour and rice flour, which together create a light and crispy coating. The spices bring warmth and depth, while the fresh chicken and optional herbs add character. Let’s take a closer look at what to gather:
- 6 tablespoons gram flour (besan): This is the base for the batter, giving it a distinct flavor and texture.
- 3 1/2 tablespoons rice flour: This adds extra crispiness to the pakoras.
- 1/4 teaspoon salt: Essential for enhancing the flavors of the other ingredients.
- 1/4 teaspoon turmeric powder: A key spice that gives the pakora its beautiful golden color and earthy flavor.
- 3/4 teaspoon red chili powder: Adjust this for your desired spice level.
- 3/4 teaspoon garam masala powder: Adds a complex warmth to the dish.
- 2 teaspoons ginger-garlic paste: Infuses the pakoras with aromatic flavor.
- 1/3 cup finely chopped onion (optional): Adds sweetness and moisture.
- 2 green chilies, chopped (optional): For those who love a spicy kick.
- 1 tablespoon lime juice: Brightens the dish and enhances the flavors.
- 2 sprigs curry leaves (or 2 tablespoons chopped cilantro): Adds a fresh, aromatic touch.
- 1/2 pound boneless chicken, cut into thin strips or bite-size cubes: The star of our dish!
- 1 egg white: Helps bind the batter to the chicken.
- About 2 tablespoons water (add as needed for a thick, stiff batter): To achieve the right consistency.
- Oil for deep frying: Essential for that perfect crispiness.
- Fresh cilantro, chopped (for garnish): Adds a fresh touch just before serving.
Recipe Steps for Chicken Pakora
Getting to the cooking steps for Chicken Pakora is where the fun really begins! You’ll love how straightforward the process is, and before you know it, your kitchen will be filled with delicious aromas. Let’s dive into the steps needed to create this delightful dish.
- Begin by gathering all your ingredients. In a bowl, combine gram flour, rice flour, salt, turmeric, red chili powder, and garam masala. Stir well to ensure everything is evenly mixed.
- Add in the ginger-garlic paste, chopped onion, green chilies, lime juice, and curry leaves. Mix these ingredients thoroughly. The batter should have a thick, sticky consistency.
- Now it’s time to incorporate the chicken. Add the pieces to the bowl, and gently fold them in until they’re fully coated with the batter. This helps to infuse the flavors into the chicken.
- Next, add the egg white and mix again until everything is well combined. You can add a little water if the batter seems too thick; it should be able to coat the chicken well.
- Heat oil in a deep pan over medium heat. To test if the oil is ready, drop a small blob of the batter in. It should sizzle gently; if it doesn’t, wait a few more moments.
- Once the oil is ready, carefully drop in small batches of the batter-coated chicken. Be sure not to overcrowd the pan, as this can lower the oil’s temperature and affect crispiness.
- Fry the chicken pieces until they are golden brown and fully cooked, about 4 to 6 minutes, turning them occasionally for even cooking. Keep an eye on them—nobody likes a burnt pakora!
- Use a slotted spoon to remove the fried chicken and drain it on paper towels. This helps remove excess oil and keeps them crispy.
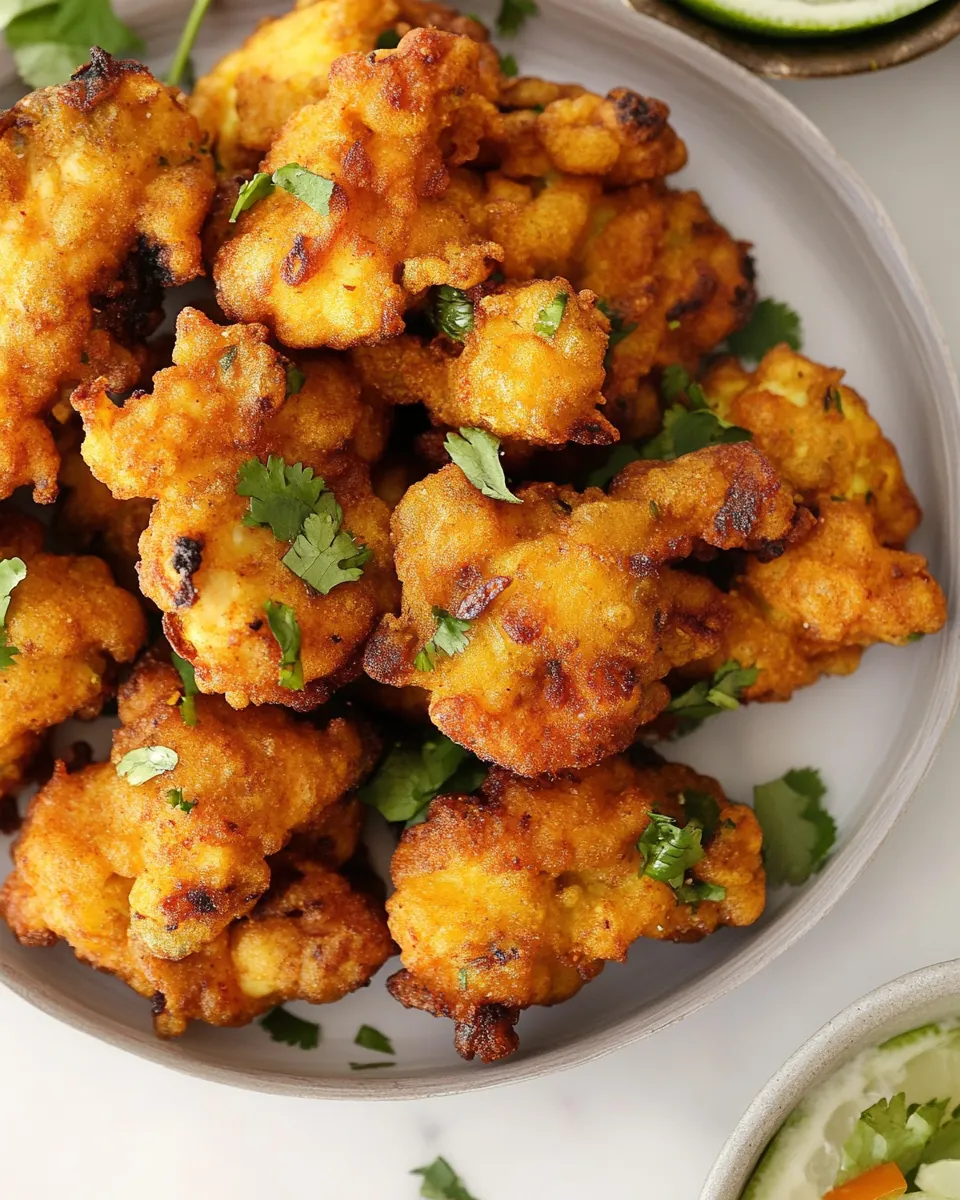
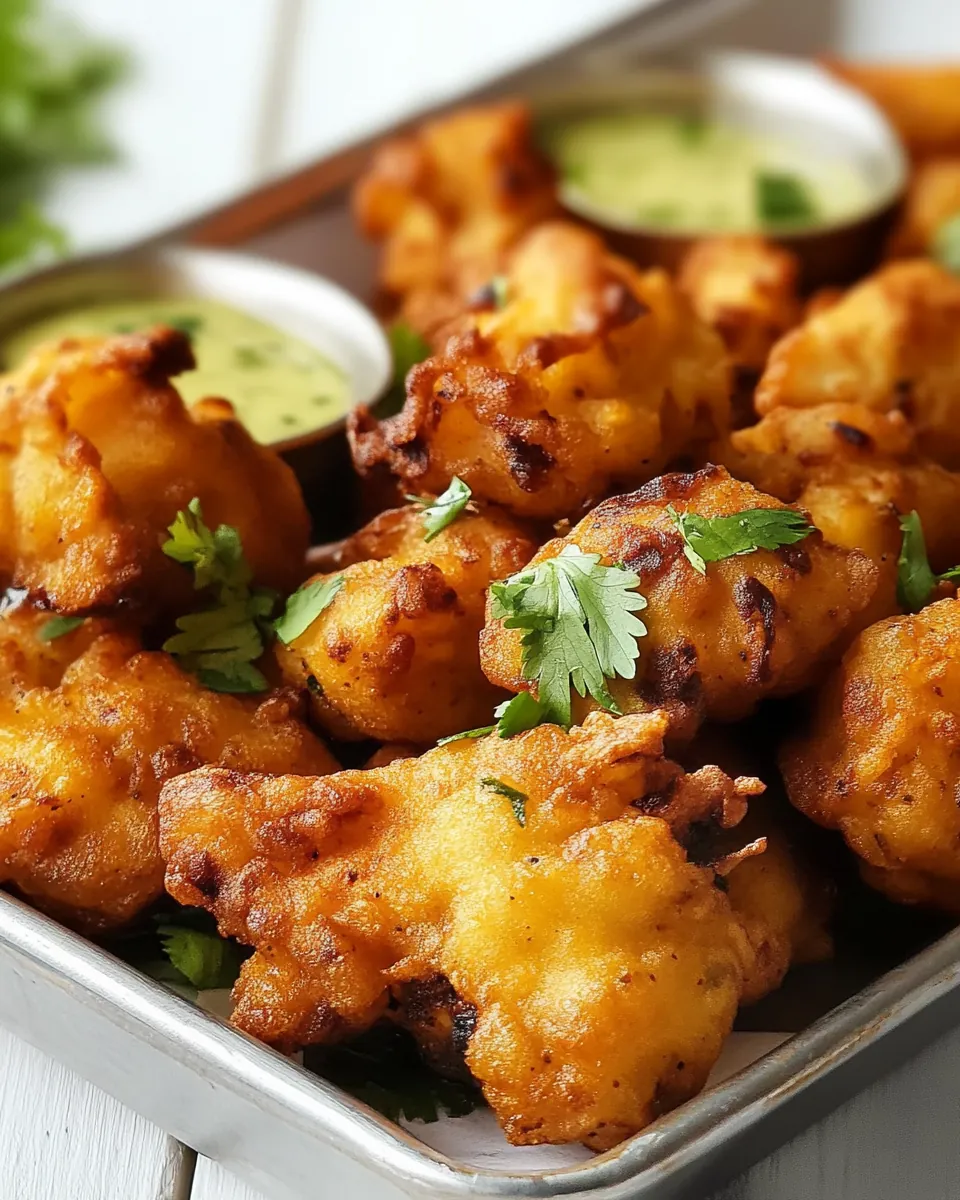
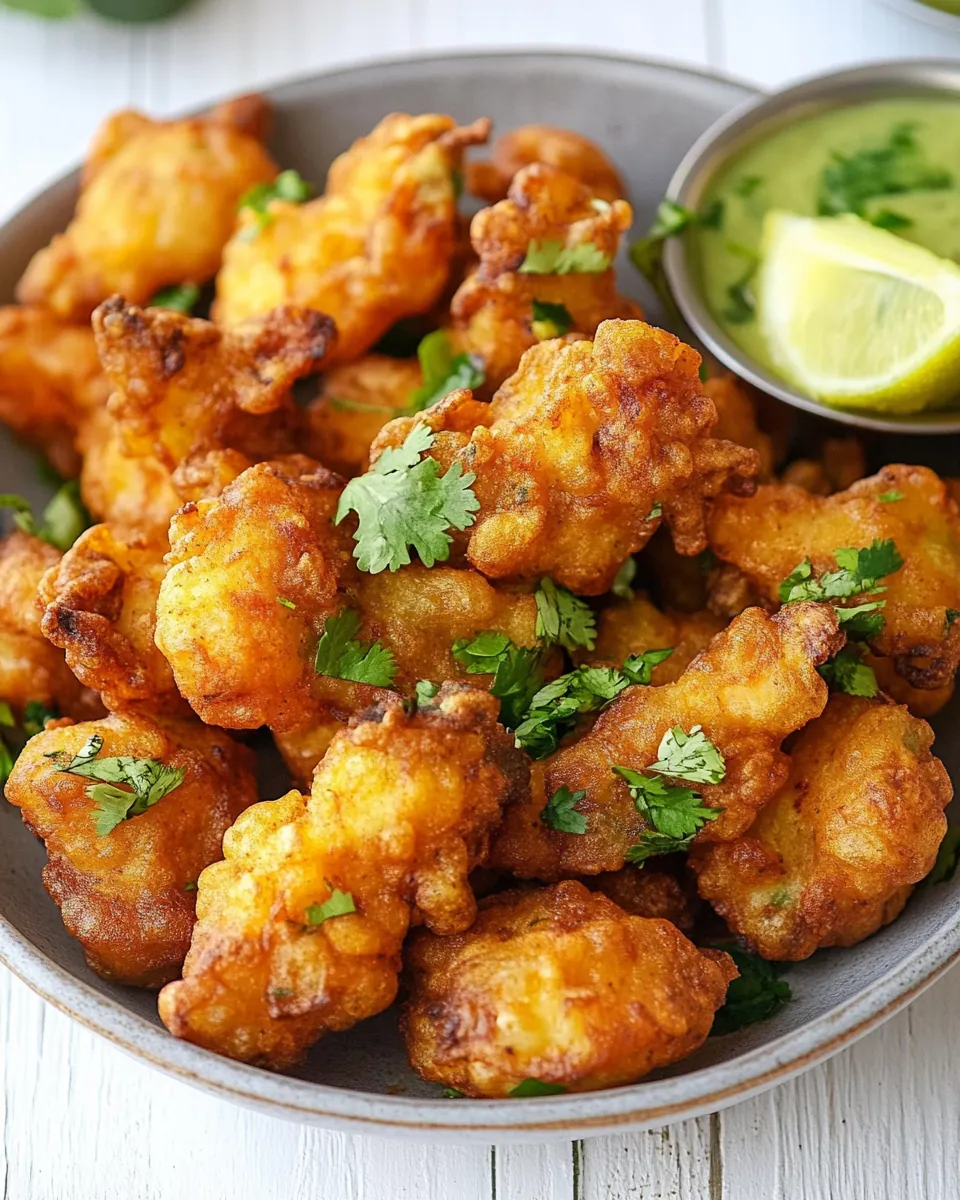
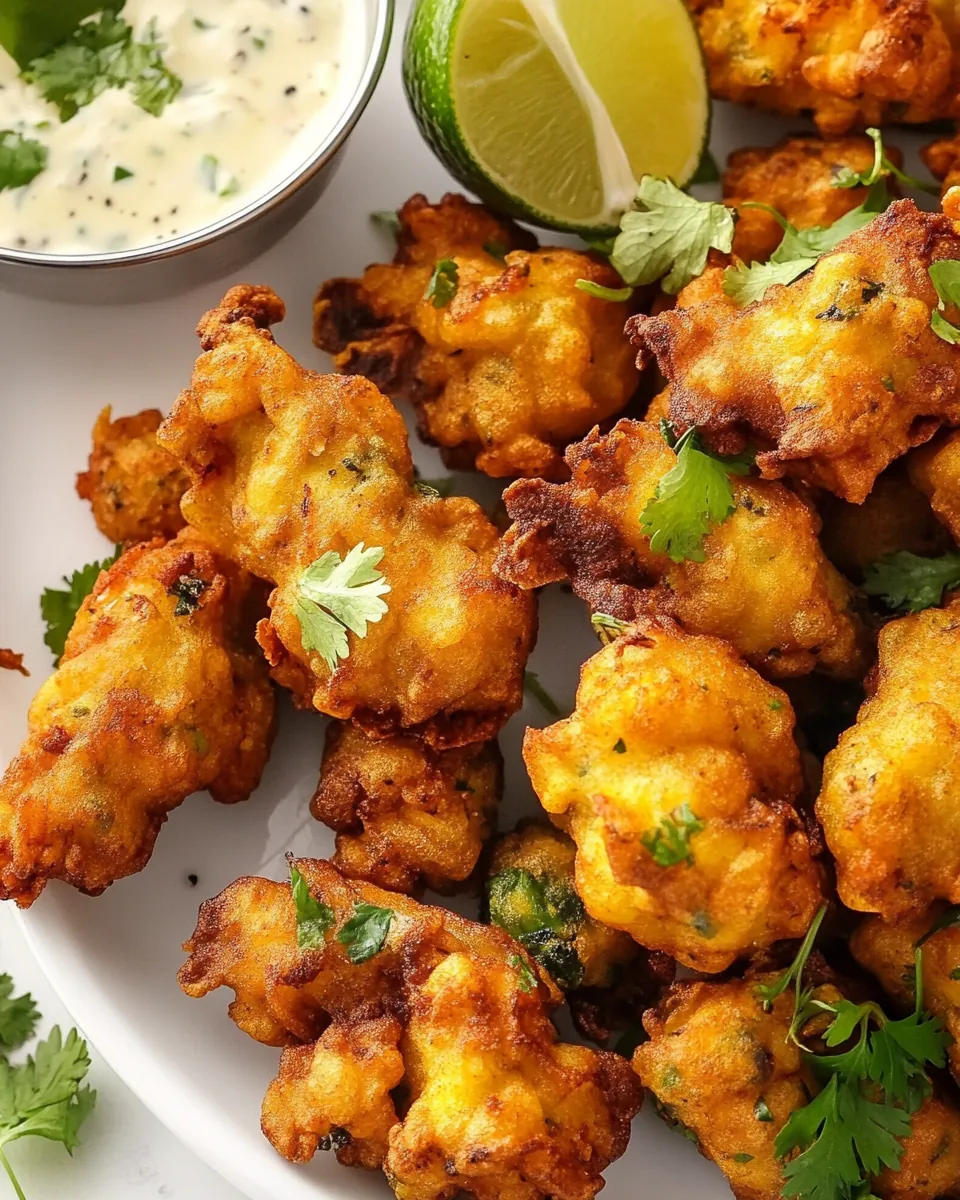
- Finally, serve your piping hot Chicken Pakora garnished with fresh cilantro. Pair it with your favorite chutney or a squeeze of lemon for an added burst of flavor.
Things Worth Knowing
- Oil Temperature: Ensuring the oil is at the right temperature is crucial for crispy pakoras. Too hot, and they’ll burn; too cold, and they’ll absorb too much oil.
- Batch Cooking: Fry in small batches to maintain the oil temperature. This also ensures even cooking and a consistent texture.
- Consistency of Batter: The batter should be thick enough to coat the chicken without dripping off. Adjust with water as needed.
- Serving Fresh: Chicken Pakora is best served immediately after frying for maximum crispiness. Enjoy them hot!
Making Adjustments
Like any recipe, Chicken Pakora can be adjusted to your liking. Here are some tips to help you make the perfect batch!
- Storage: If you have leftovers, store them in an airtight container in the refrigerator for up to three days. Reheat in the oven to restore crispiness.
- Freezing: You can freeze the batter-coated chicken before frying. Just ensure to thaw completely and fry straight from the fridge for best results.
- Pairing: Serve with various sauces like mint chutney, tamarind sauce, or even a simple yogurt dip for a refreshing contrast.
- Vegetarian Option: Substitute the chicken with paneer or mixed vegetables for a delightful vegetarian version.
- Spice Levels: Adjust the red chili powder according to your spice tolerance. Feel free to experiment!
Serve This Chicken Pakora With
When it comes to serving Chicken Pakora, the options are endless. Here are some suggestions to elevate your dining experience:
- Chutneys: Serve with mint chutney or tamarind sauce for a refreshing dip that complements the spiciness of the pakoras.
- Salads: A simple cucumber and onion salad can balance out the rich flavors of the pakoras.
- Tea Time Snack: These pakoras make for an excellent accompaniment to your afternoon tea, bringing warmth and comfort to your break.
- Festive Gatherings: Perfect for parties or festive occasions, Chicken Pakora can be a showstopper appetizer that gets everyone’s attention.
- Casual Dinners: Serve them as a side dish with your favorite curry or daal for a wholesome meal.
- Seasonal Pairings: In colder months, they are a fantastic comfort food, while in warmer months, they can be enjoyed as a cool snack.
FAQ
Conclusion
In summary, Chicken Pakora is a delightful dish that brings warmth and joy to any gathering. It’s easy to prepare and offers an exceptional flavor experience that everyone will love. I encourage you to try making it and enjoy the smiles it brings to your family and friends!
Chicken Pakora
Ingredients
Equipment
Method
- In a bowl, combine gram flour, rice flour, salt, turmeric, red chili powder, and garam masala.
- Mix in ginger-garlic paste, chopped onion, green chilies, lime juice, and curry leaves. Add the chicken pieces and egg white, then stir until well combined.
- Gradually incorporate water to create a thick, stiff batter that fully coats the chicken.
- Heat oil in a deep pan over medium heat. To test the oil, drop in a small blob of batter; it should sizzle gently.
- Fry the chicken pieces in small batches until golden brown and fully cooked.
- Use a slotted spoon to remove them and drain on paper towels.
- Serve hot, garnished with chopped cilantro, along with your favorite chutney or a squeeze of lemon.
Notes
- Tip 1: Store leftovers in an airtight container in the refrigerator for up to three days.
- Tip 2: You can freeze the batter-coated chicken before frying.
- Tip 3: Serve with mint chutney or tamarind sauce.
- Tip 4: Substitute the chicken with paneer for a vegetarian version.
- Tip 5: Adjust the red chili powder according to your spice tolerance.