Chicken Romano
There’s something incredibly satisfying about making a dish that just feels like home, and for me, that dish is Chicken Romano. I still remember the first time I had it; it was a crisp evening, and the warm aroma wafted through the house, inviting everyone to gather around the table. This dish combines the tenderness of boneless, skinless chicken cutlets with the rich flavors of grated romano cheese, creating a meal that’s as comforting as it is delicious. It’s not just about the taste, though; it’s the memories that come with it – family dinners, laughter, and the simple joy of sharing a meal. There’s something magical about the crispy exterior and the bright marinara sauce that brings it all together.
Recipe Snapshot
30 mins
10 mins
20 mins
Medium
510 kcal
28 g
Gluten-Free, Low FODMAP
25 g
Mixing Bowl, Grater, Skillet, Frying Pan, Whisk
The Best Thing About This Chicken Romano
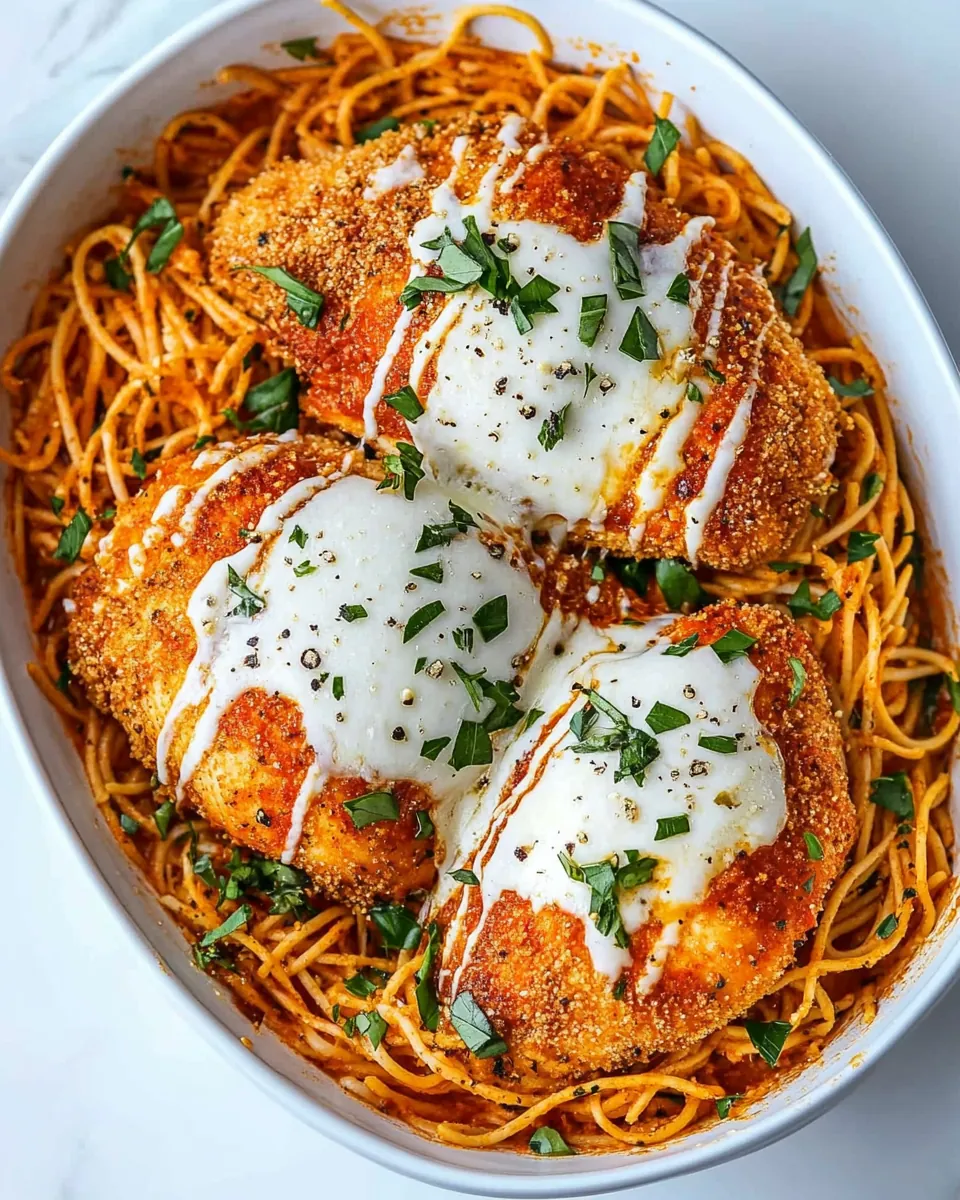
Flavorful Crispiness
One of the standout features of Chicken Romano is its delightful crispiness. The golden-brown exterior, thanks to the panko breadcrumbs, creates a texture that contrasts beautifully with the juicy chicken inside. Each bite is a celebration of textures, making it hard to resist for both kids and adults alike.
Rich Cheese Flavor
Using romano cheese elevates this dish to a new level. Its sharp, salty notes enhance the flavor profile, and when combined with the chicken, it creates a satisfying umami experience that lingers on your palate. Trust me, you won’t want to skip on the cheese!
Quick and Easy to Prepare
Even on busy weeknights, Chicken Romano proves to be a lifesaver. The preparation is straightforward, and it comes together quickly, making it an excellent choice for those who want a delicious meal without spending hours in the kitchen. You can have it on the table in no time, allowing you to enjoy more moments with your loved ones.
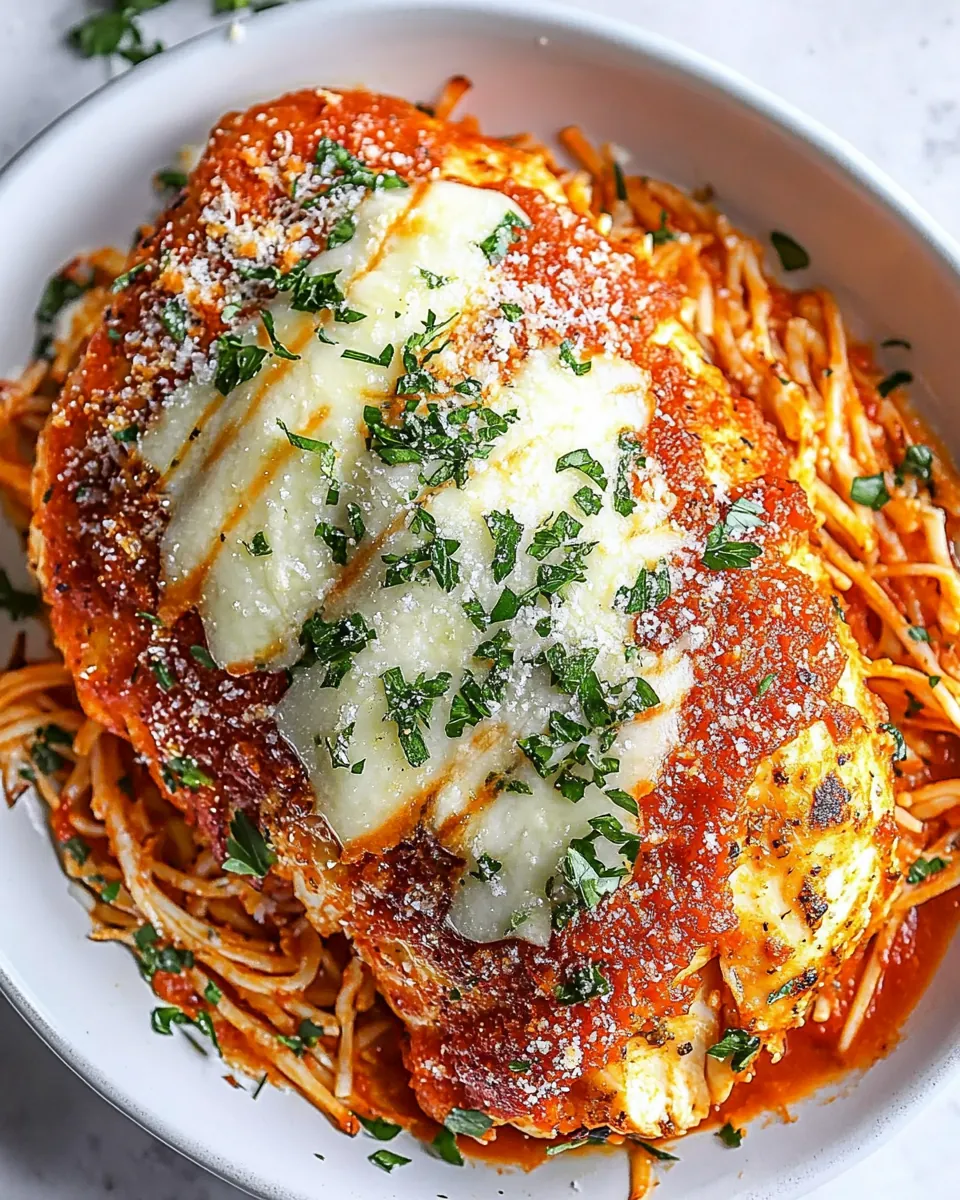
Perfect with Pasta
Serving Chicken Romano over a bed of cooked spaghetti is a match made in heaven. The marinara sauce adds a layer of flavor that complements the chicken wonderfully. It’s a complete meal that’s both filling and satisfying, ideal for any occasion, whether it’s a casual family dinner or a special gathering.
Customization at Its Best
This recipe also allows for some creativity. You can easily customize it by adding your favorite herbs or spices to the breadcrumb mixture. Want a bit of heat? Toss in some red pepper flakes. Prefer a fresher taste? A sprinkle of parsley can brighten the dish. It’s versatile, making it an excellent canvas for your culinary imagination.
Kid-Friendly Meal
Kids love Chicken Romano! Its crispy exterior and cheesy goodness make it appealing to younger palates. It’s an excellent way to introduce them to new flavors without overwhelming them. Trust me; it will quickly become a family favorite!
What to Gather for Chicken Romano
When it comes to making Chicken Romano, the ingredients are simple yet incredibly effective. Each component plays a crucial role in delivering flavor and texture, making this meal a delightful experience. The key players are the chicken cutlets, which serve as the base, and the romano cheese, infusing the dish with richness. With a few pantry staples, you can create a meal that is not only satisfying but also memorable.
- 4 boneless skinless chicken cutlets: These juicy cutlets serve as the main protein, providing a tender and flavorful base for the dish.
- 2 eggs: Used for binding, the eggs help the breadcrumb and cheese coating adhere beautifully to the chicken.
- ½ cup grated romano cheese: This cheese adds a sharp, savory flavor that enhances the overall dish.
- ¼ cup panko breadcrumbs: The panko gives the chicken a delightful crunch that contrasts with the juicy meat.
- ¼ cup all-purpose flour: A light dusting of flour helps create a crispy coating on the chicken.
- ½ teaspoon salt: This seasoning brings out the flavors of the chicken and other ingredients.
- ½ teaspoon pepper: Adds a bit of warmth and enhances the overall flavor profile.
- ¼ cup vegetable oil for frying: Used for frying the chicken, the oil helps achieve that golden-brown color.
- 16 ounces Homemade Marinara: A rich sauce that complements the chicken perfectly.
- 12 ounces cooked spaghetti: Serves as the delicious bed for the chicken, making it a complete meal.
- Additional grated romano cheese for garnish: A sprinkle on top adds a visual appeal and enhances the cheesy flavor.
Recipe Steps for Chicken Romano
Cooking Chicken Romano is an enjoyable experience that brings the kitchen to life. Follow these simple steps to create a dish that your family will love. You’ll notice the enticing aroma filling your home as you cook, and I promise, it’s going to be delicious!
- Start by whisking 2 eggs in a shallow platter or plate. This will create a wet mixture to help the breadcrumbs stick to the chicken.
- In a separate shallow platter or plate, combine ½ cup of grated romano cheese, ¼ cup of panko breadcrumbs, ½ teaspoon of salt, ½ teaspoon of pepper, and ¼ cup of all-purpose flour. Mix everything together thoroughly to ensure even distribution of flavors.
- Prepare a third plate to hold the breaded chicken cutlets. This will be where you place the chicken after breading it.
- Now, take one boneless skinless chicken cutlet at a time and dip it into the egg mixture, ensuring it’s evenly coated. Let any excess egg drip off back into the plate before moving on to the next step.
- Next, transfer the egg-coated cutlet into the cheese and flour mixture, making sure to coat all sides completely. The mixture should adhere well, creating a delicious crust once cooked.
- Place the breaded chicken onto your empty plate, and repeat the process with the remaining cutlets until they are all coated.
- In a large skillet, heat ¼ cup of vegetable oil over medium heat. It’s essential to reach the right temperature for frying, so keep an eye on it to avoid burning.
- Once the oil is hot, carefully add the breaded chicken cutlets to the pan, two cutlets at a time. Cook each cutlet for about 8 to 10 minutes per side, turning them when they are golden brown. Use a meat thermometer to check that the internal temperature reaches 165 degrees Fahrenheit.
- Once all the chicken is cooked, take it out of the pan and let it rest for a moment. In the meantime, prepare your serving plate with 12 ounces of cooked spaghetti.
- Top the spaghetti with 16 ounces of Homemade Marinara and then place the cooked chicken cutlets on top. Finish with a sprinkle of additional grated romano cheese for an added burst of flavor.
Things Worth Knowing
- Ensure proper oil temperature: The oil should be hot enough to sizzle when you add the chicken. This ensures a crispy exterior.
- Don’t overcrowd the pan: Frying too many cutlets at once can lower the oil temperature, resulting in soggy chicken. Fry in batches if necessary.
- Use a meat thermometer: To guarantee perfectly cooked chicken, check the internal temperature to avoid undercooking or overcooking.
- Let the chicken rest: Allowing the chicken to rest after cooking helps retain its juices, ensuring every bite is succulent.
Helpful Hints
Here are some helpful hints to make your experience with Chicken Romano as smooth as possible. These tips are designed to enhance your cooking and serving experience, ensuring that you’ll achieve the best results.
- Storage: After enjoying your Chicken Romano, store leftovers in an airtight container in the fridge for up to 3 days. Reheat in the oven for the best texture.
- Freezing: You can freeze unbreaded chicken cutlets for up to 2 months. Thaw in the fridge before preparing the dish.
- Pairing: Serve your Chicken Romano with a fresh garden salad or garlic bread for a complete meal.
- Variations: Experiment with different cheeses like parmesan or mozzarella for a unique flavor twist.
- Spice it up: Add some red pepper flakes to the breadcrumb mixture for a spicy kick.
Serving This Chicken Romano
When it comes to serving Chicken Romano, the possibilities are endless! Here are some ideas to elevate your meal:
- Pair with Pasta: As mentioned, serving over cooked spaghetti creates a hearty dish that is perfect for family dinners.
- Seasonal Vegetables: Consider adding seasonal roasted vegetables on the side for a colorful and nutritious addition.
- Special Occasions: This dish is ideal for holiday gatherings, special anniversaries, or even a cozy date night at home.
- Storage: If you have leftovers, store them properly to maintain their texture. They taste great the next day!
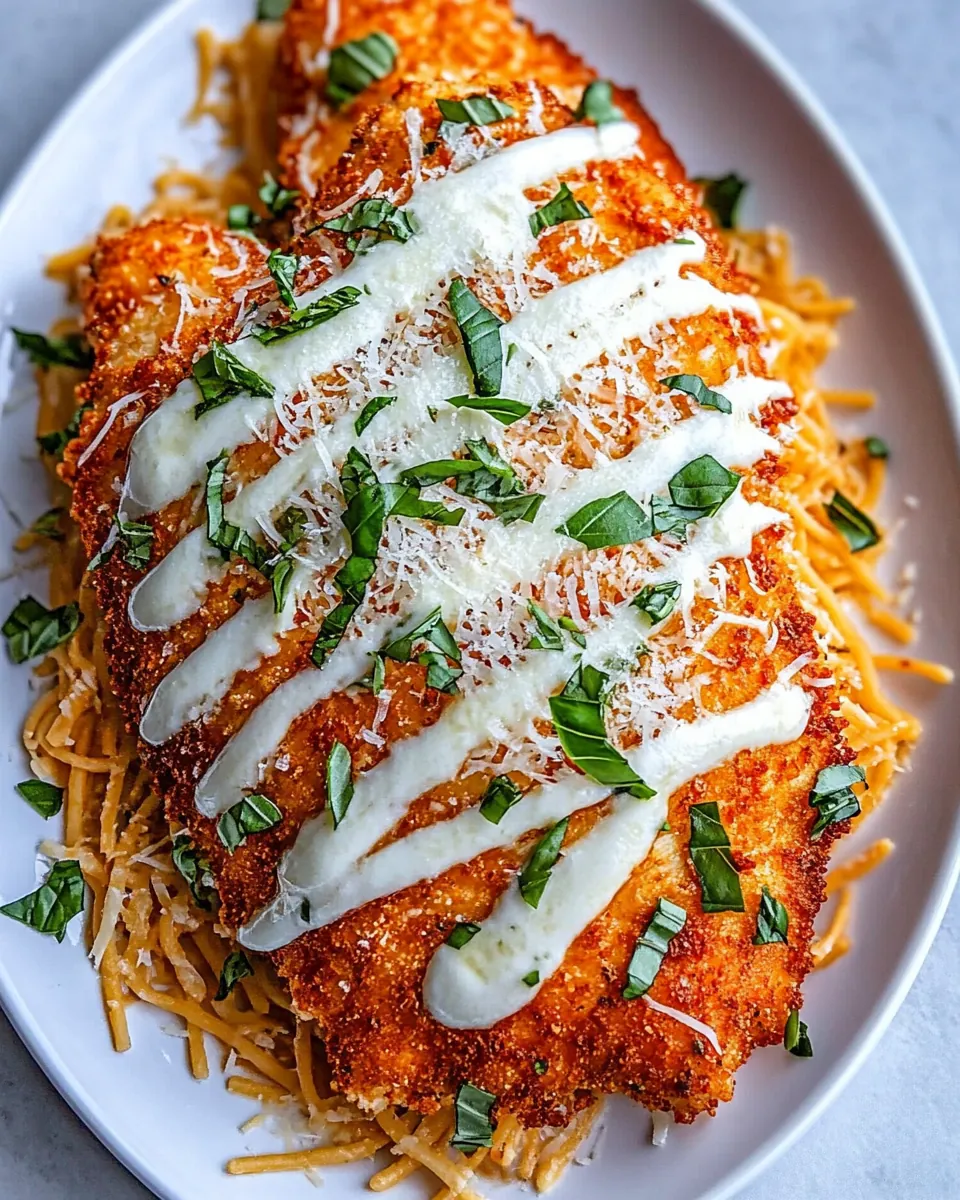
- Garnish Creatively: A sprinkle of freshly chopped basil or parsley can add a burst of color and freshness to your plate.
FAQ
Conclusion
Chicken Romano is truly a dish that brings comfort and joy to the table. Its delightful combination of crispy chicken, rich cheese, and flavorful marinara creates a memorable meal that your family will love. Don’t hesitate to give this recipe a try; it’s perfect for any occasion and easy enough for a weeknight dinner. I can’t wait for you to enjoy all the wonderful moments this dish will bring to your home!
Chicken Romano
Ingredients
Equipment
Method
- Start by whisking 2 eggs in a shallow platter or plate. This will create a wet mixture to help the breadcrumbs stick to the chicken.
- In a separate shallow platter or plate, combine ½ cup of grated romano cheese, ¼ cup of panko breadcrumbs, ½ teaspoon of salt, ½ teaspoon of pepper, and ¼ cup of all-purpose flour. Mix everything together thoroughly to ensure even distribution of flavors.
- Prepare a third plate to hold the breaded chicken cutlets. This will be where you place the chicken after breading it.
- Now, take one boneless skinless chicken cutlet at a time and dip it into the egg mixture, ensuring it’s evenly coated. Let any excess egg drip off back into the plate before moving on to the next step.
- Next, transfer the egg-coated cutlet into the cheese and flour mixture, making sure to coat all sides completely. The mixture should adhere well, creating a delicious crust once cooked.
- Place the breaded chicken onto your empty plate, and repeat the process with the remaining cutlets until they are all coated.
- In a large skillet, heat ¼ cup of vegetable oil over medium heat. It's essential to reach the right temperature for frying, so keep an eye on it to avoid burning.
- Once the oil is hot, carefully add the breaded chicken cutlets to the pan, two cutlets at a time. Cook each cutlet for about 8 to 10 minutes per side, turning them when they are golden brown. Use a meat thermometer to check that the internal temperature reaches 165 degrees Fahrenheit.
- Once all the chicken is cooked, take it out of the pan and let it rest for a moment. In the meantime, prepare your serving plate with 12 ounces of cooked spaghetti.
- Top the spaghetti with 16 ounces of Homemade Marinara and then place the cooked chicken cutlets on top. Finish with a sprinkle of additional grated romano cheese for an added burst of flavor.
Notes
- Storage: After enjoying your Chicken Romano, store leftovers in an airtight container in the fridge for up to 3 days. Reheat in the oven for the best texture.
- Freezing: You can freeze unbreaded chicken cutlets for up to 2 months. Thaw in the fridge before preparing the dish.
- Pairing: Serve your Chicken Romano with a fresh garden salad or garlic bread for a complete meal.
- Variations: Experiment with different cheeses like parmesan or mozzarella for a unique flavor twist.
- Spice it up: Add some red pepper flakes to the breadcrumb mixture for a spicy kick.